WordPress Image Management with Oracle Cloud Storage (2025)
Table of Contents
ToggleAre you finding yourself constantly juggling WordPress blog images while trying to make the most of Oracle Cloud’s free tier? You’re not alone in this challenge. Today, I’m excited to share a professional solution that will transform how you manage your blog’s media library using Oracle Cloud Object Storage.
Understanding the Current Challenge
When you first start blogging with WordPress, the built-in media management system seems perfectly adequate. All your images get stored in the wp-content/uploads folder, and everything works smoothly. However, as your blog grows, several significant challenges emerge that can impact your site’s performance and your ability to manage content effectively.
The Growing Storage Problem
Oracle Cloud’s free tier provides a limited amount of server space, and this becomes a critical constraint as your blog expands. High-resolution images, which are essential for maintaining visual quality, can quickly consume your available storage. Consider this: a typical blog post with 5-6 high-quality images might use 2-3MB per image, meaning each post could consume 10-15MB of your precious server space.
The Hidden Costs of Image Optimization
While various WordPress plugins offer image optimization services, many start with a free tier that quickly becomes insufficient. As your blog grows, these plugins often push you toward paid plans, which can cost anywhere from $5 to $30 per month. This creates an unexpected expense that wasn’t part of your initial blogging budget.
Performance Implications
Storing all your images on the same server that handles your WordPress installation can lead to performance issues. When visitors request your pages, your server needs to handle both the WordPress application and image delivery simultaneously, which can slow down your site’s overall performance.
Oracle Cloud Object Storage: Your Solution
Let’s explore why Oracle Cloud Object Storage presents an ideal solution for blog image management, especially for users on the free tier.
Understanding the Benefits
Oracle Cloud provides free tier users with 20GB of Object Storage space monthly. This generous allocation exists separately from your compute instance storage, effectively doubling your available space. Here’s what makes this solution particularly powerful:
1. Performance Enhancement
When you move your images to Object Storage, your main server focuses solely on running WordPress, while image delivery happens through Oracle’s robust storage infrastructure. This separation of concerns leads to better overall performance.
2. Cost-Effective Scaling
The 20GB monthly allowance is more than sufficient for most blogs, and even if you need more space, Object Storage pricing is highly competitive, starting at just a few cents per GB per month.
3. Global Content Delivery
Object Storage integrates seamlessly with Content Delivery Networks (CDNs), allowing your images to be served from locations closer to your visitors, regardless of where they are in the world.
Detailed Implementation Guide
Let’s walk through the setup process step by step, ensuring you understand each component and its purpose.
Step 1: Setting Up Authentication
Creating Your Customer Secret Key
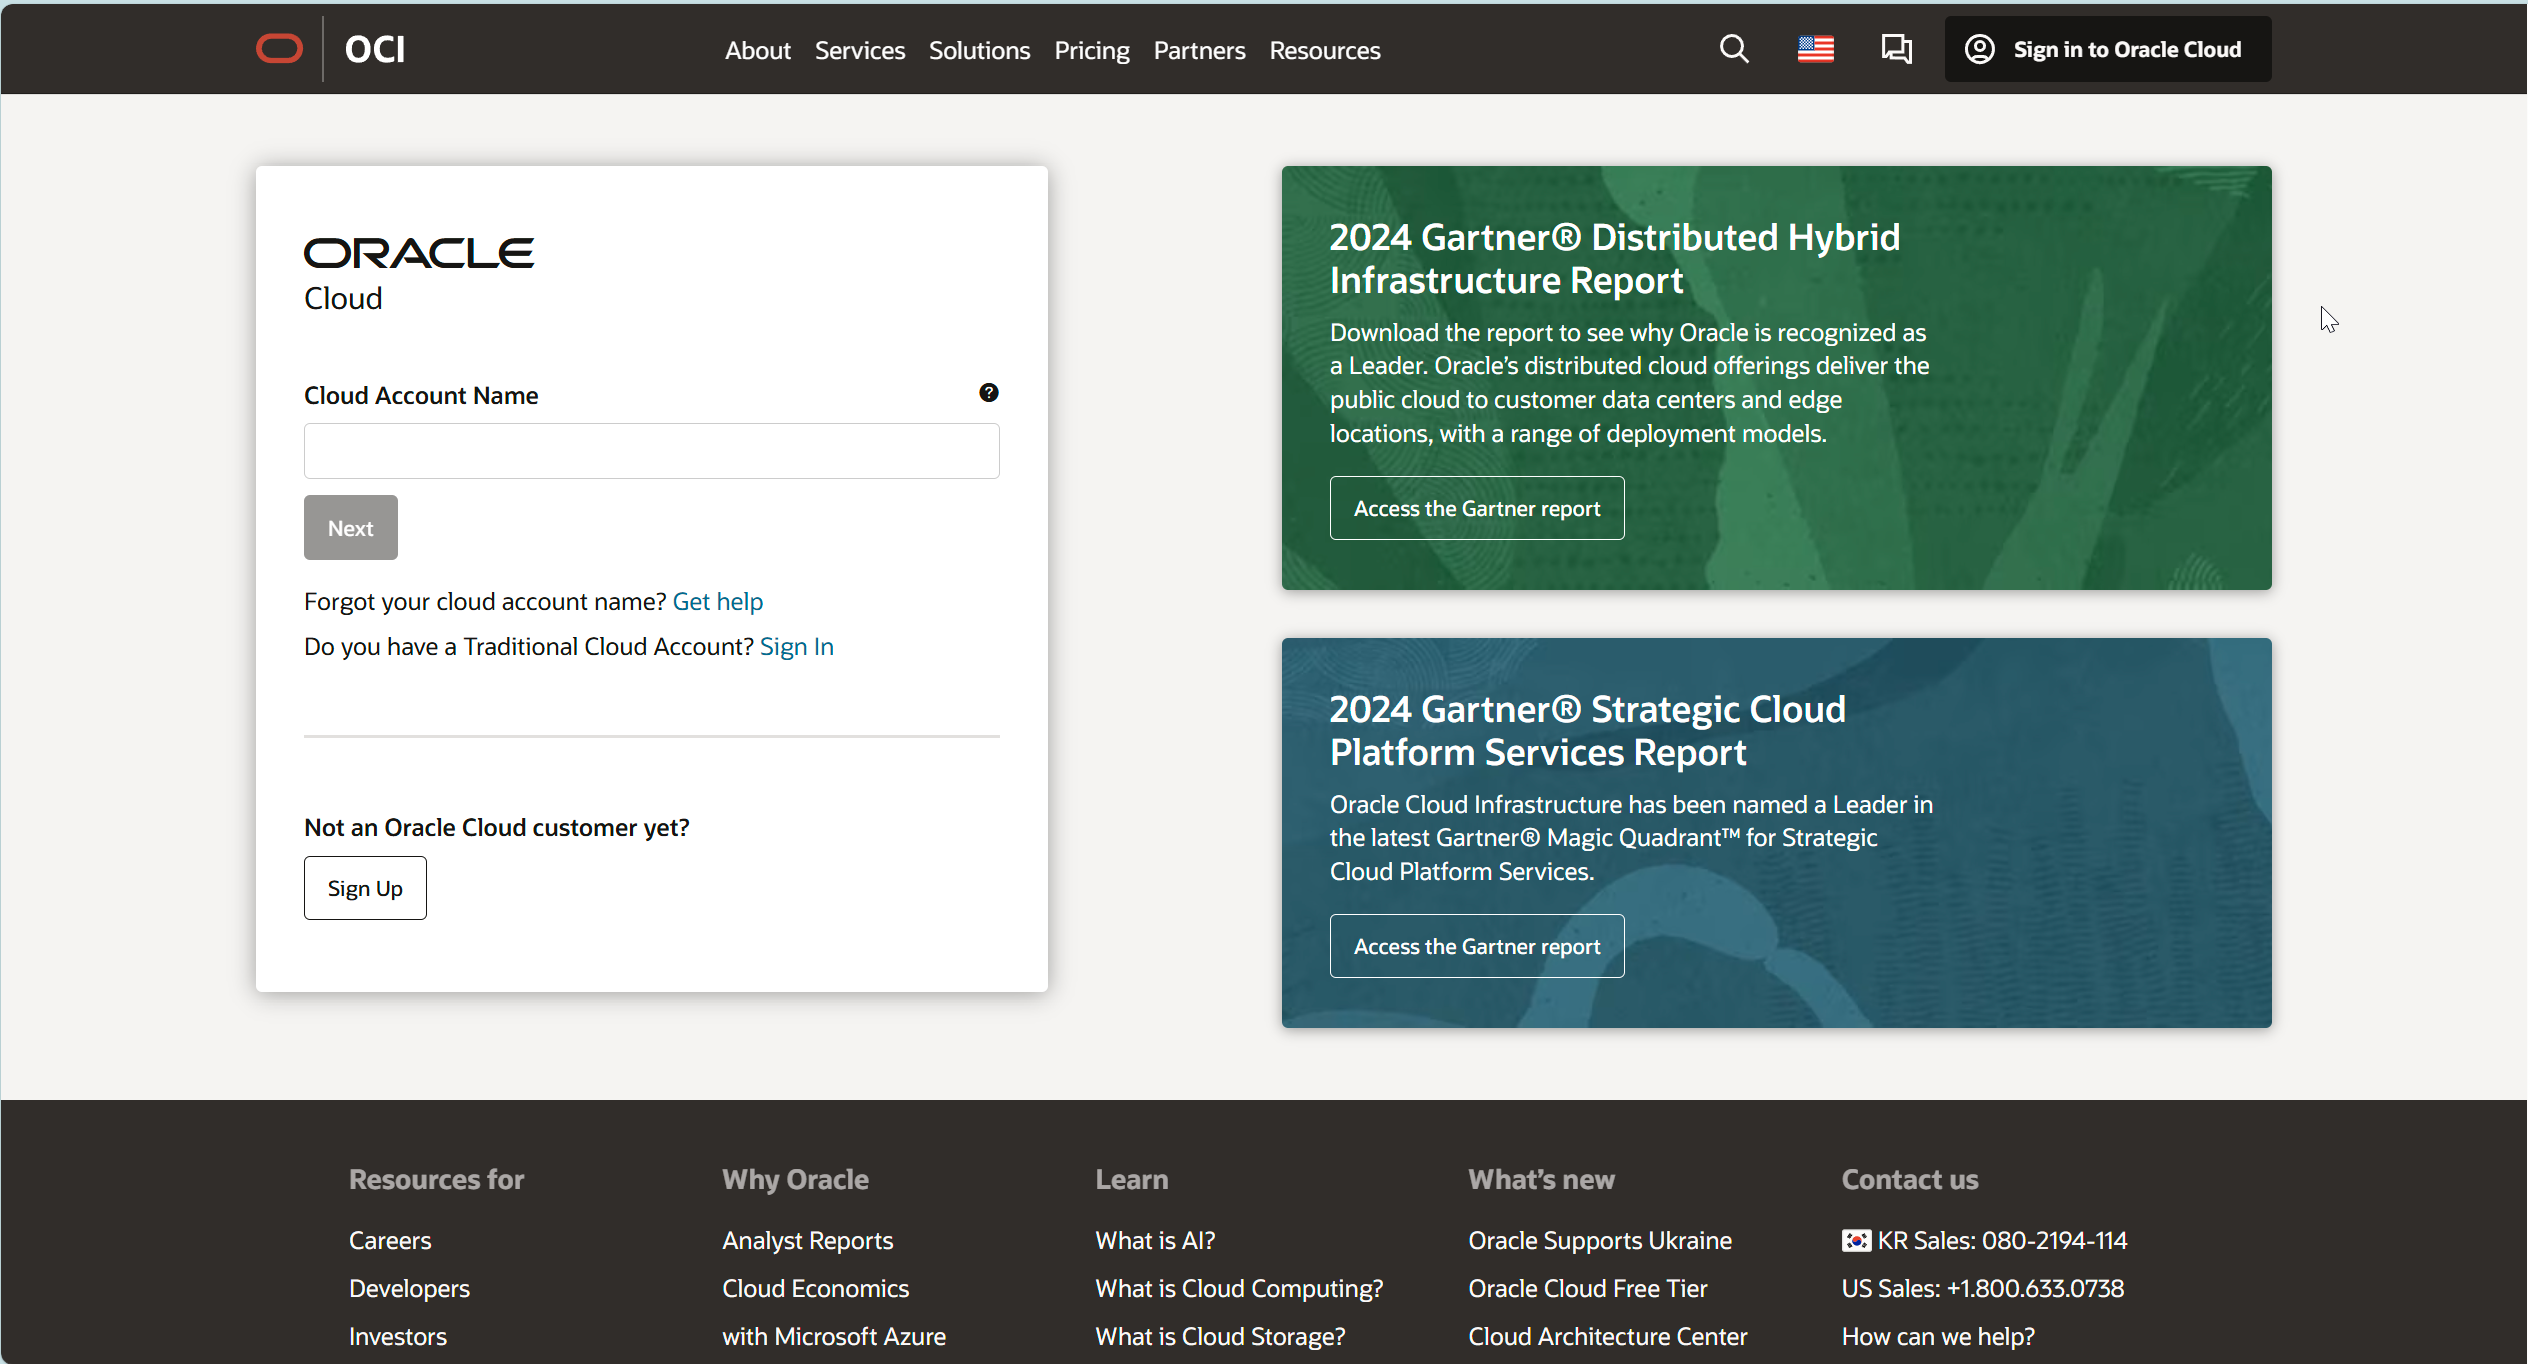
1. Navigate to the Oracle Cloud Console (https://cloud.oracle.com)
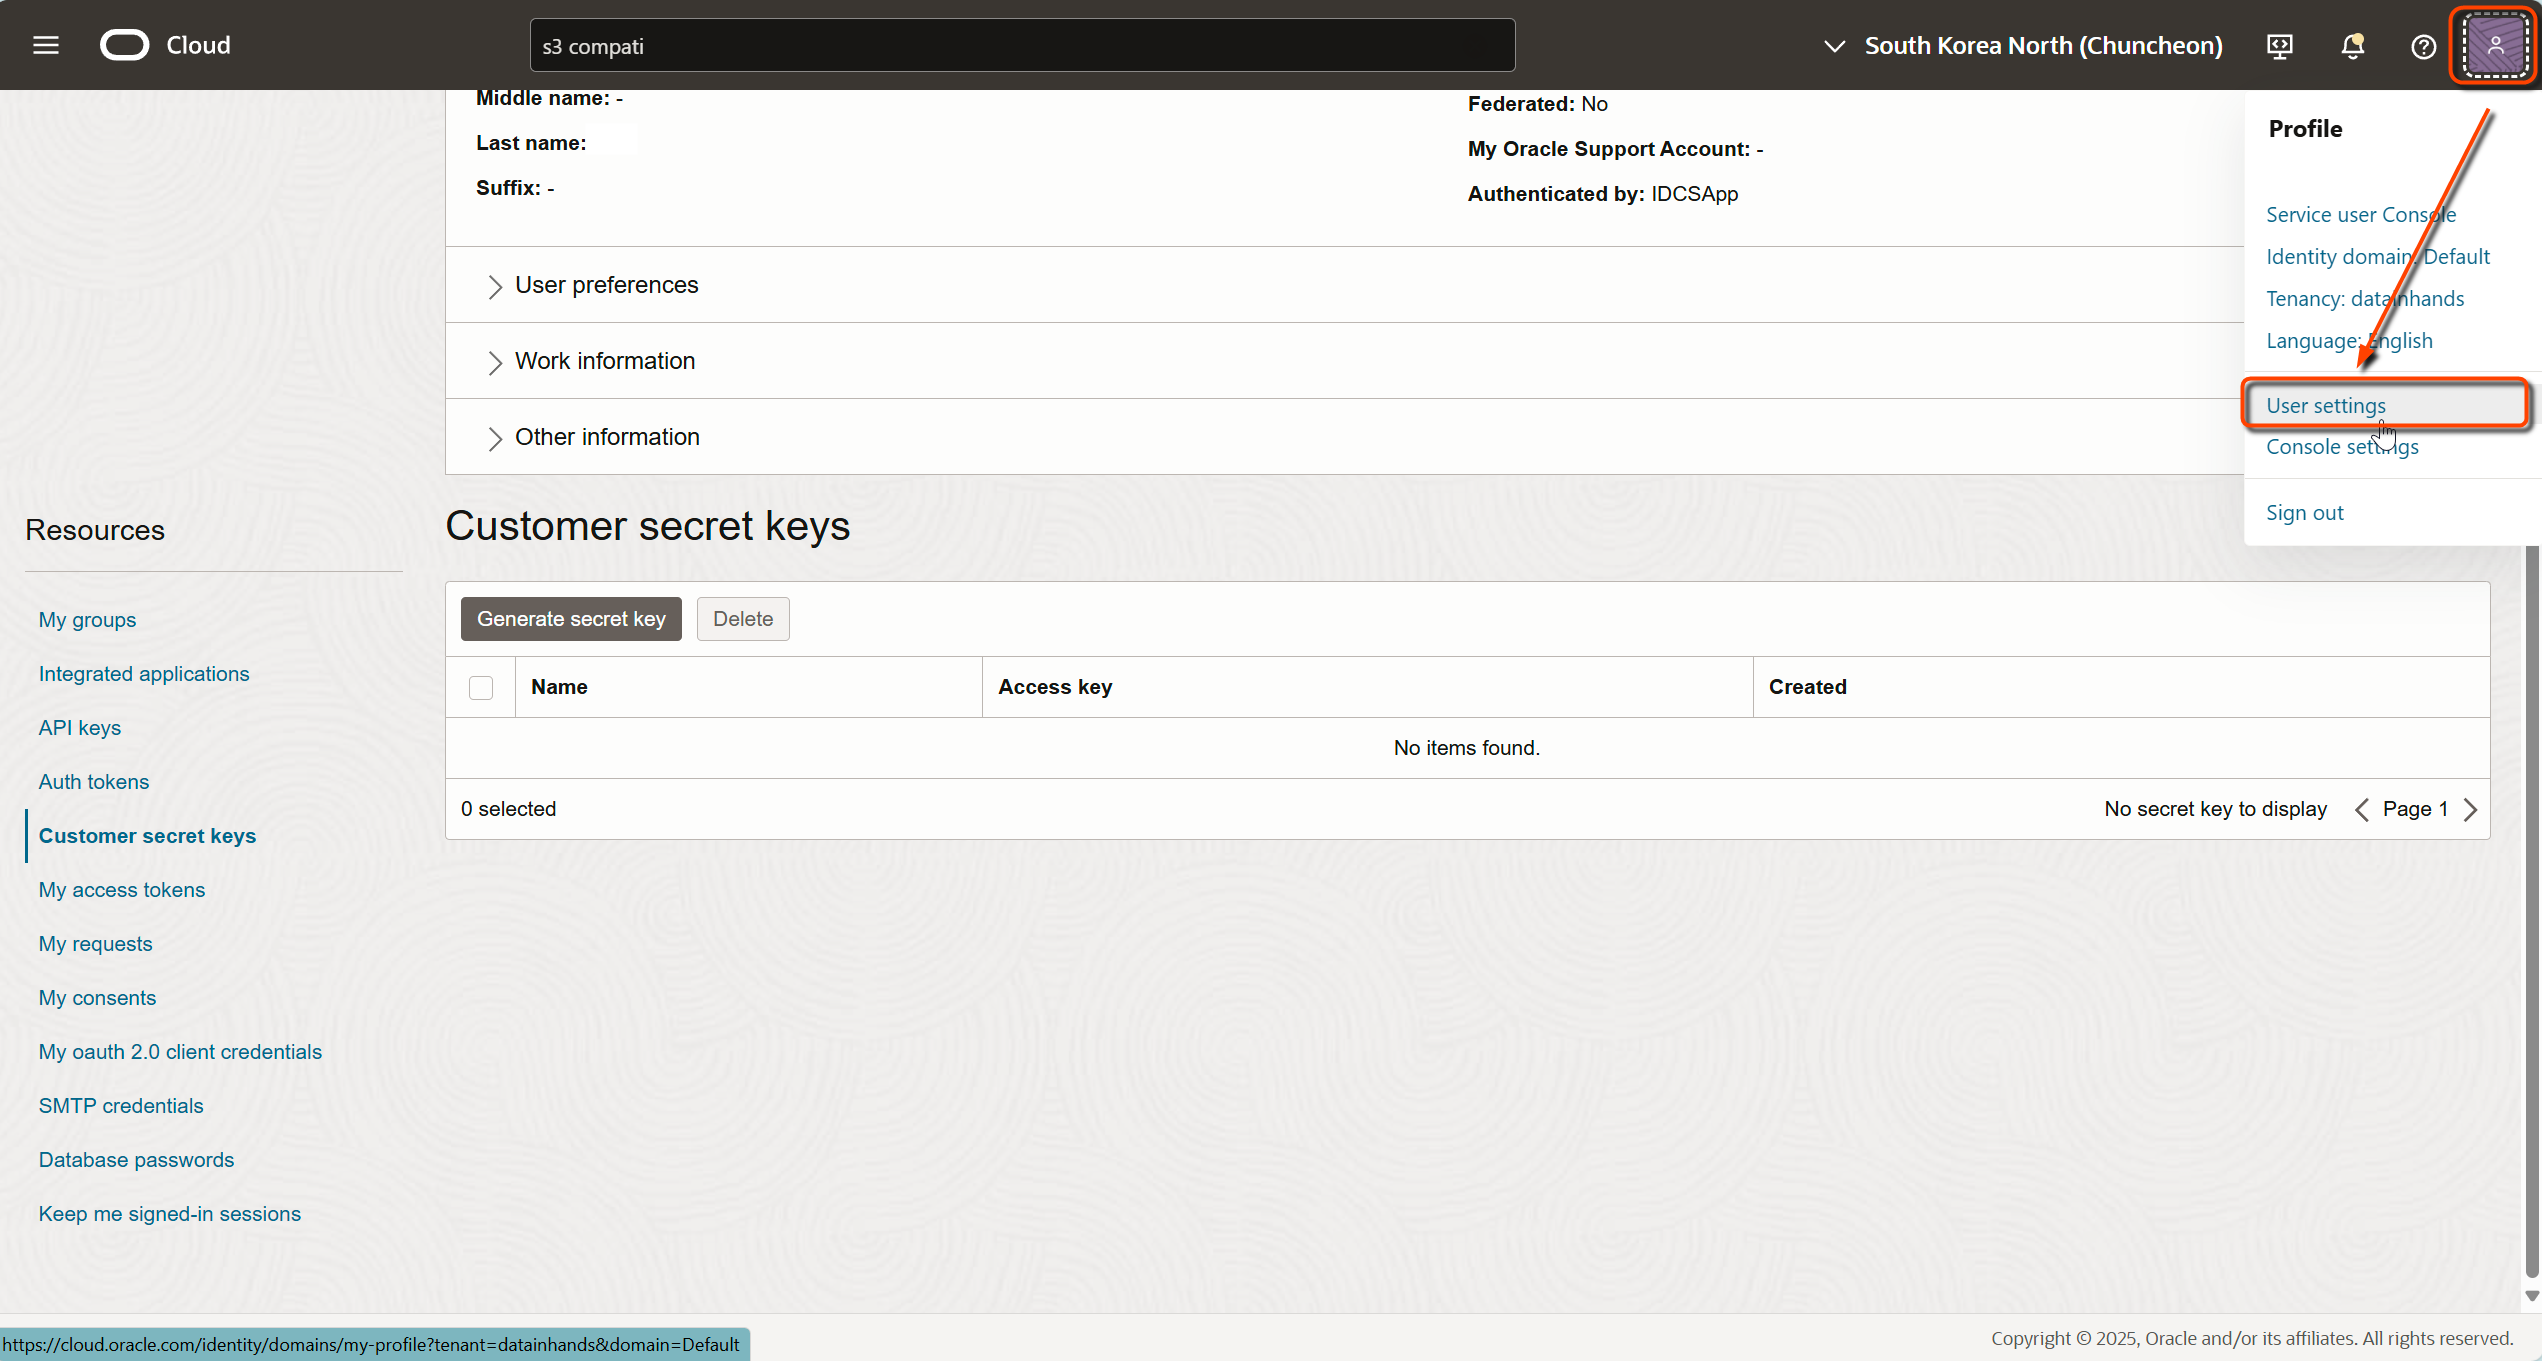
2. After logging in, locate and click your profile icon in the top-right corner
3. Select “User Settings” or “My Profile” from the dropdown menu
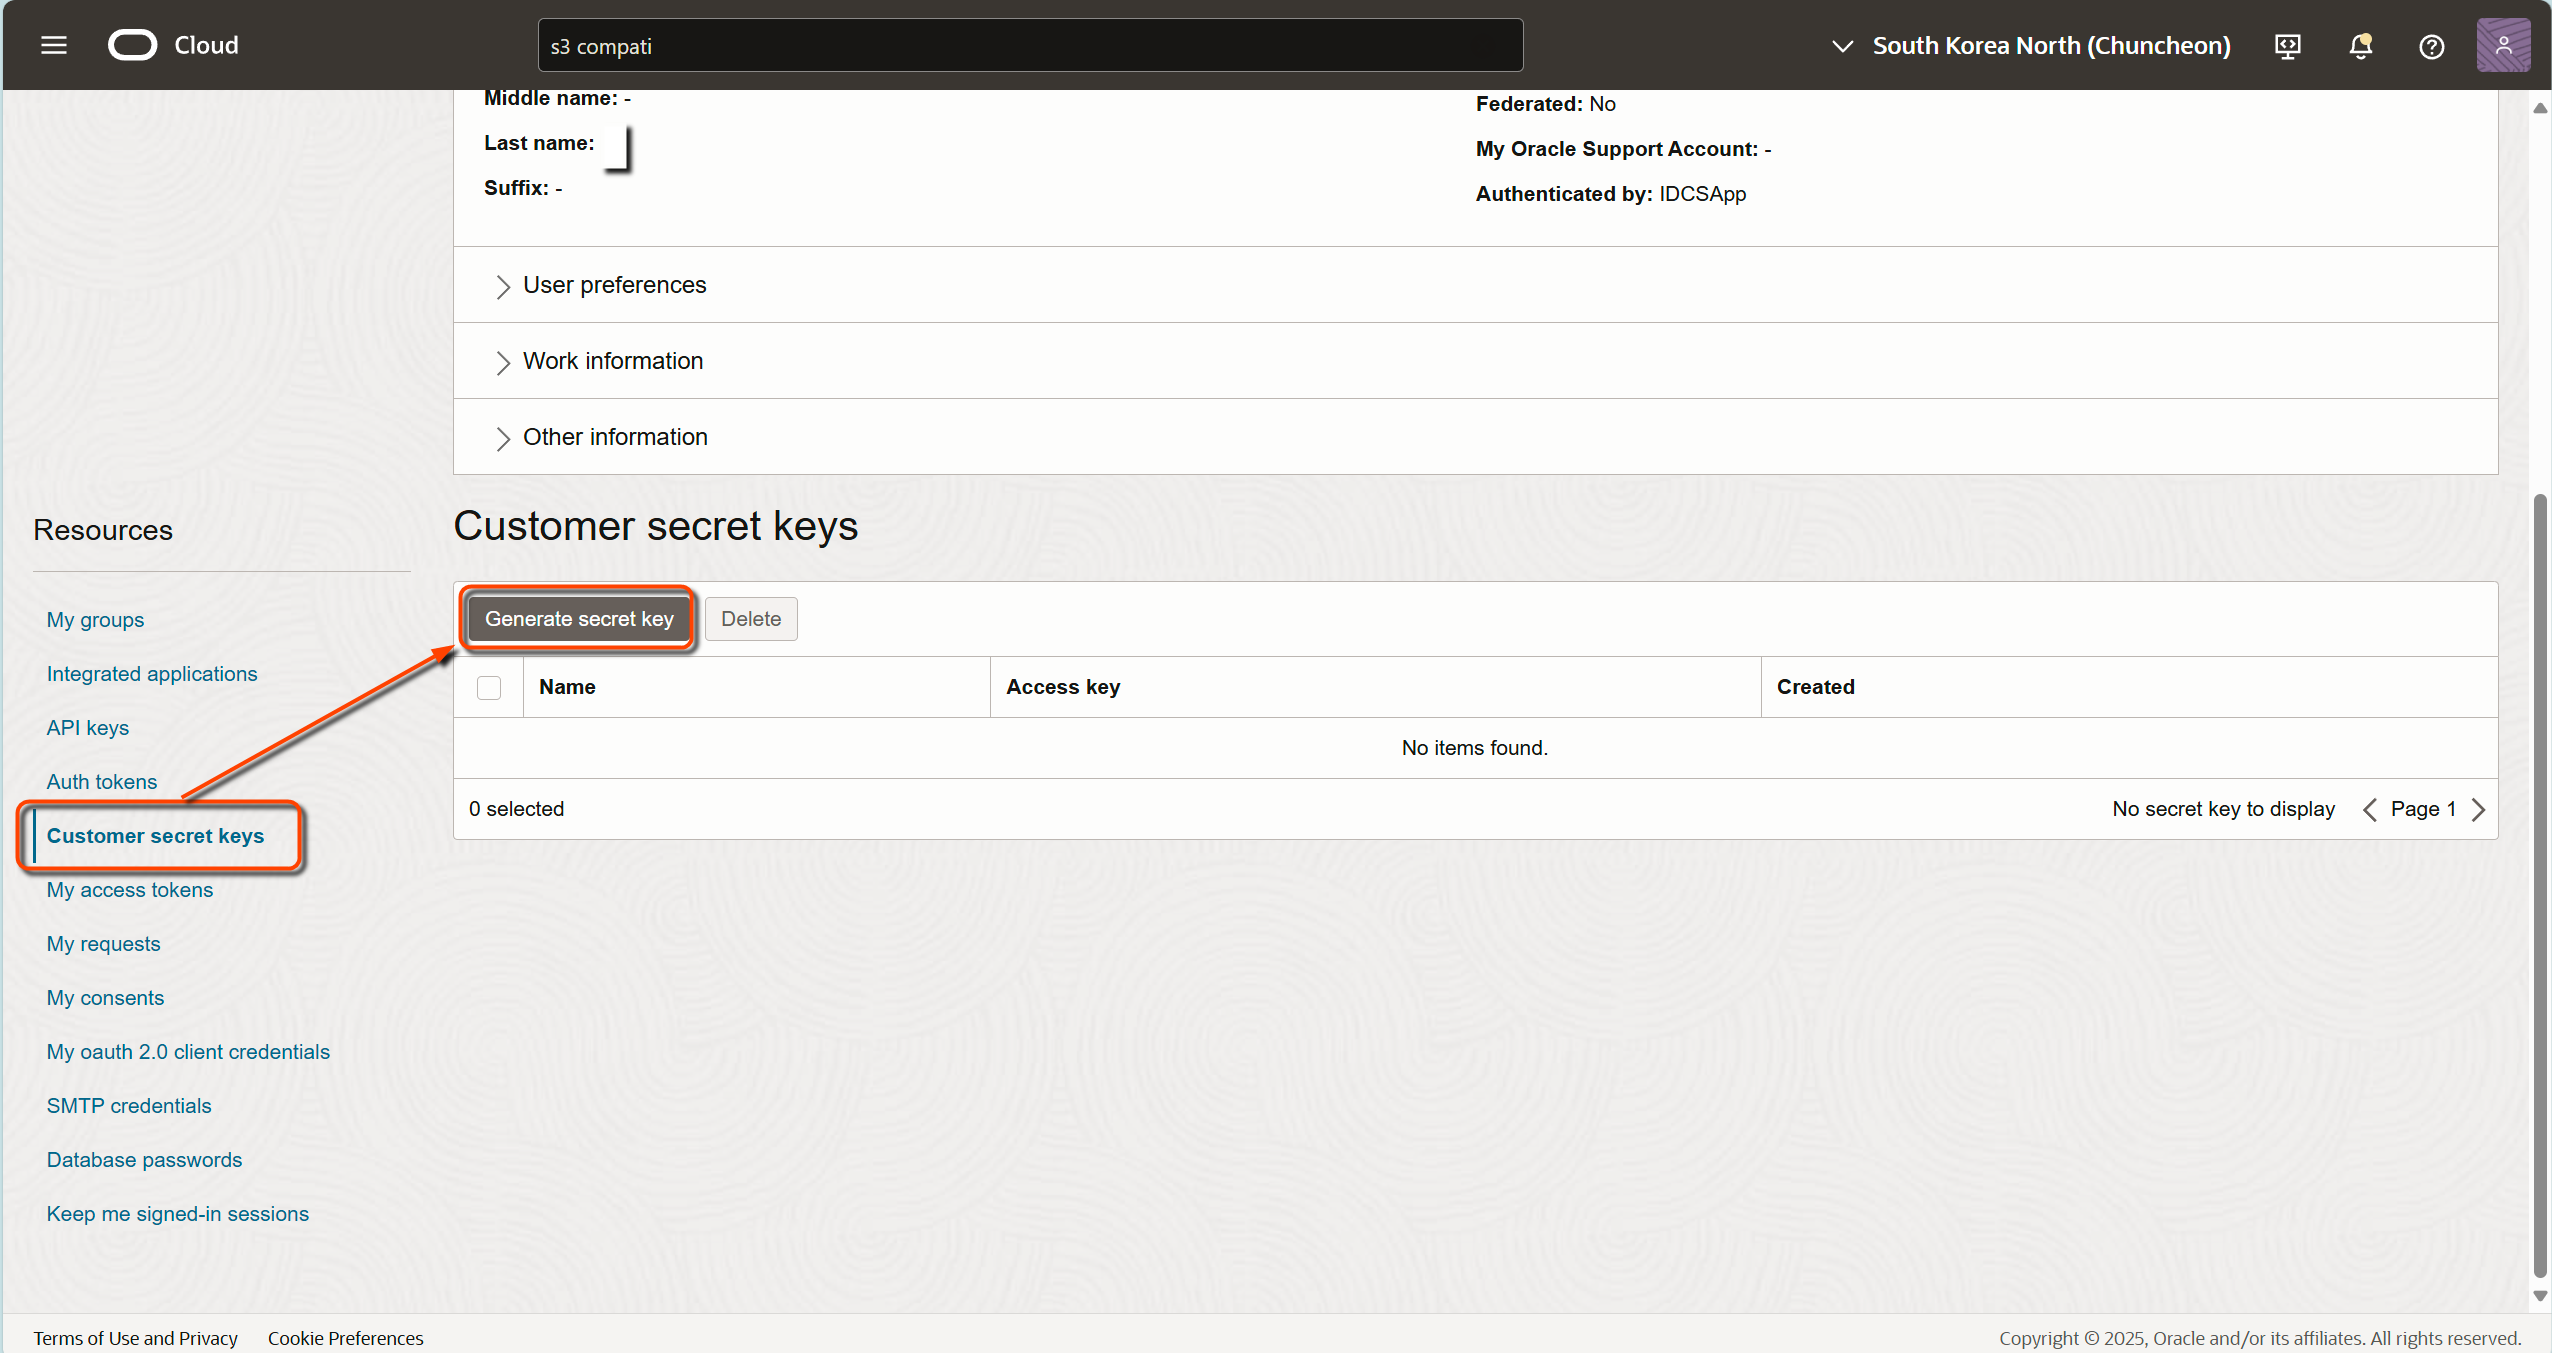
4. Find and click “Customer Secret Keys” in the left navigation panel
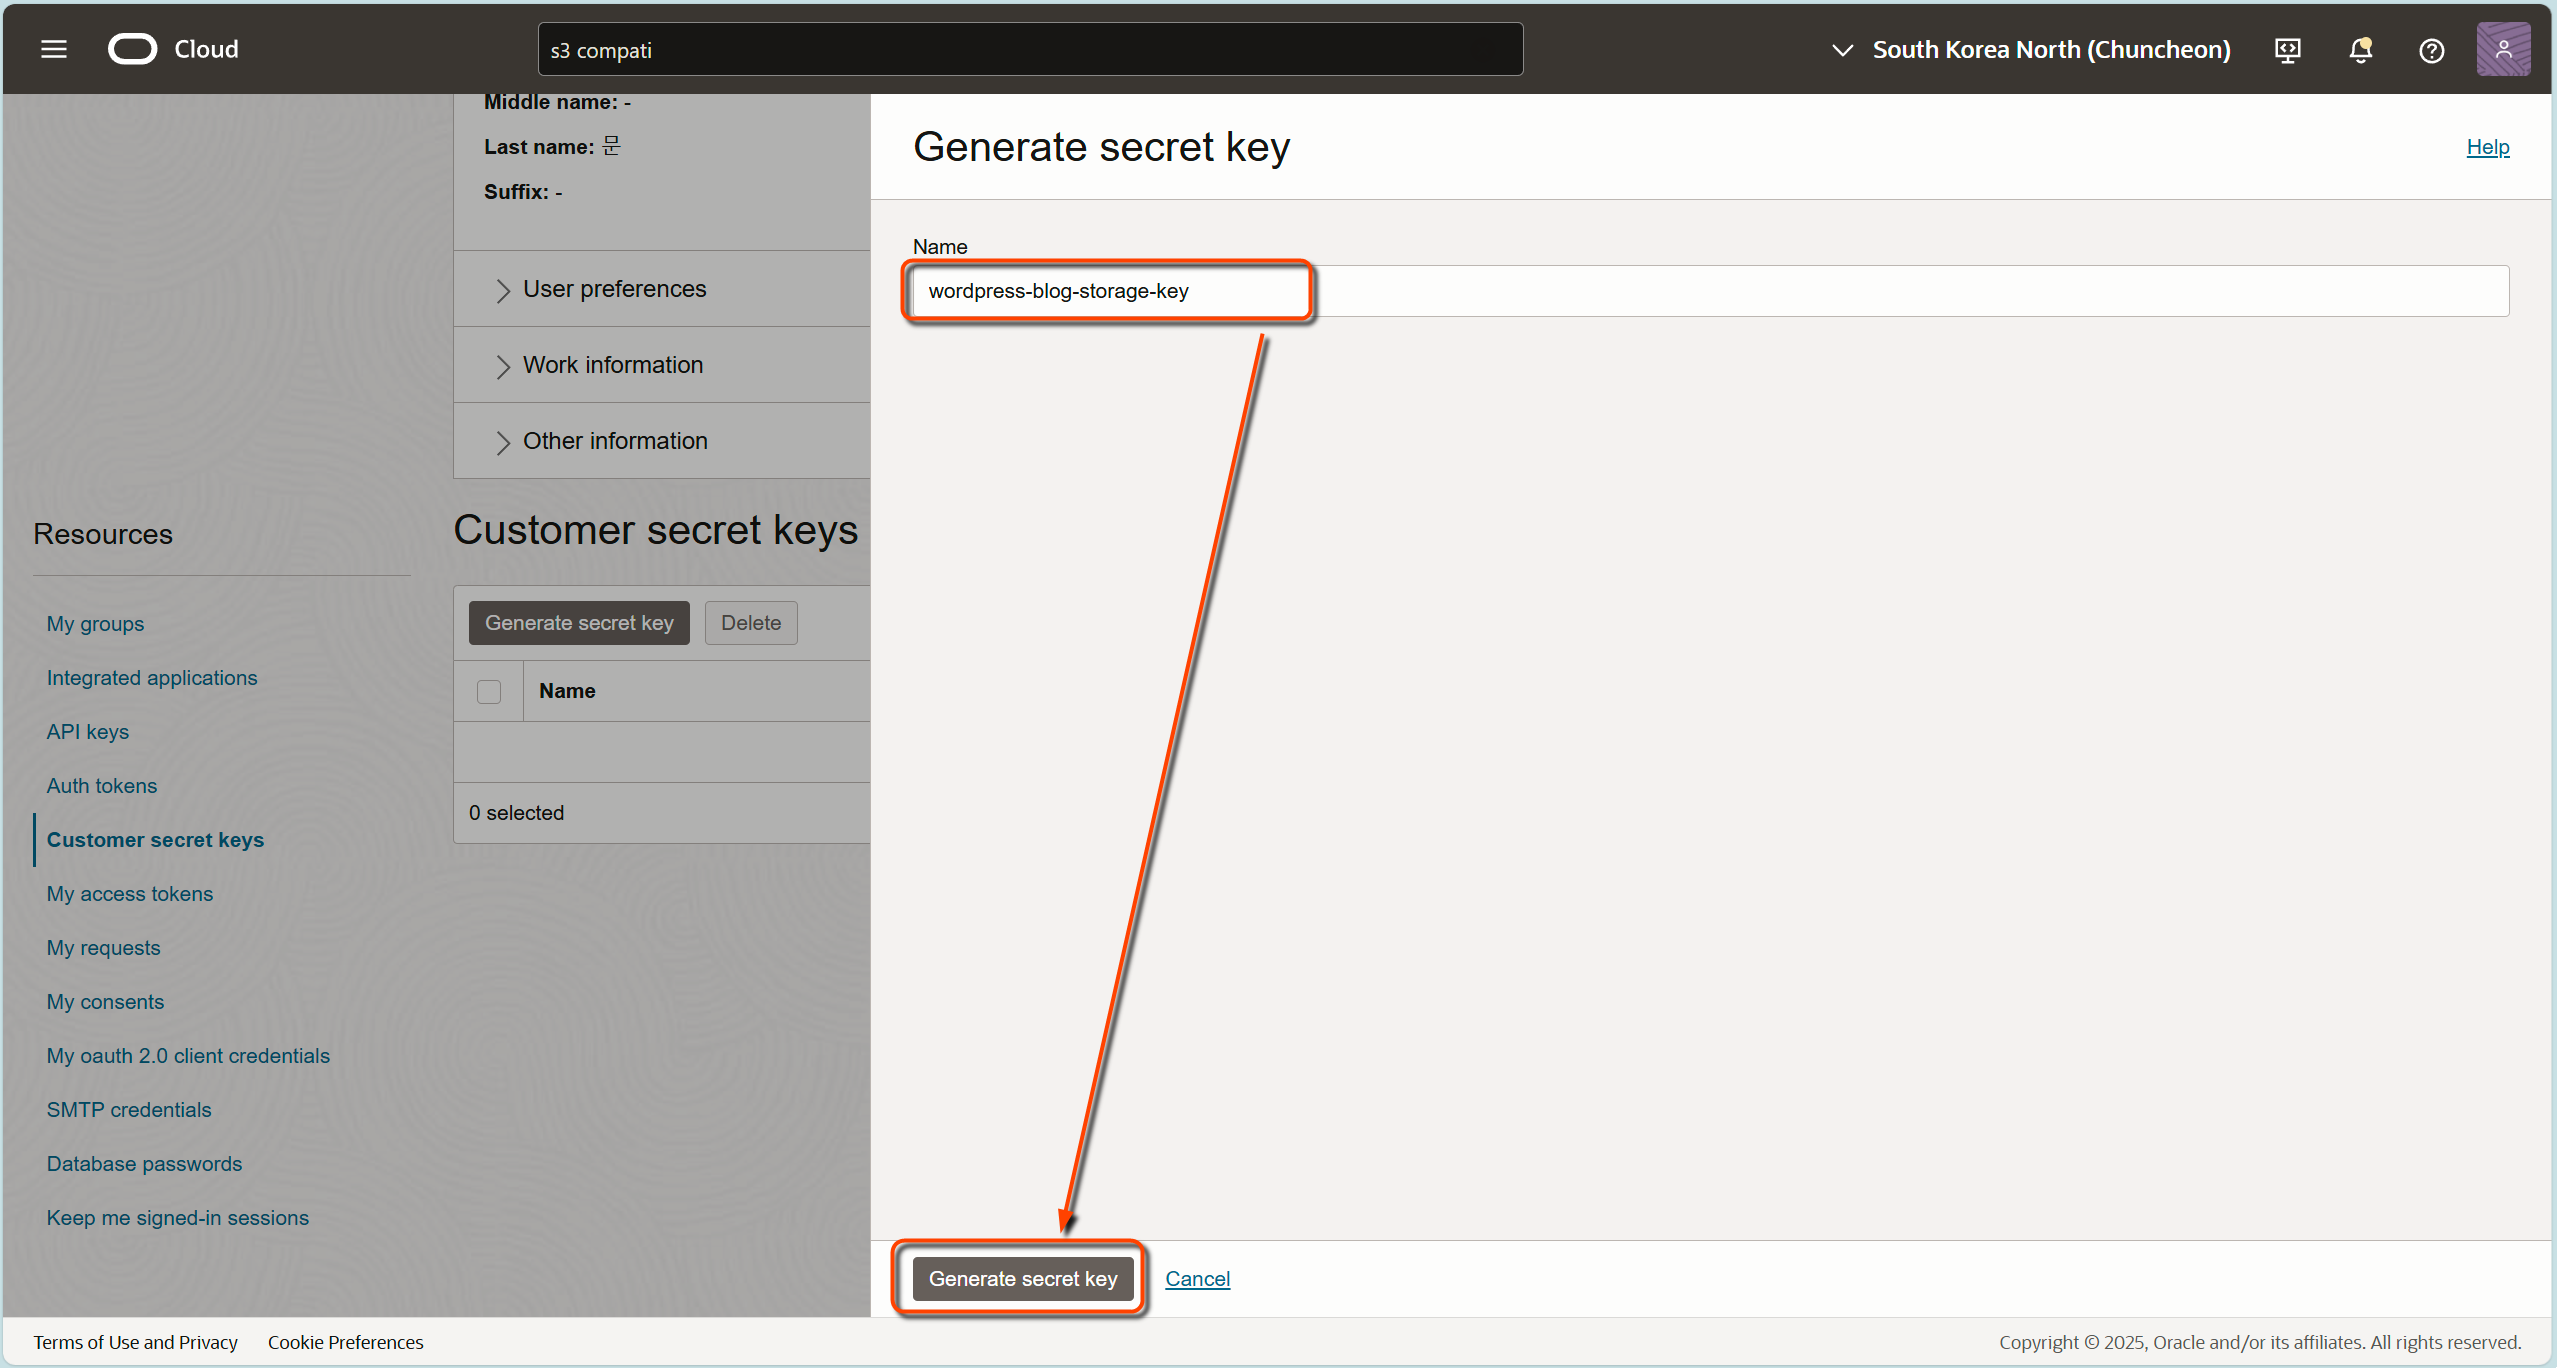
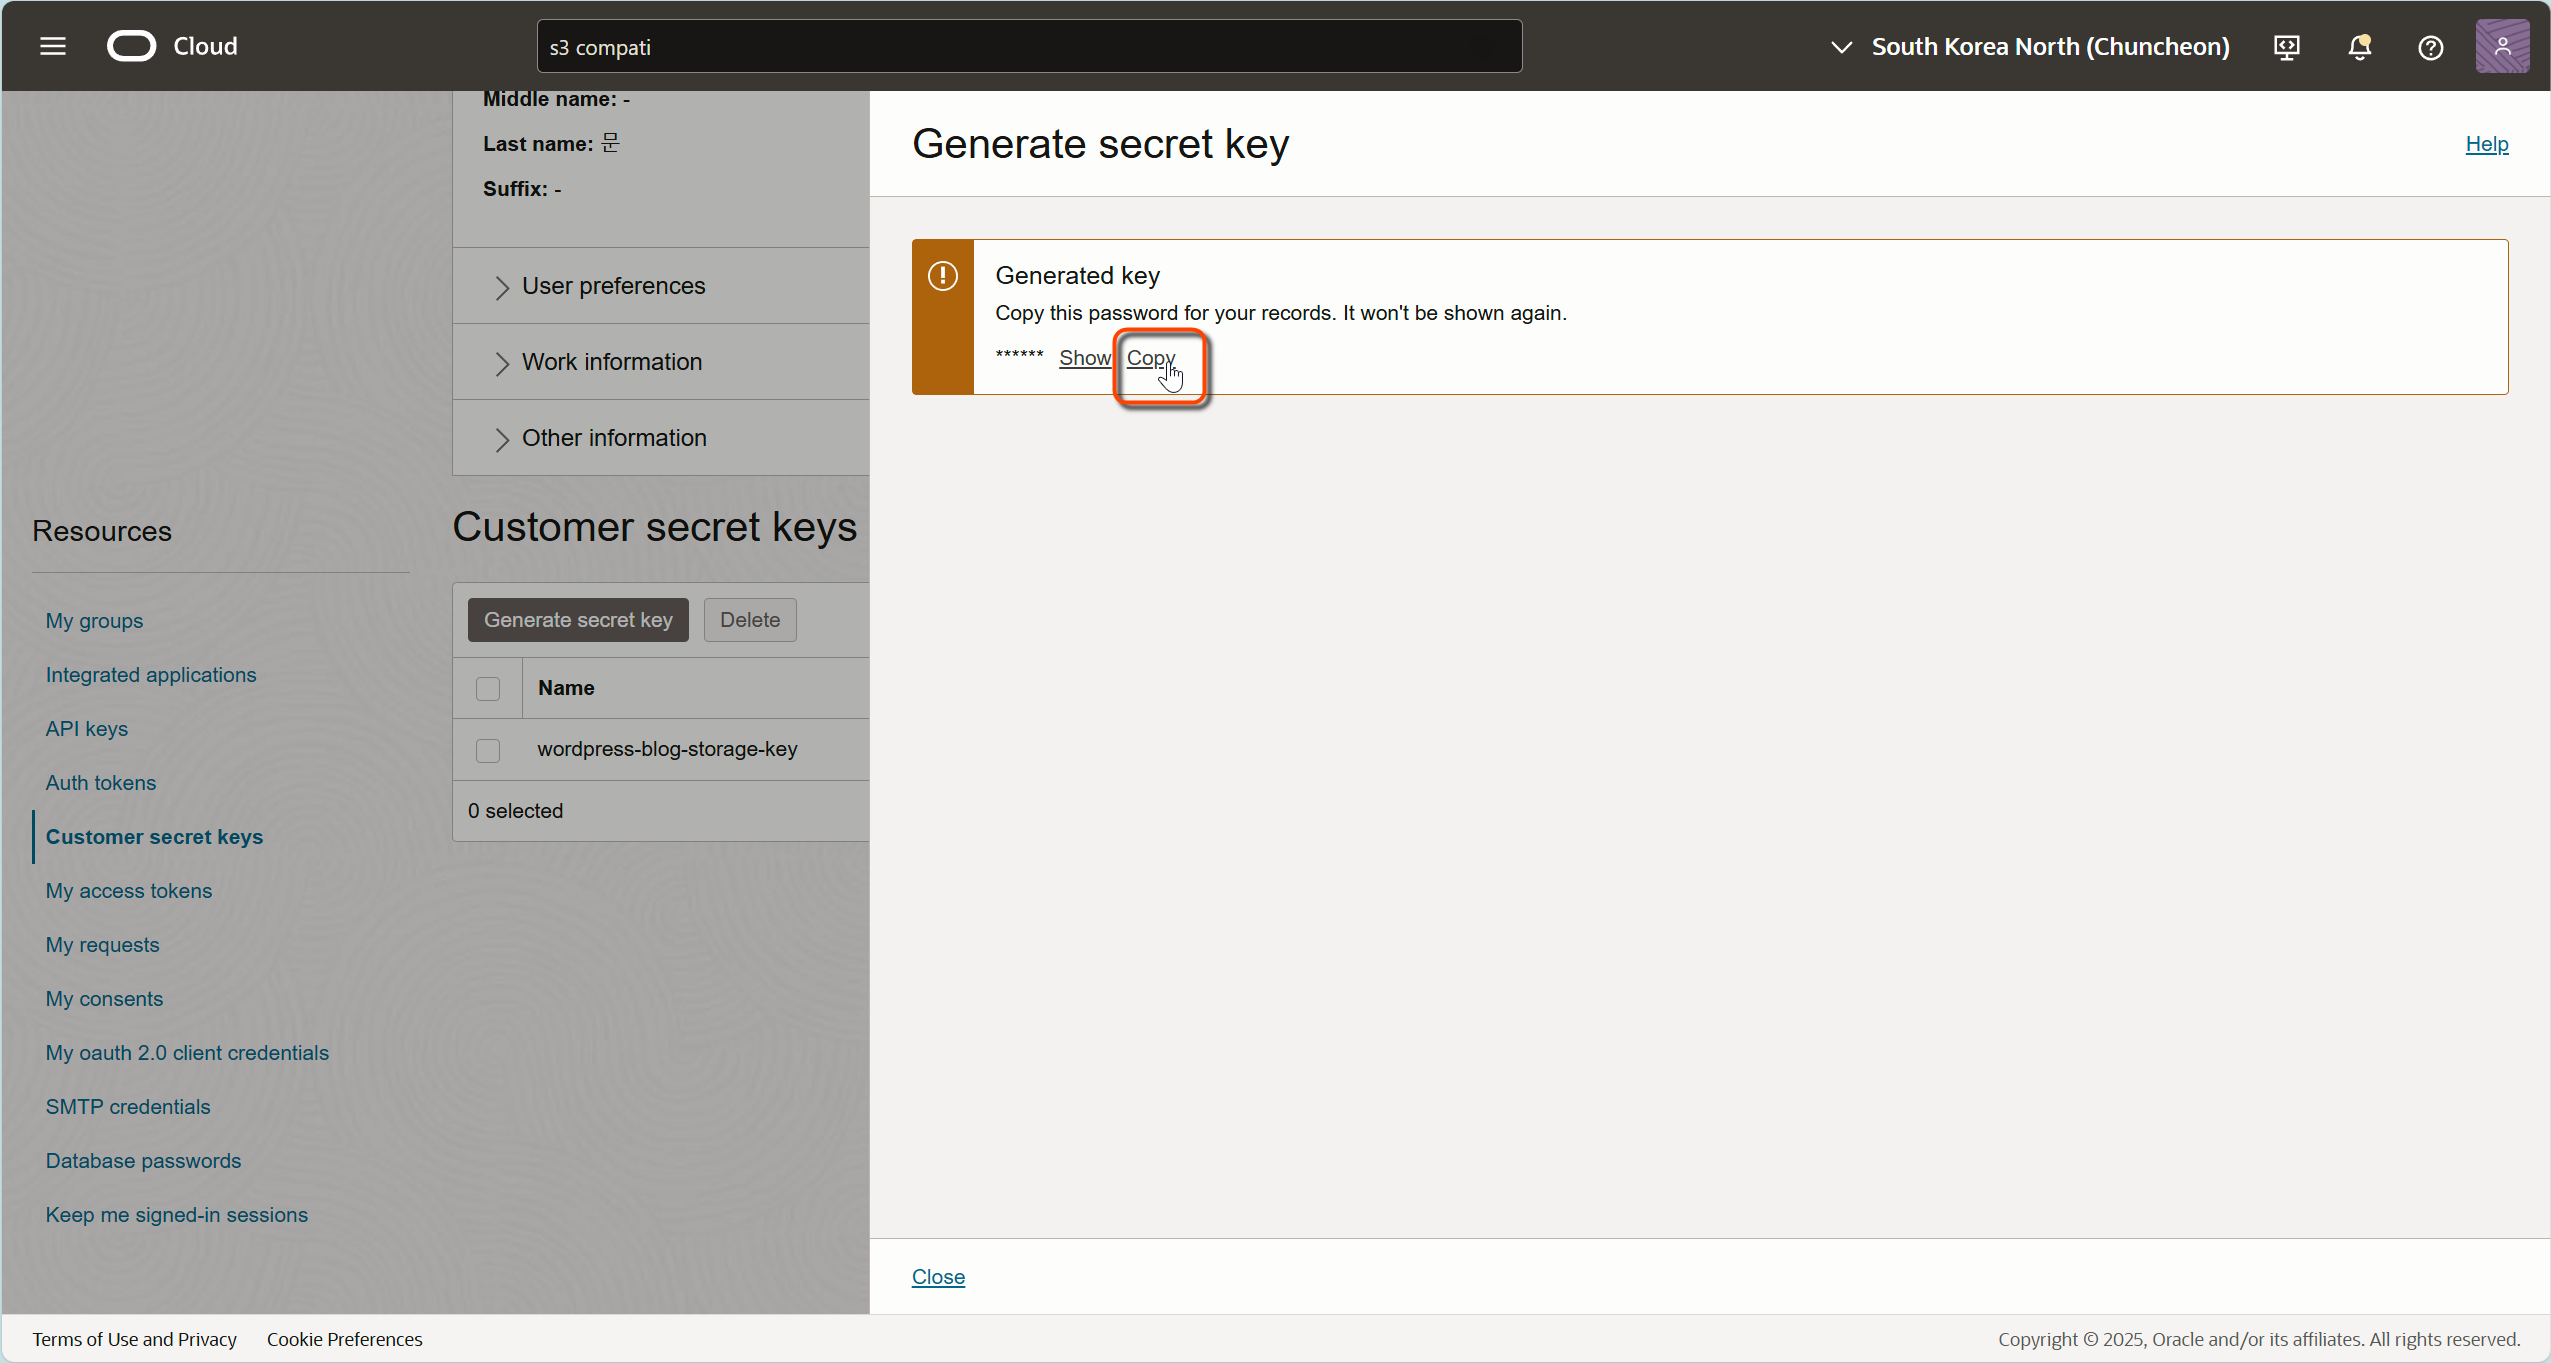
5. Click the “Generate Secret Key” button
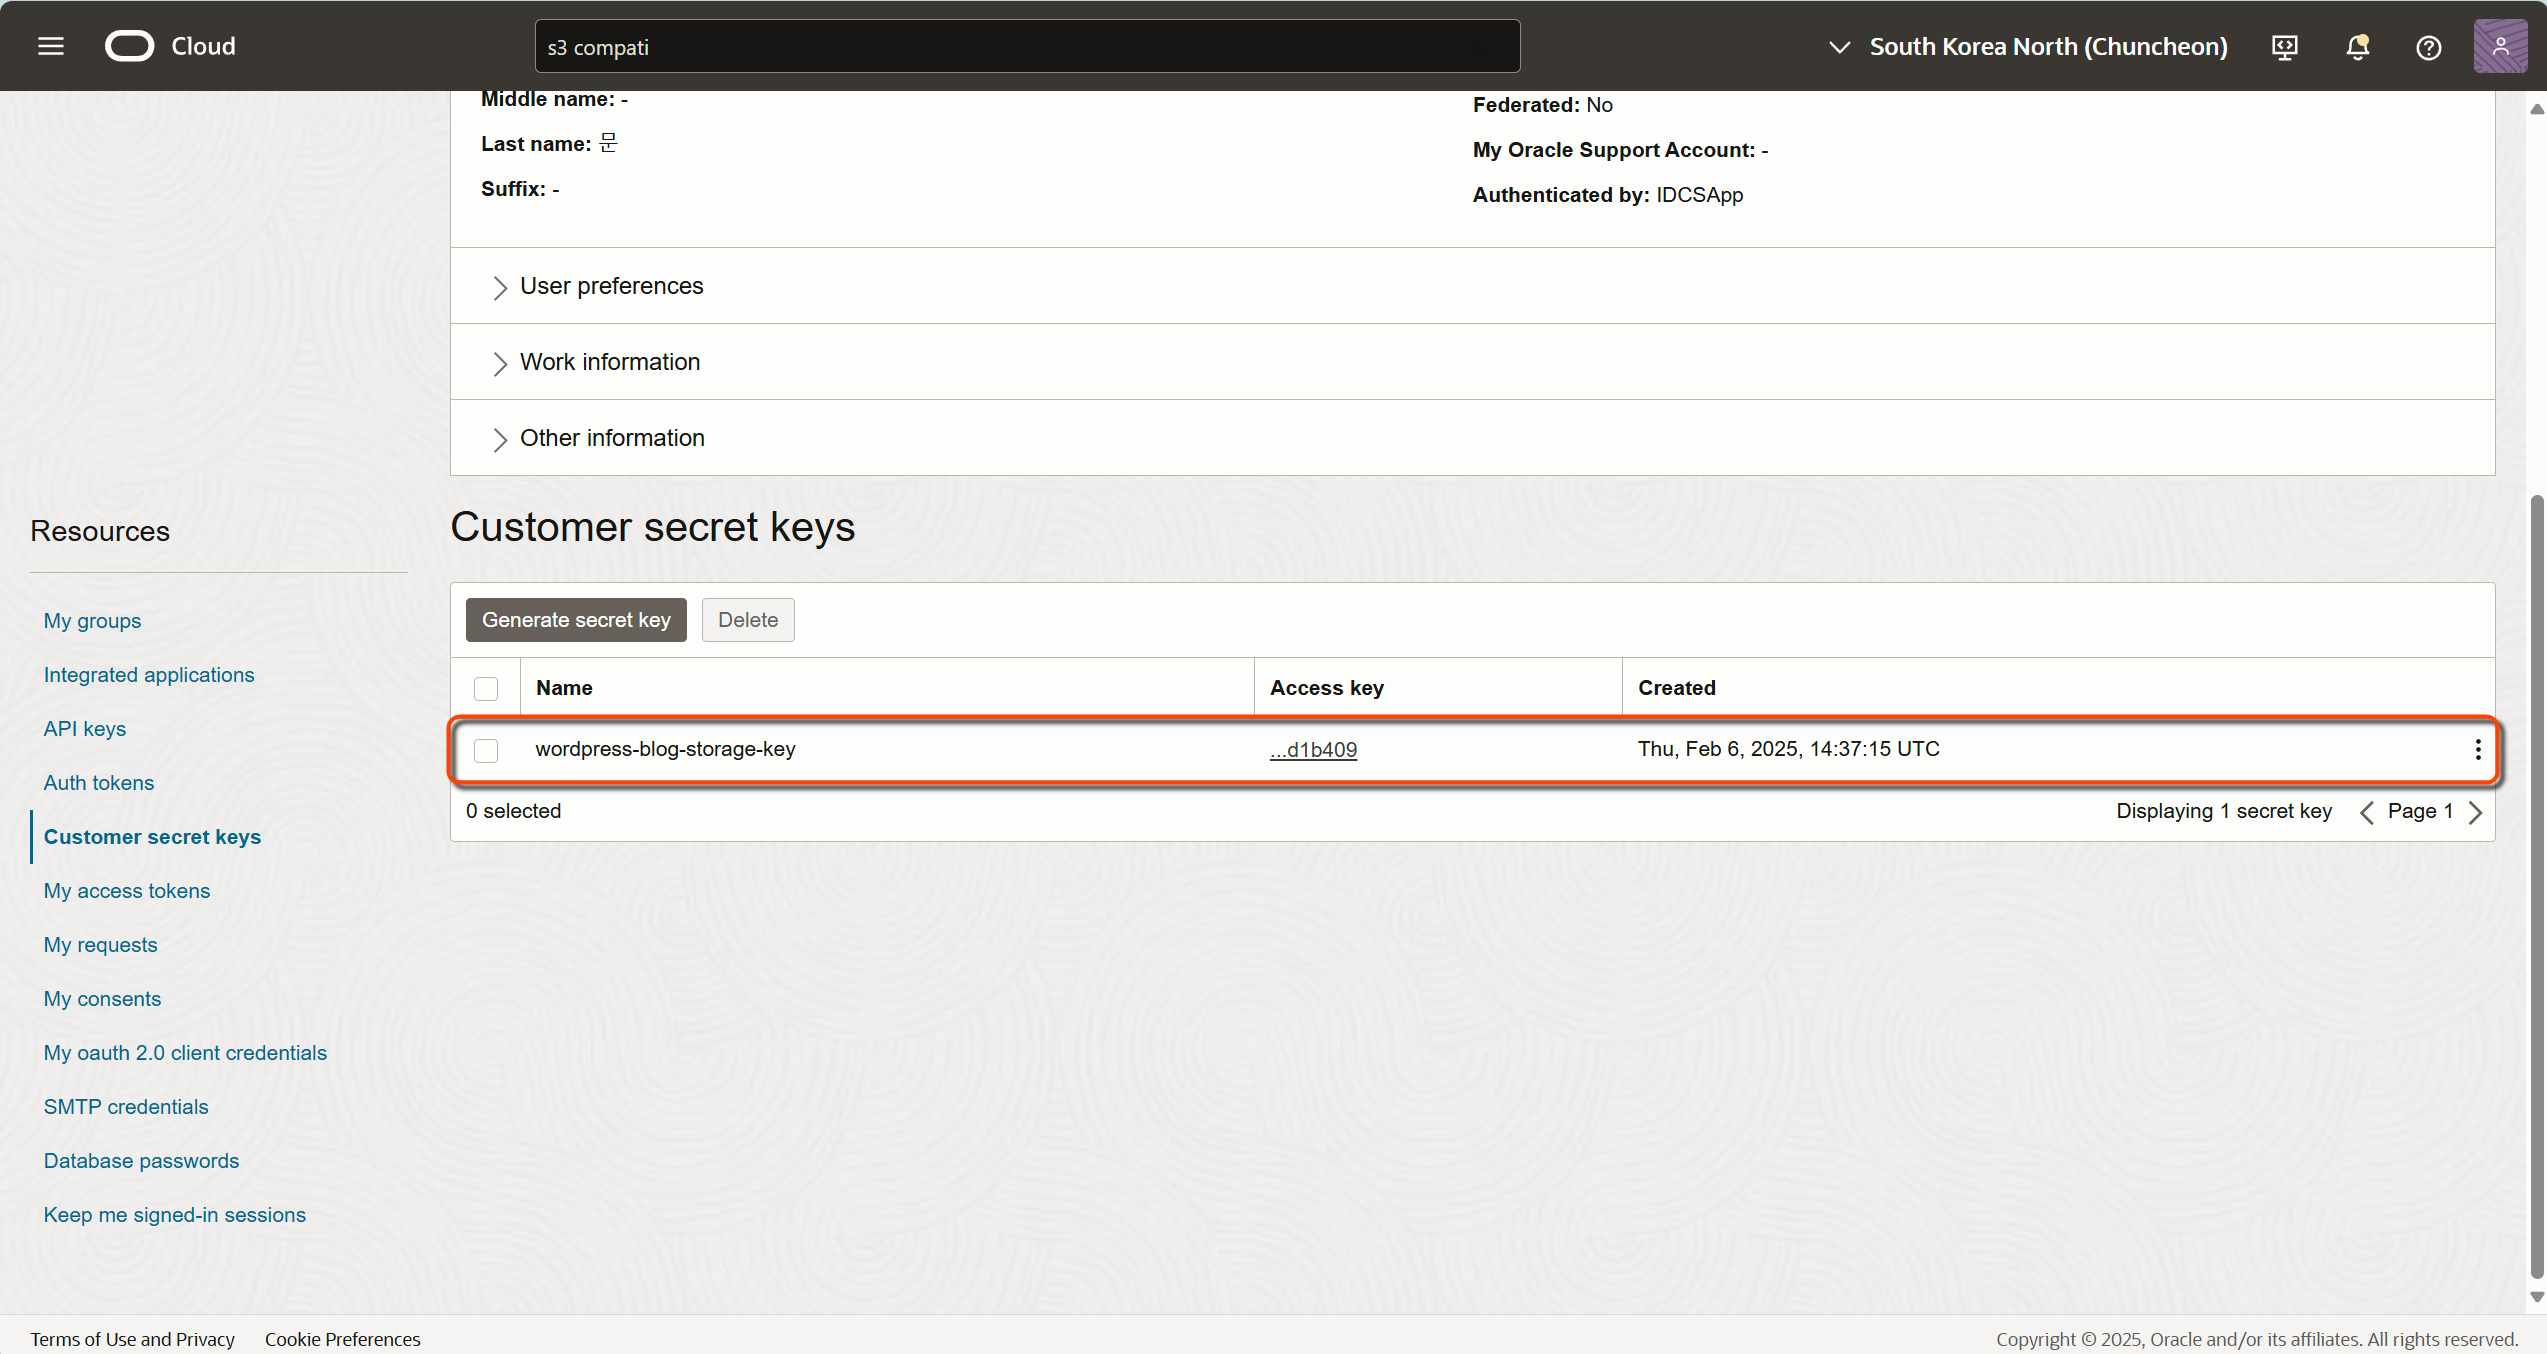
6. Provide a descriptive name (e.g., “wordpress-blog-storage-key”)
Note: Important: When the key is generated, you’ll receive two crucial pieces of information
- Access Key: Save this carefully as you’ll need it for configuration
- Secret Key: This appears only once, so store it securely
Step 2: Creating Your Storage Bucket
A bucket in Object Storage is like a dedicated folder for your blog images. Here’s how to set it up:
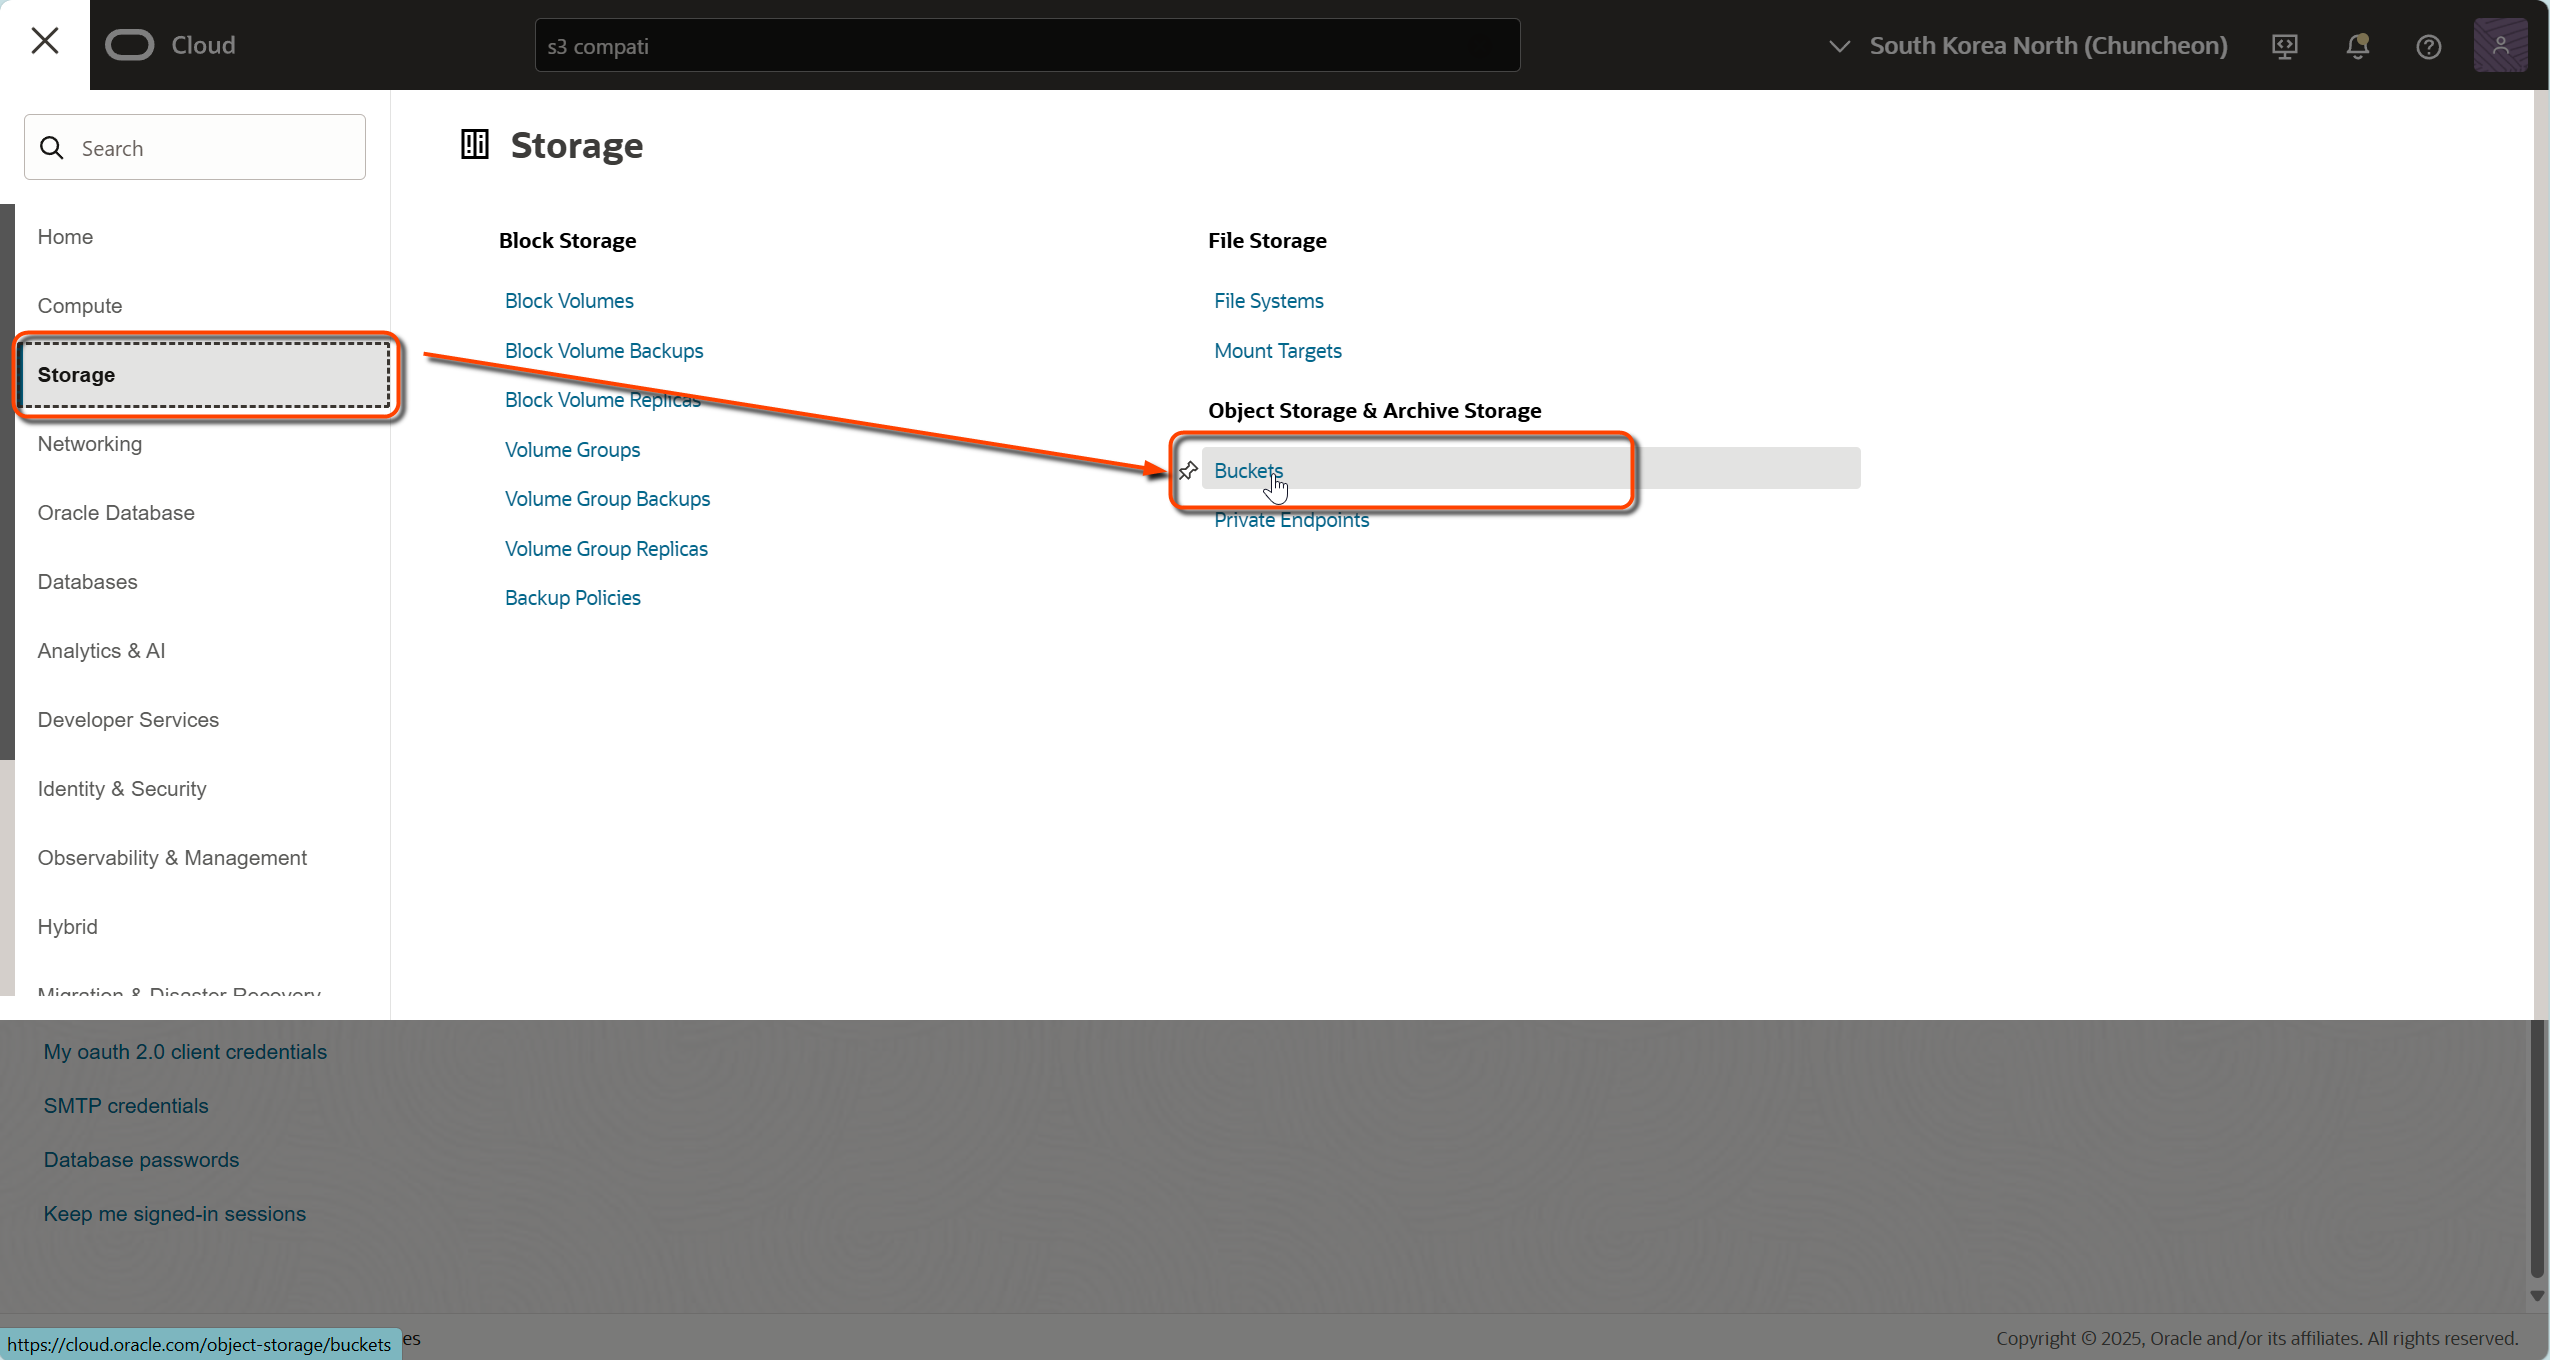
1. In the Oracle Cloud Console, navigate to:
Storage → Object Storage & Archive Storage
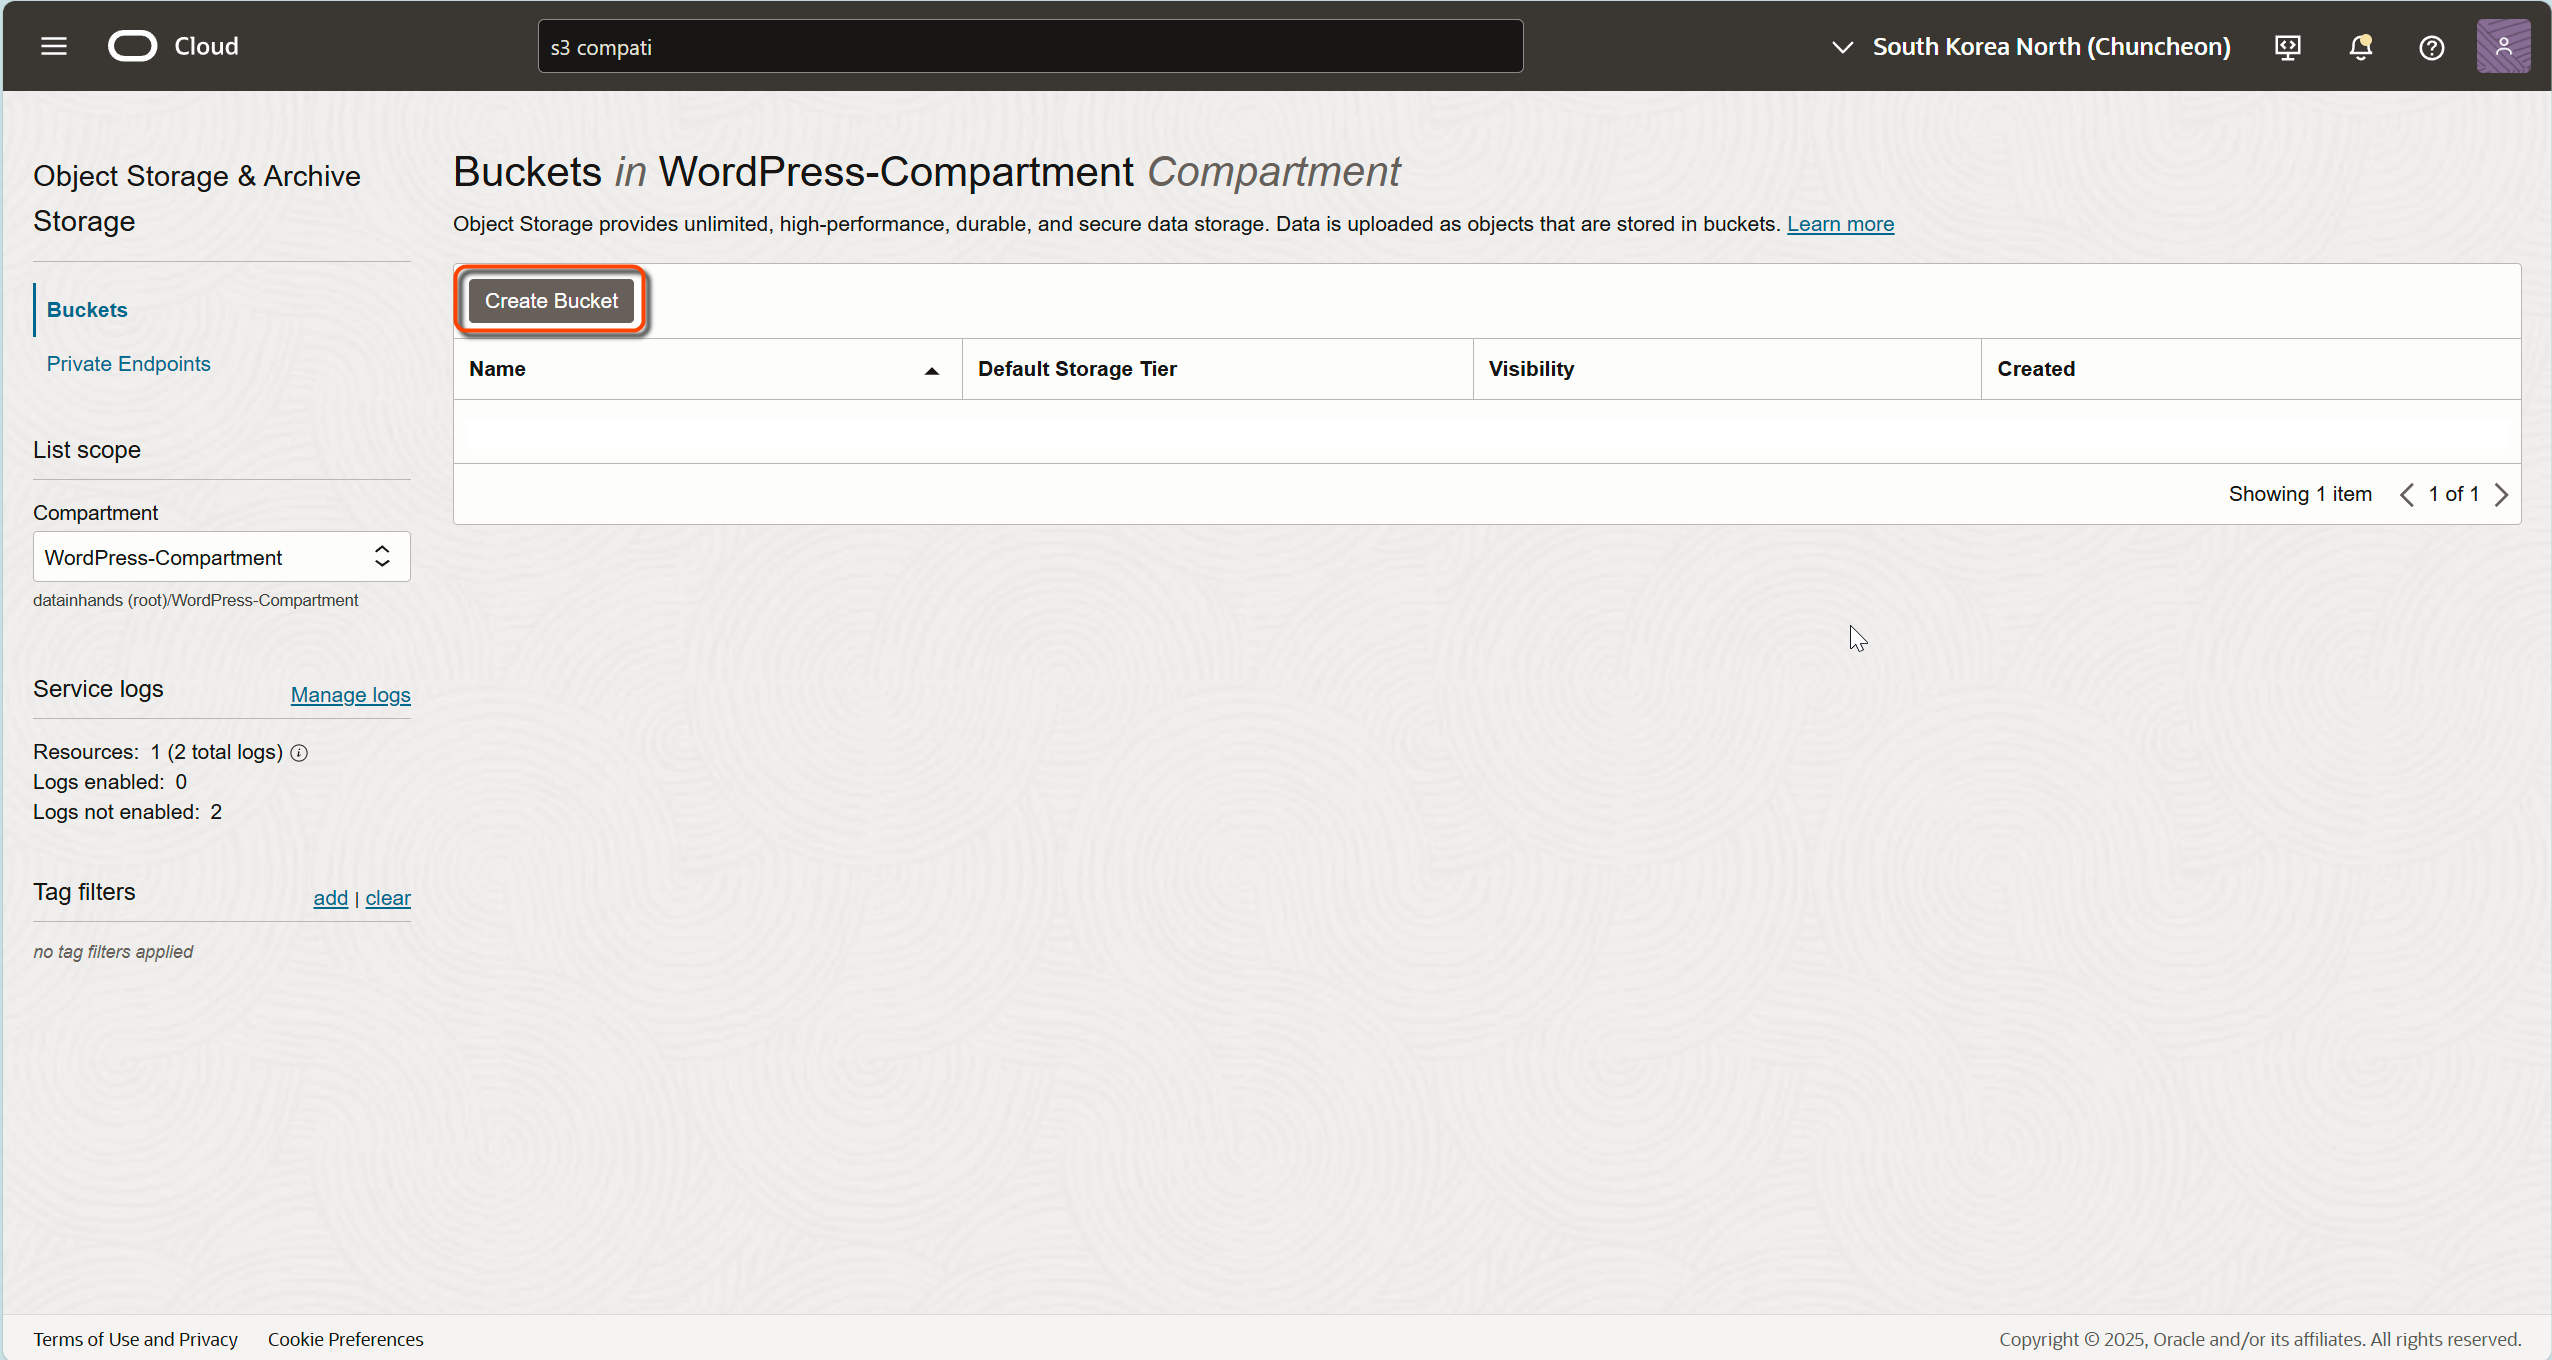
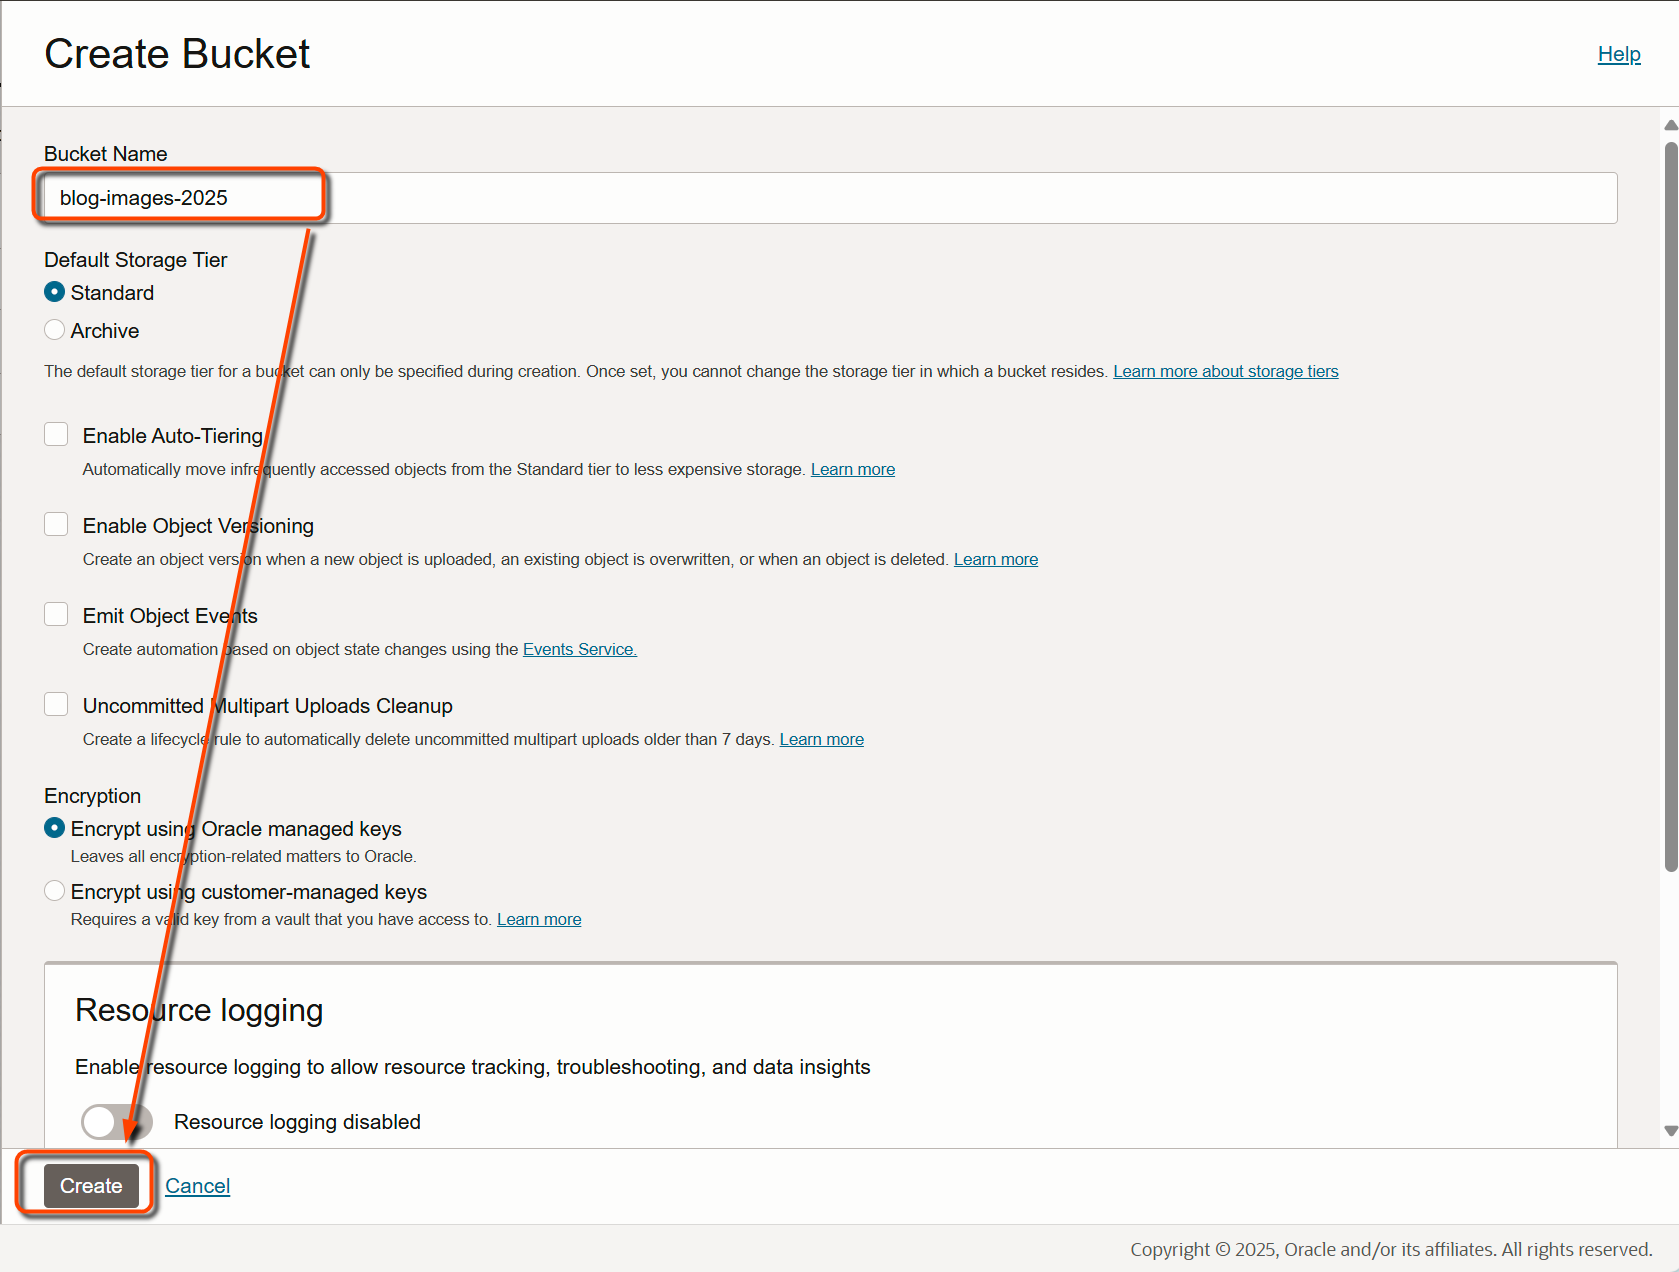
2. Click “Create Bucket”
3. Configure your bucket:
- Name: Choose something meaningful like “blog-images-2025”
- Default Storage Tier: Standard
- Default Visibility: Private (we’ll change this later)
4. Making Your Bucket Public
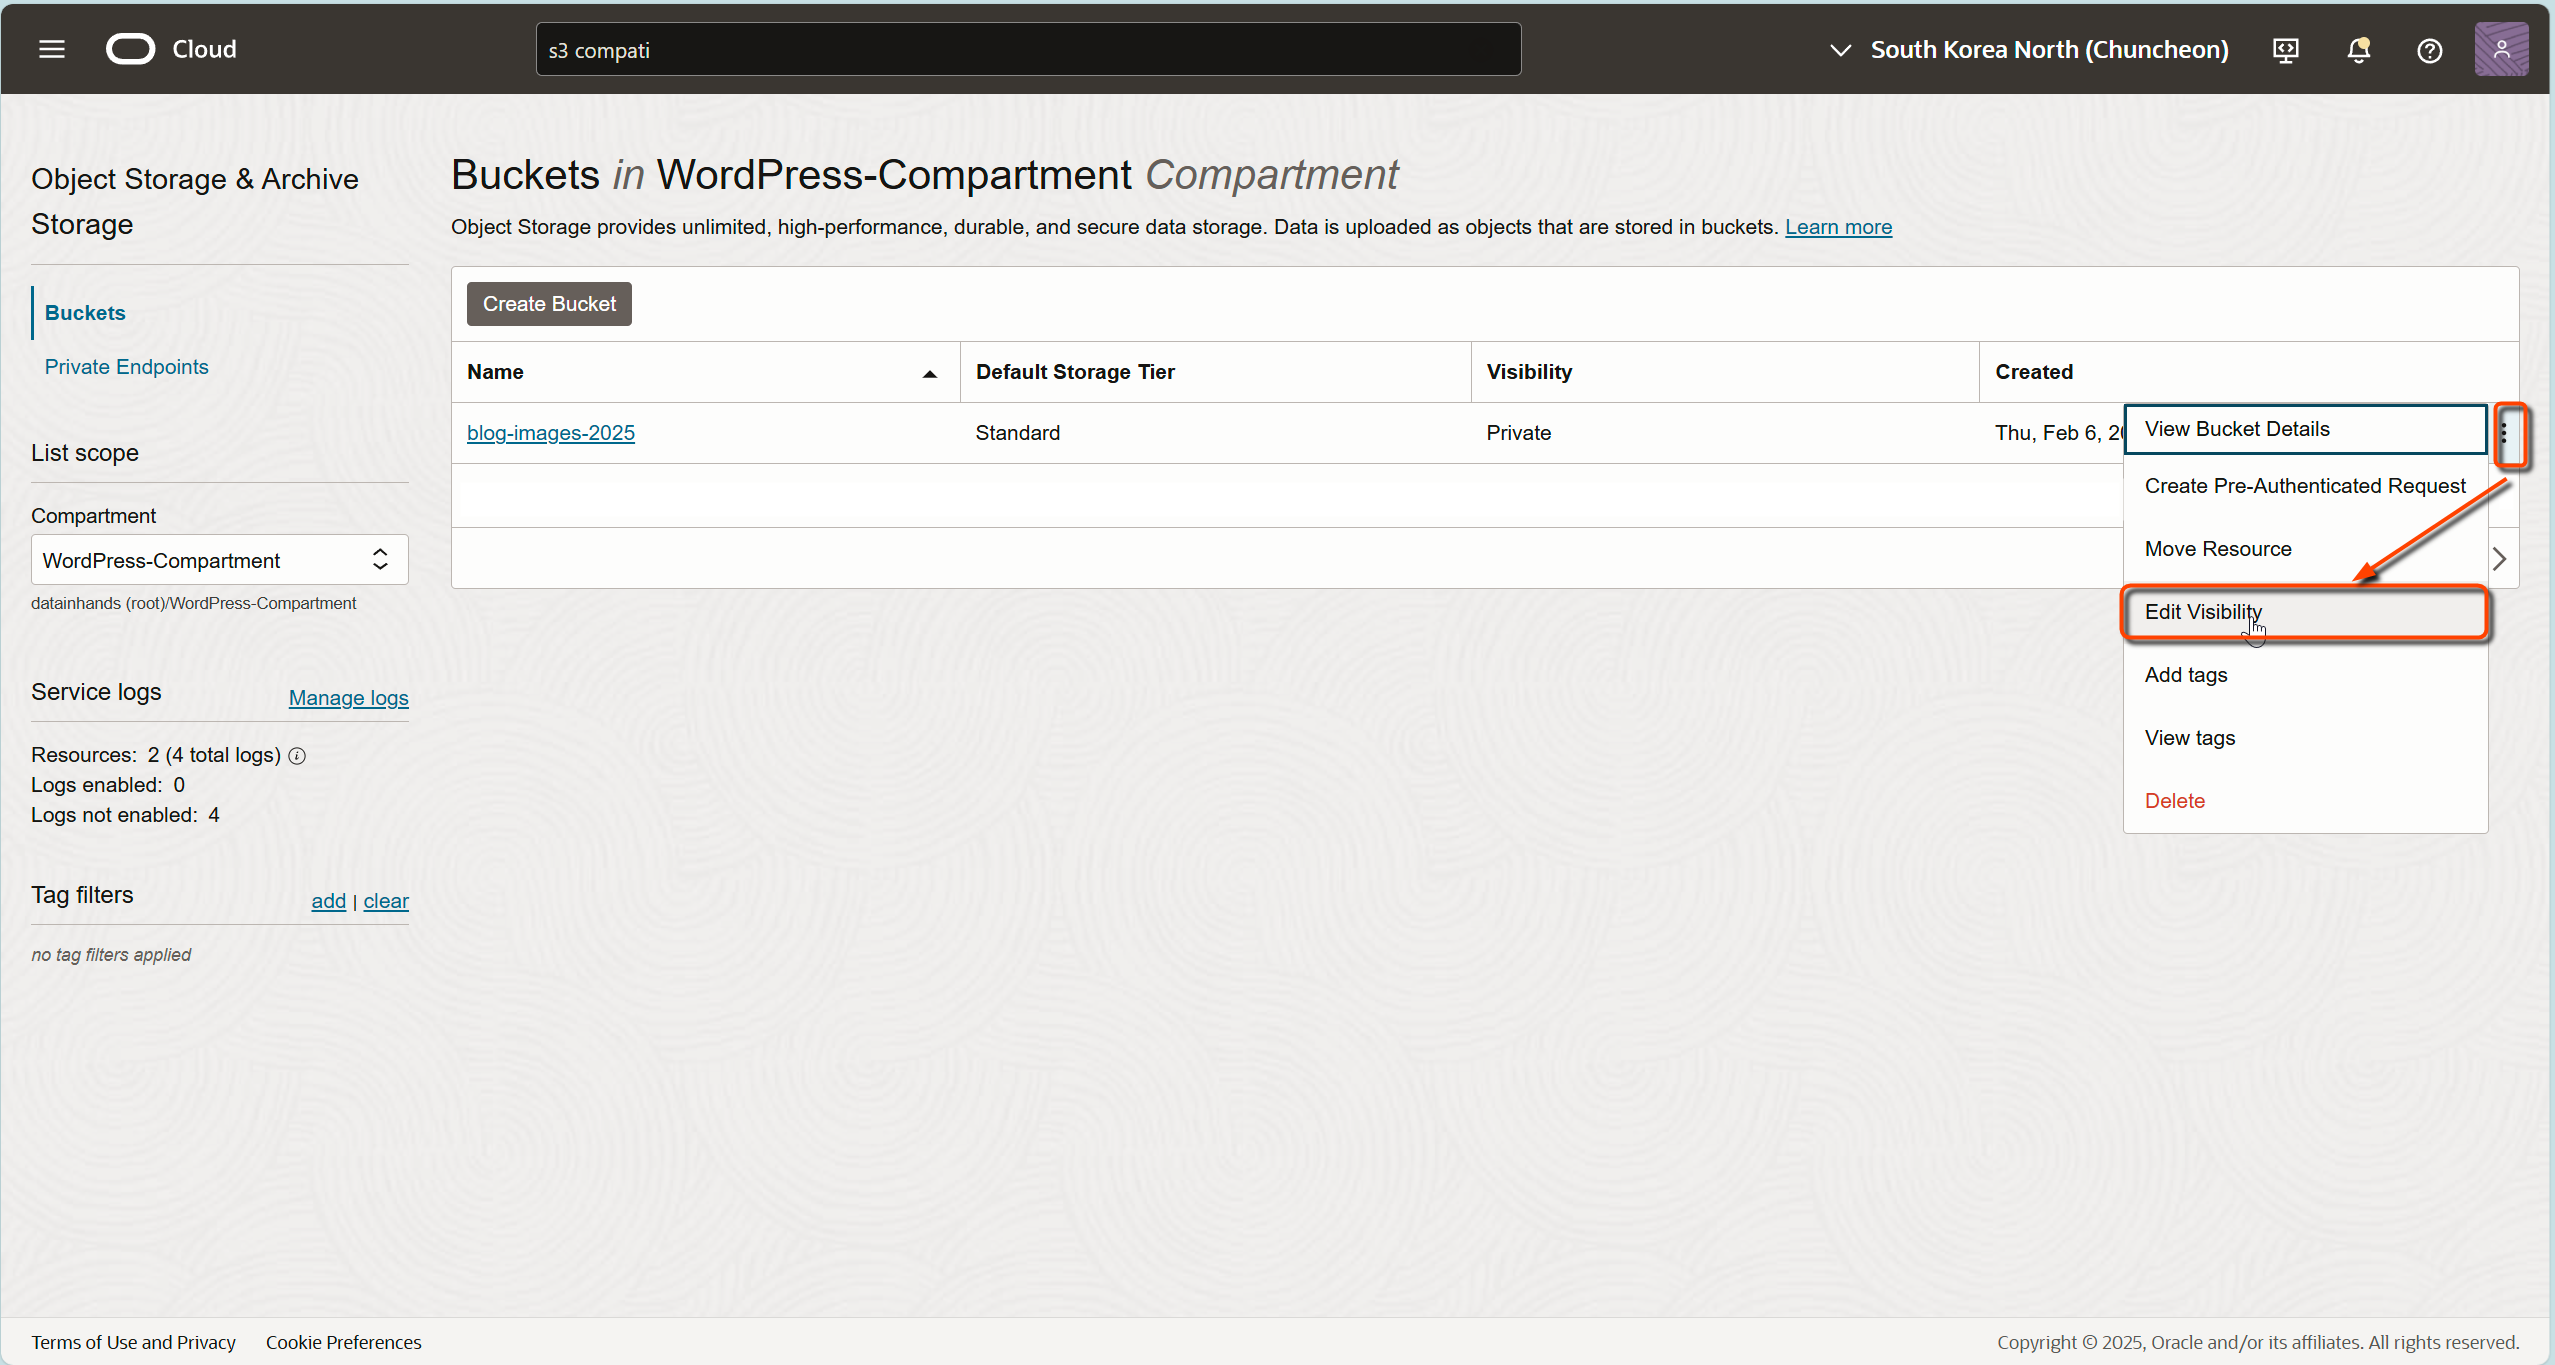
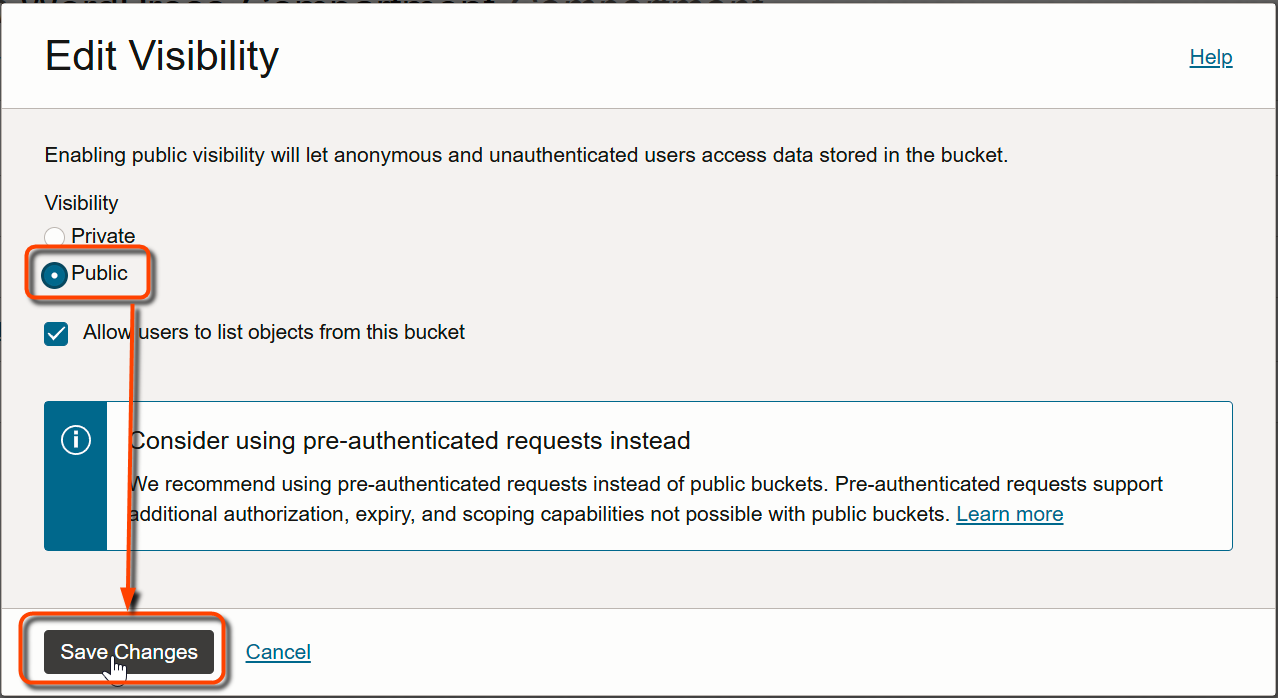
After creation, modify the bucket’s visibility:
- Select your newly created bucket
- Click “Edit Visibility”
- Change to “Public”
- Save your changes
Using a public bucket significantly simplifies image management. However, keep in mind that this means all images will be publicly accessible, so be cautious not to upload any images containing sensitive information. For typical blog images, this setup is the most practical and easiest to manage.
Important Note About OCI Namespace
The OCI namespace is a unique string that identifies your tenancy. This information is crucial when constructing Object Storage URLs. Here are two ways to find your namespace:
Method 1: Through Profile Settings
- Log in to the OCI Console
- Click the profile icon in the top right corner
- Click “Tenancy: [Your Tenancy Name]”
- Find your namespace under the Object Storage Namespace section
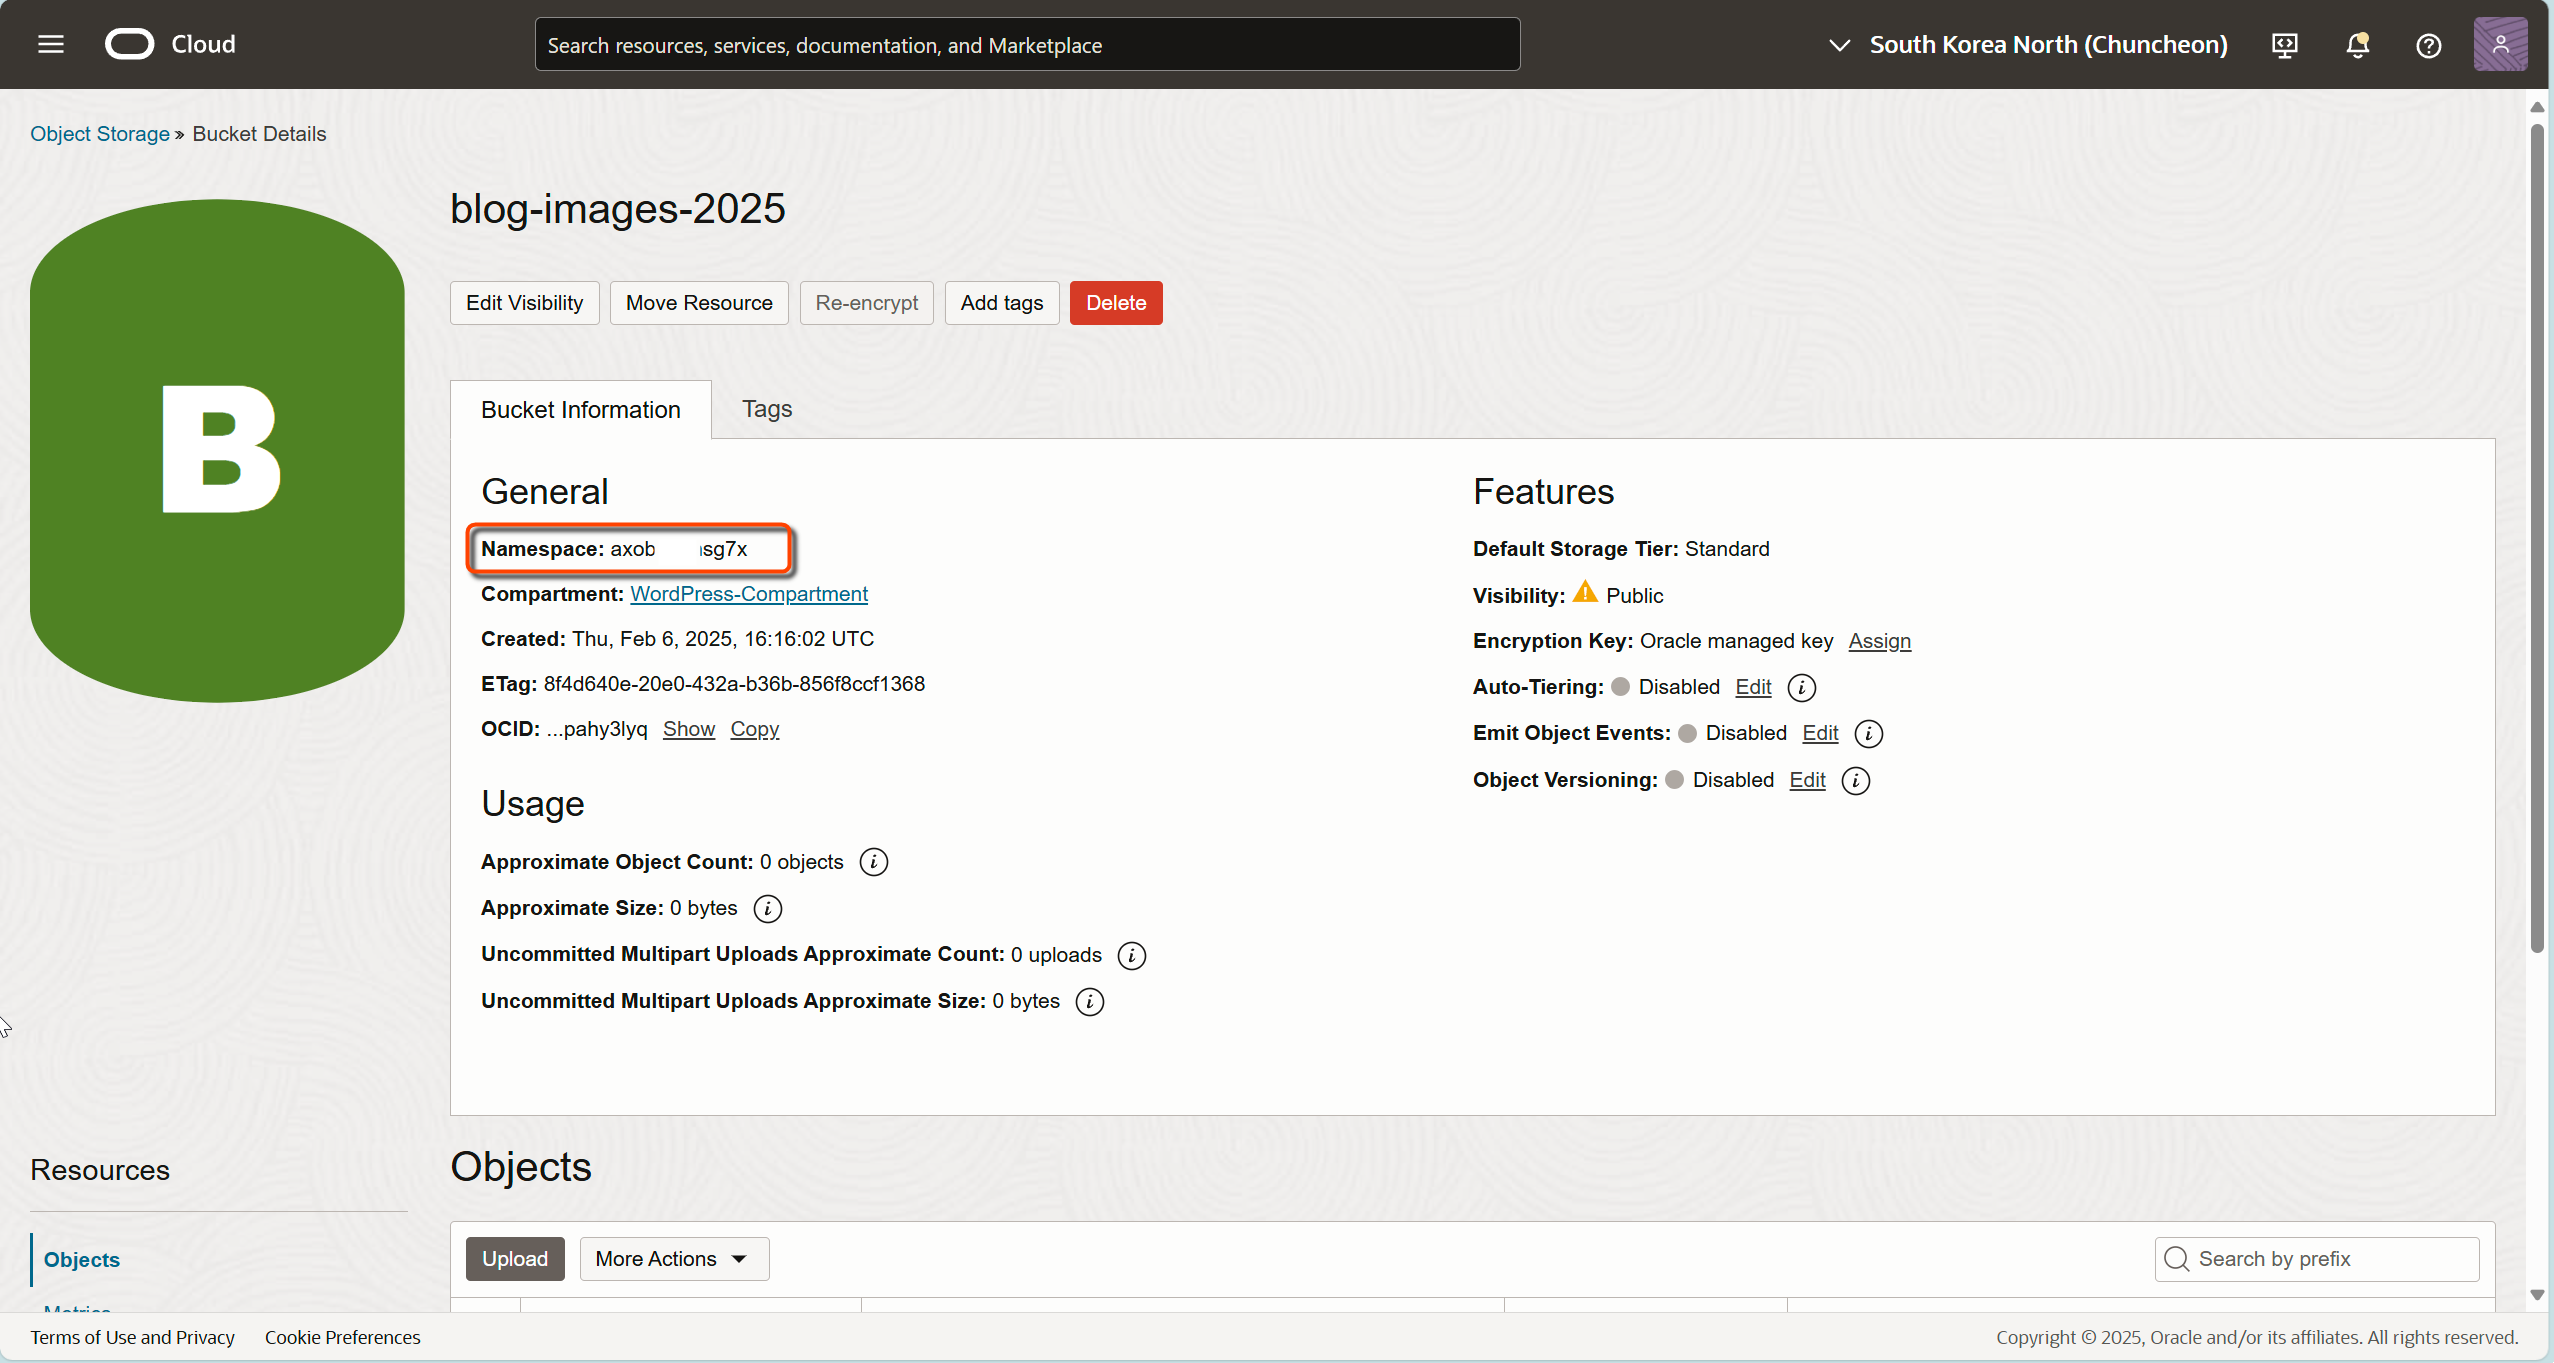
Method 2: Through Object Storage Console
- Navigate to “Storage” → “Object Storage & Archive Storage” in the OCI Console
- Click on your newly created bucket to view its details
- Look for the “Namespace:” label at the top of the Bucket Information’s General section
Your namespace is typically a string of letters and numbers, for example ‘axdf1g2x3’. This value is automatically assigned when your tenancy is created and cannot be changed.
Step 3: Installing SFTPGo Client
SFTPGo serves as your bridge between your computer and Object Storage, making file management as simple as working with local folders.
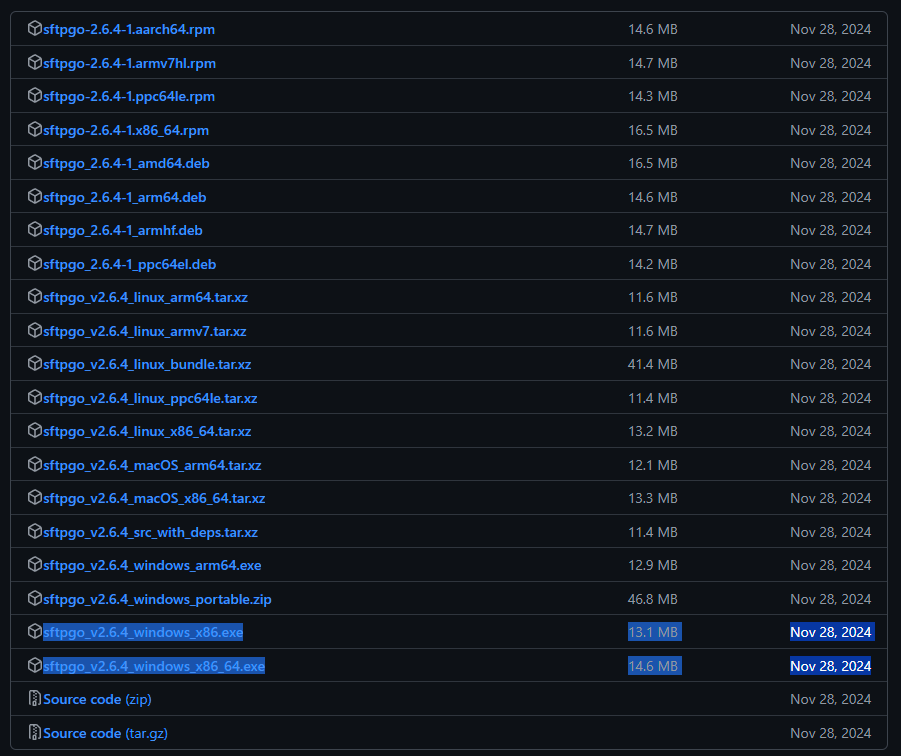
Download SFTPGo
- Visit https://github.com/drakkan/sftpgo/releases
- Download the appropriate version:
SFTPGo Initial Setup
- Extract the downloaded file
- For Windows users, run the installation program
- For macOS or Linux users, you may need to grant execution permissions in the terminal
Configuring the Admin Portal
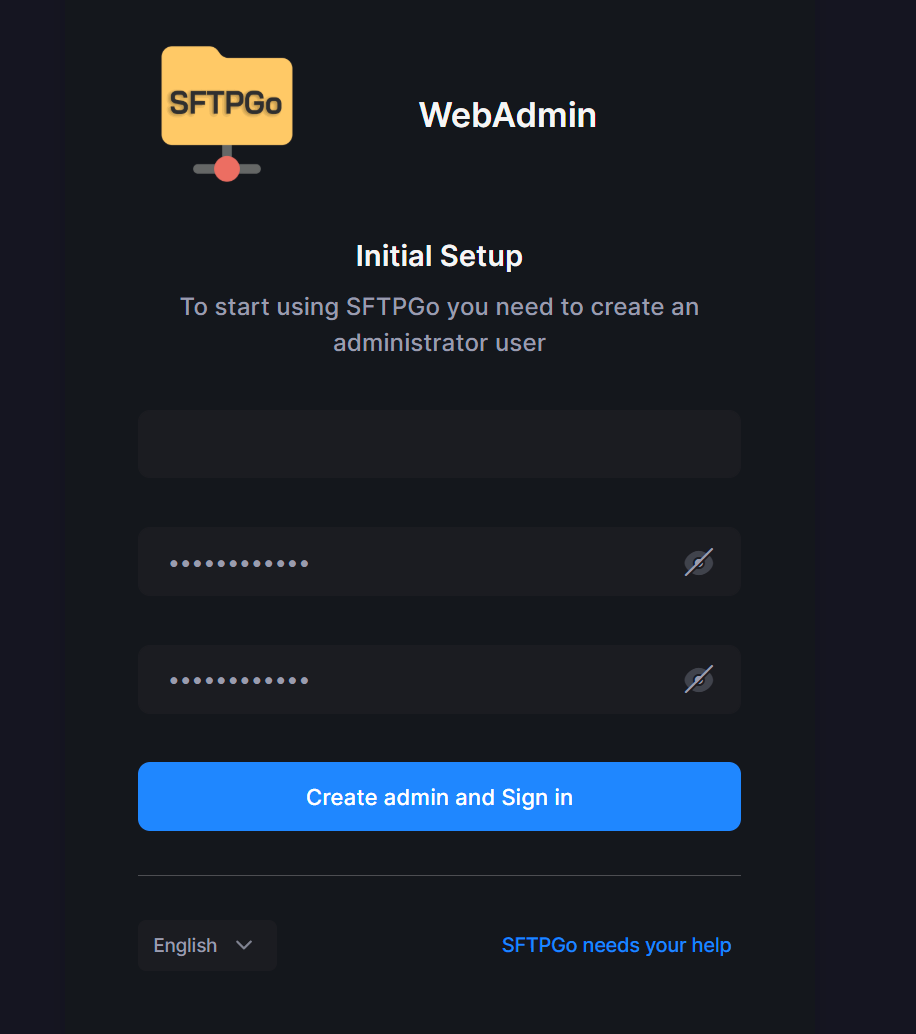
When you first run SFTPGo, a web browser should automatically open. If it doesn’t, navigate to http://localhost:8080/web/admin manually.
In the initial setup screen:
- Set your administrator username (e.g., “admin”)
- Create a secure password (make sure to remember this!)
- Click the ‘Create admin and Sign in’ button
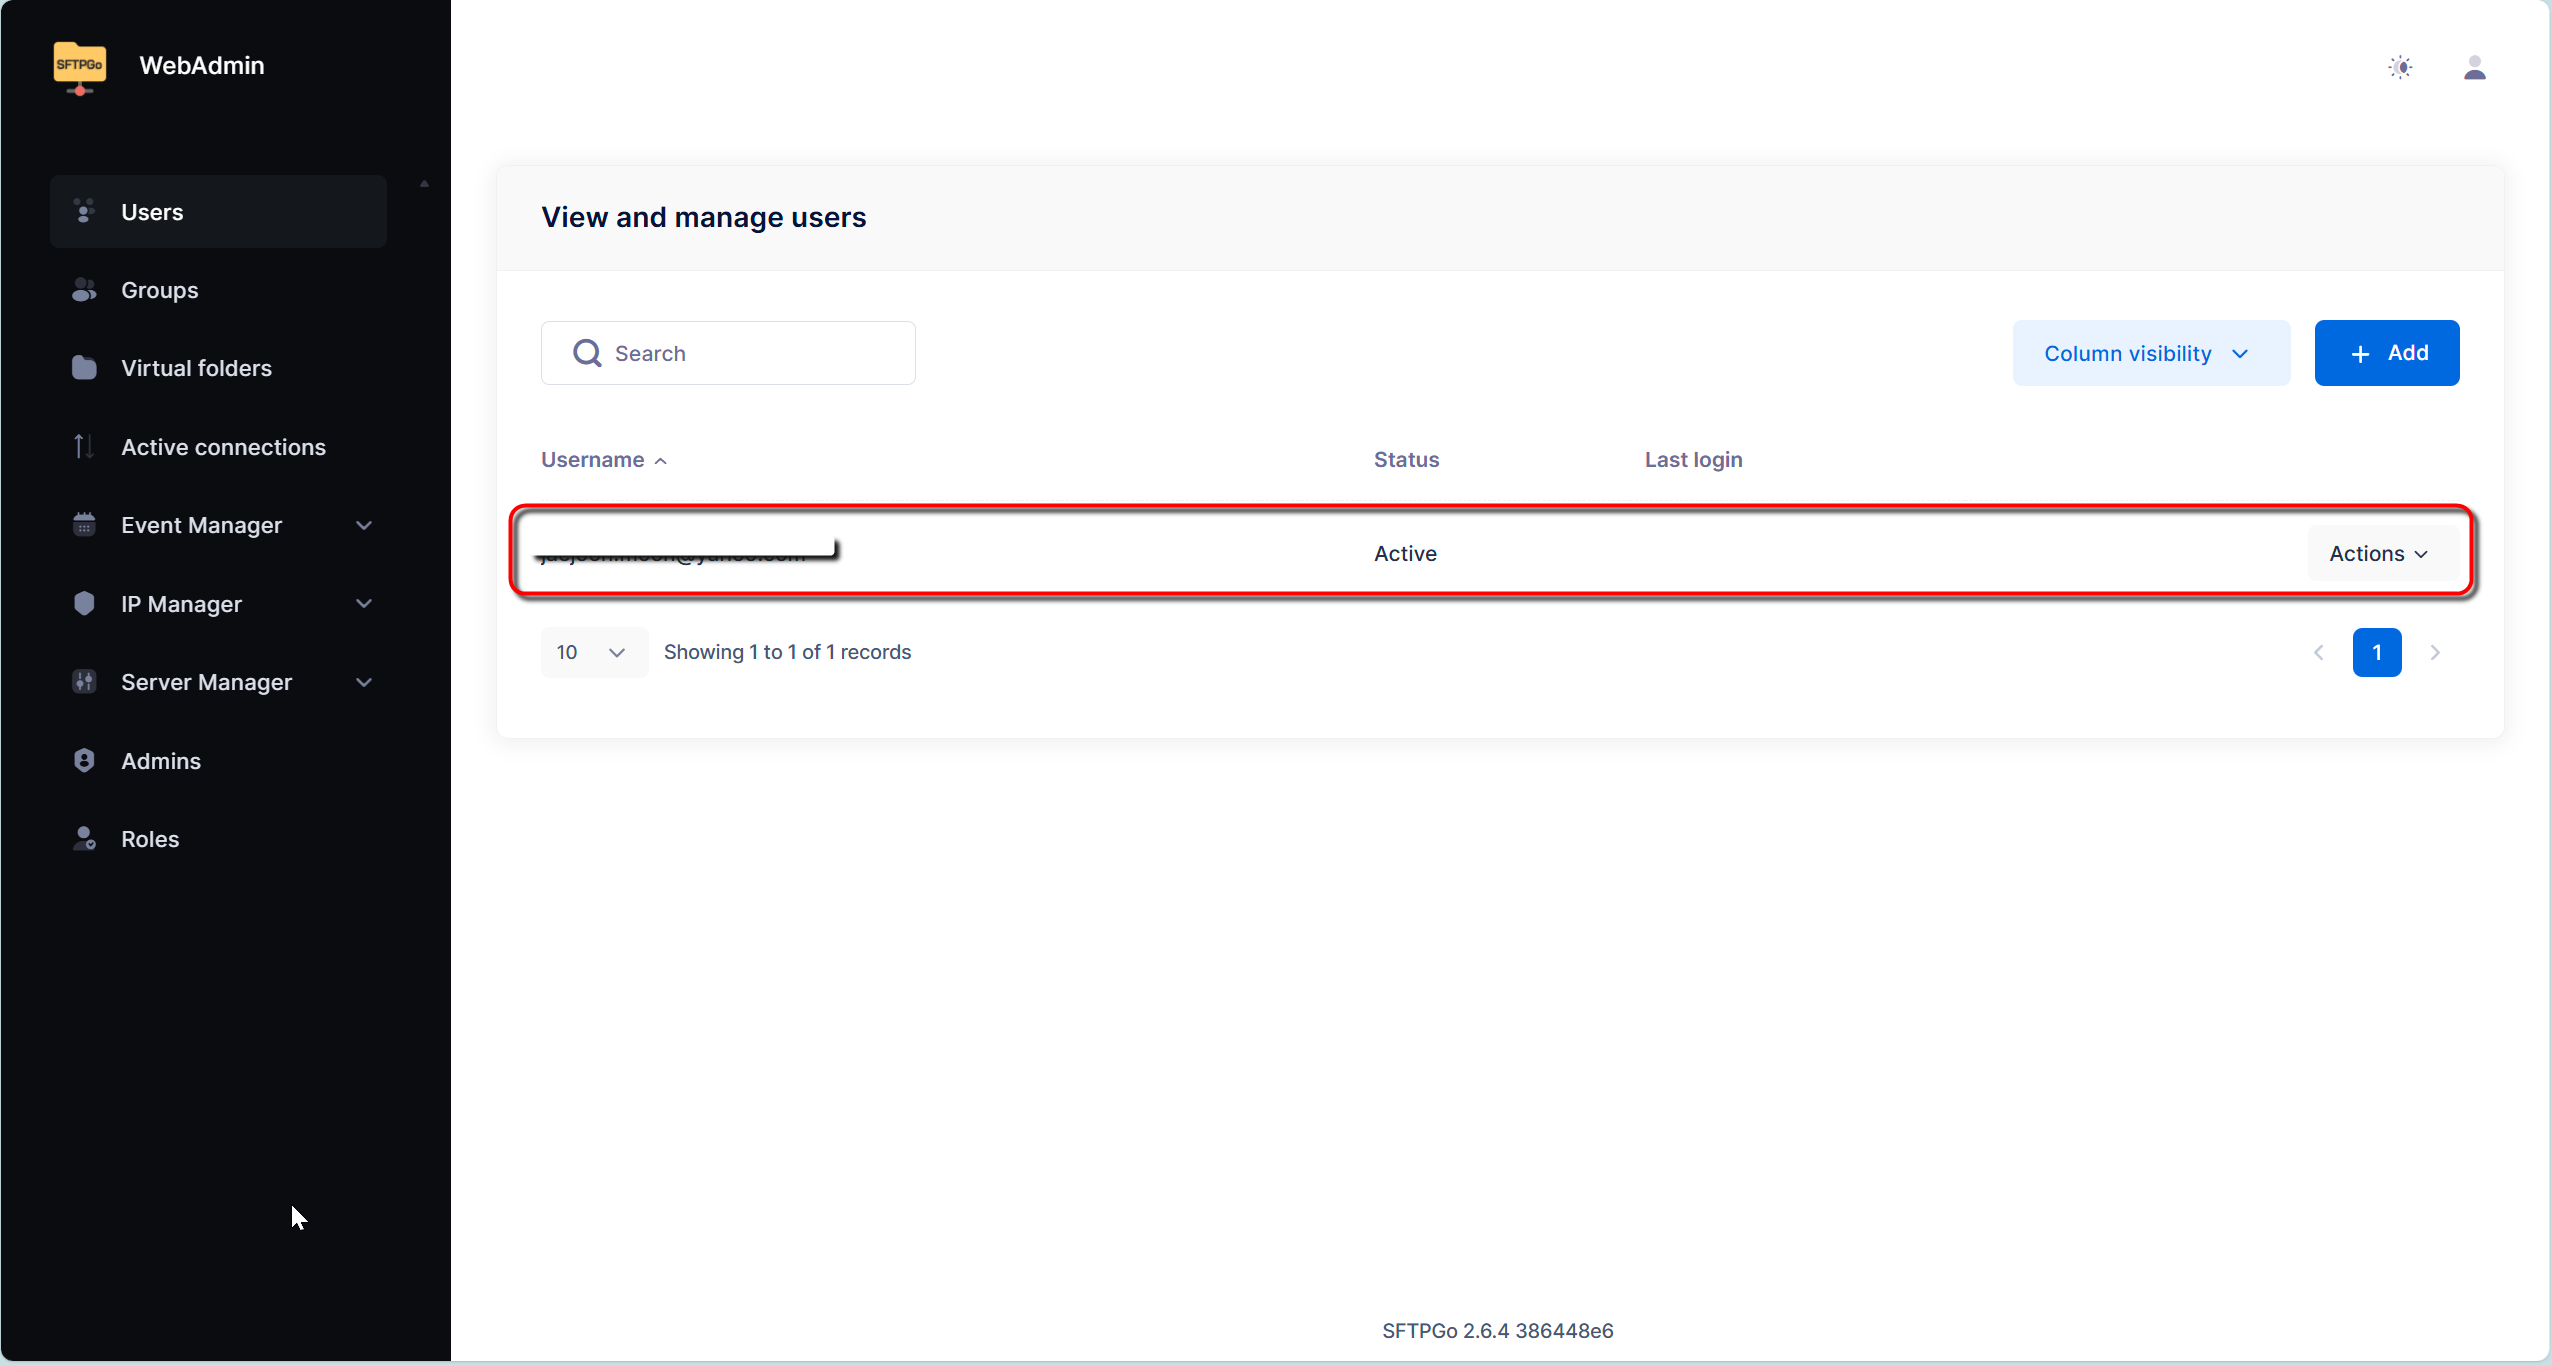
Adding an Object Storage Connection User
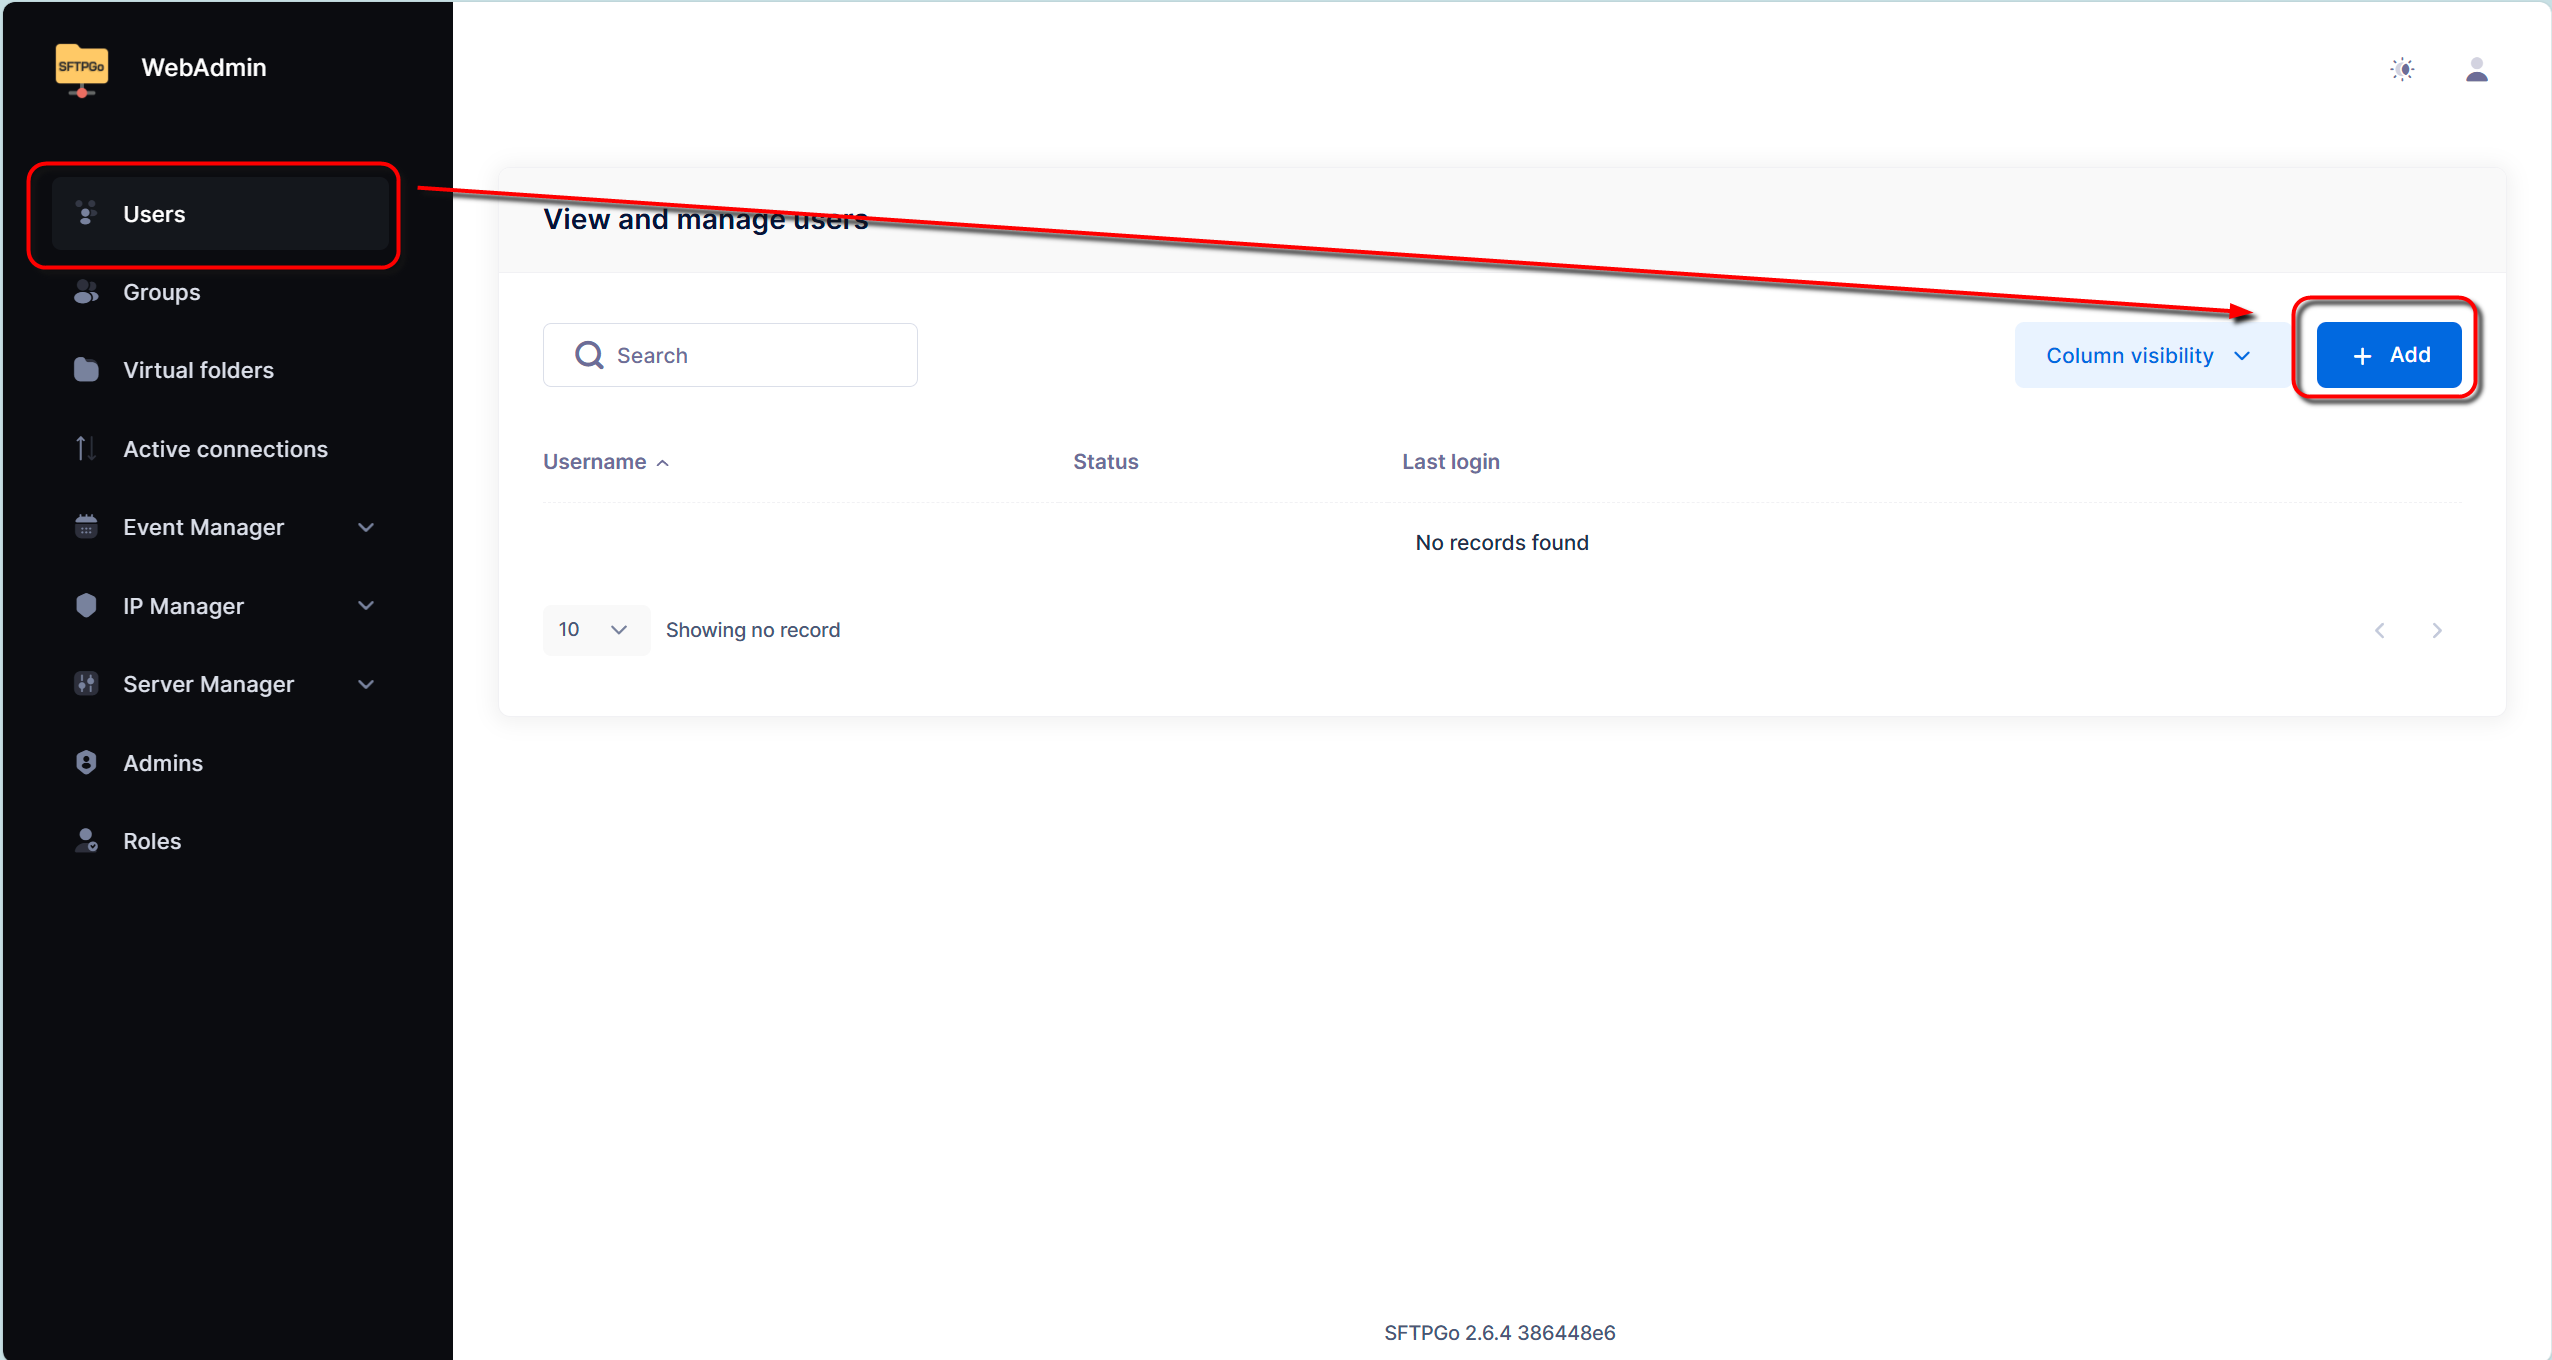
Once you’re logged in as administrator, let’s create a user to connect with Object Storage:
- Select “Users” from the left menu
- Click the Plus(+) button in the top right corner
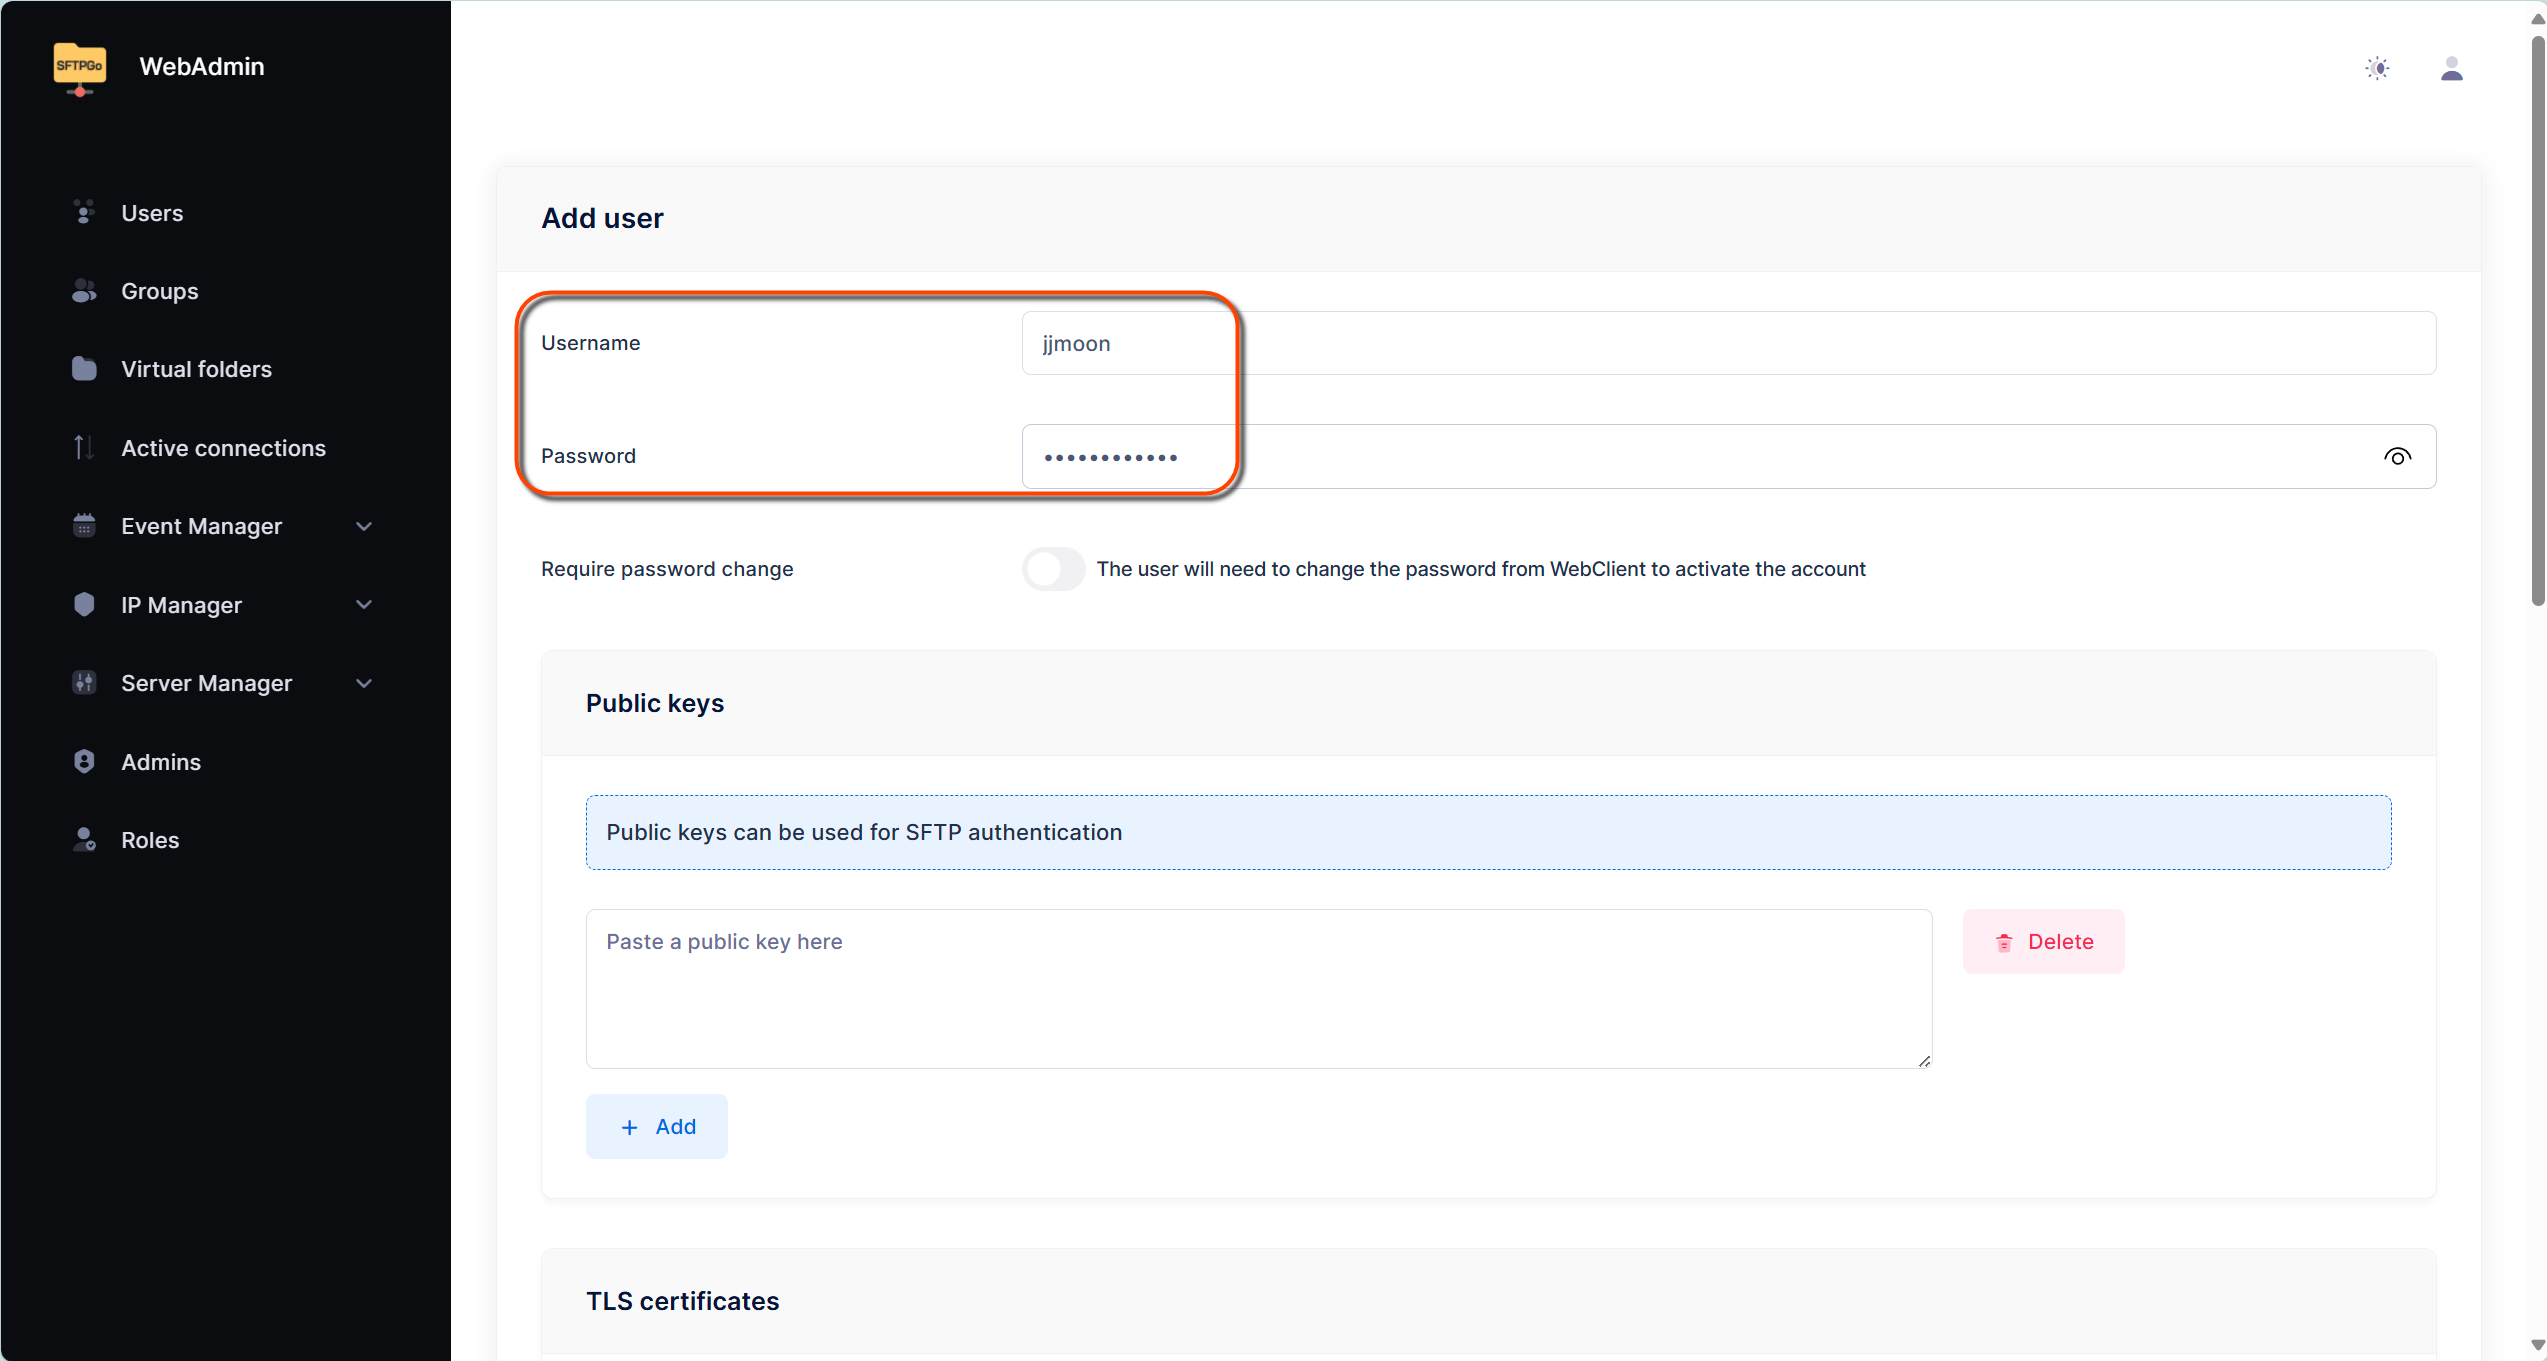
Basic Information Setup:
- Username: Choose your preferred username
- Password: Set a secure password
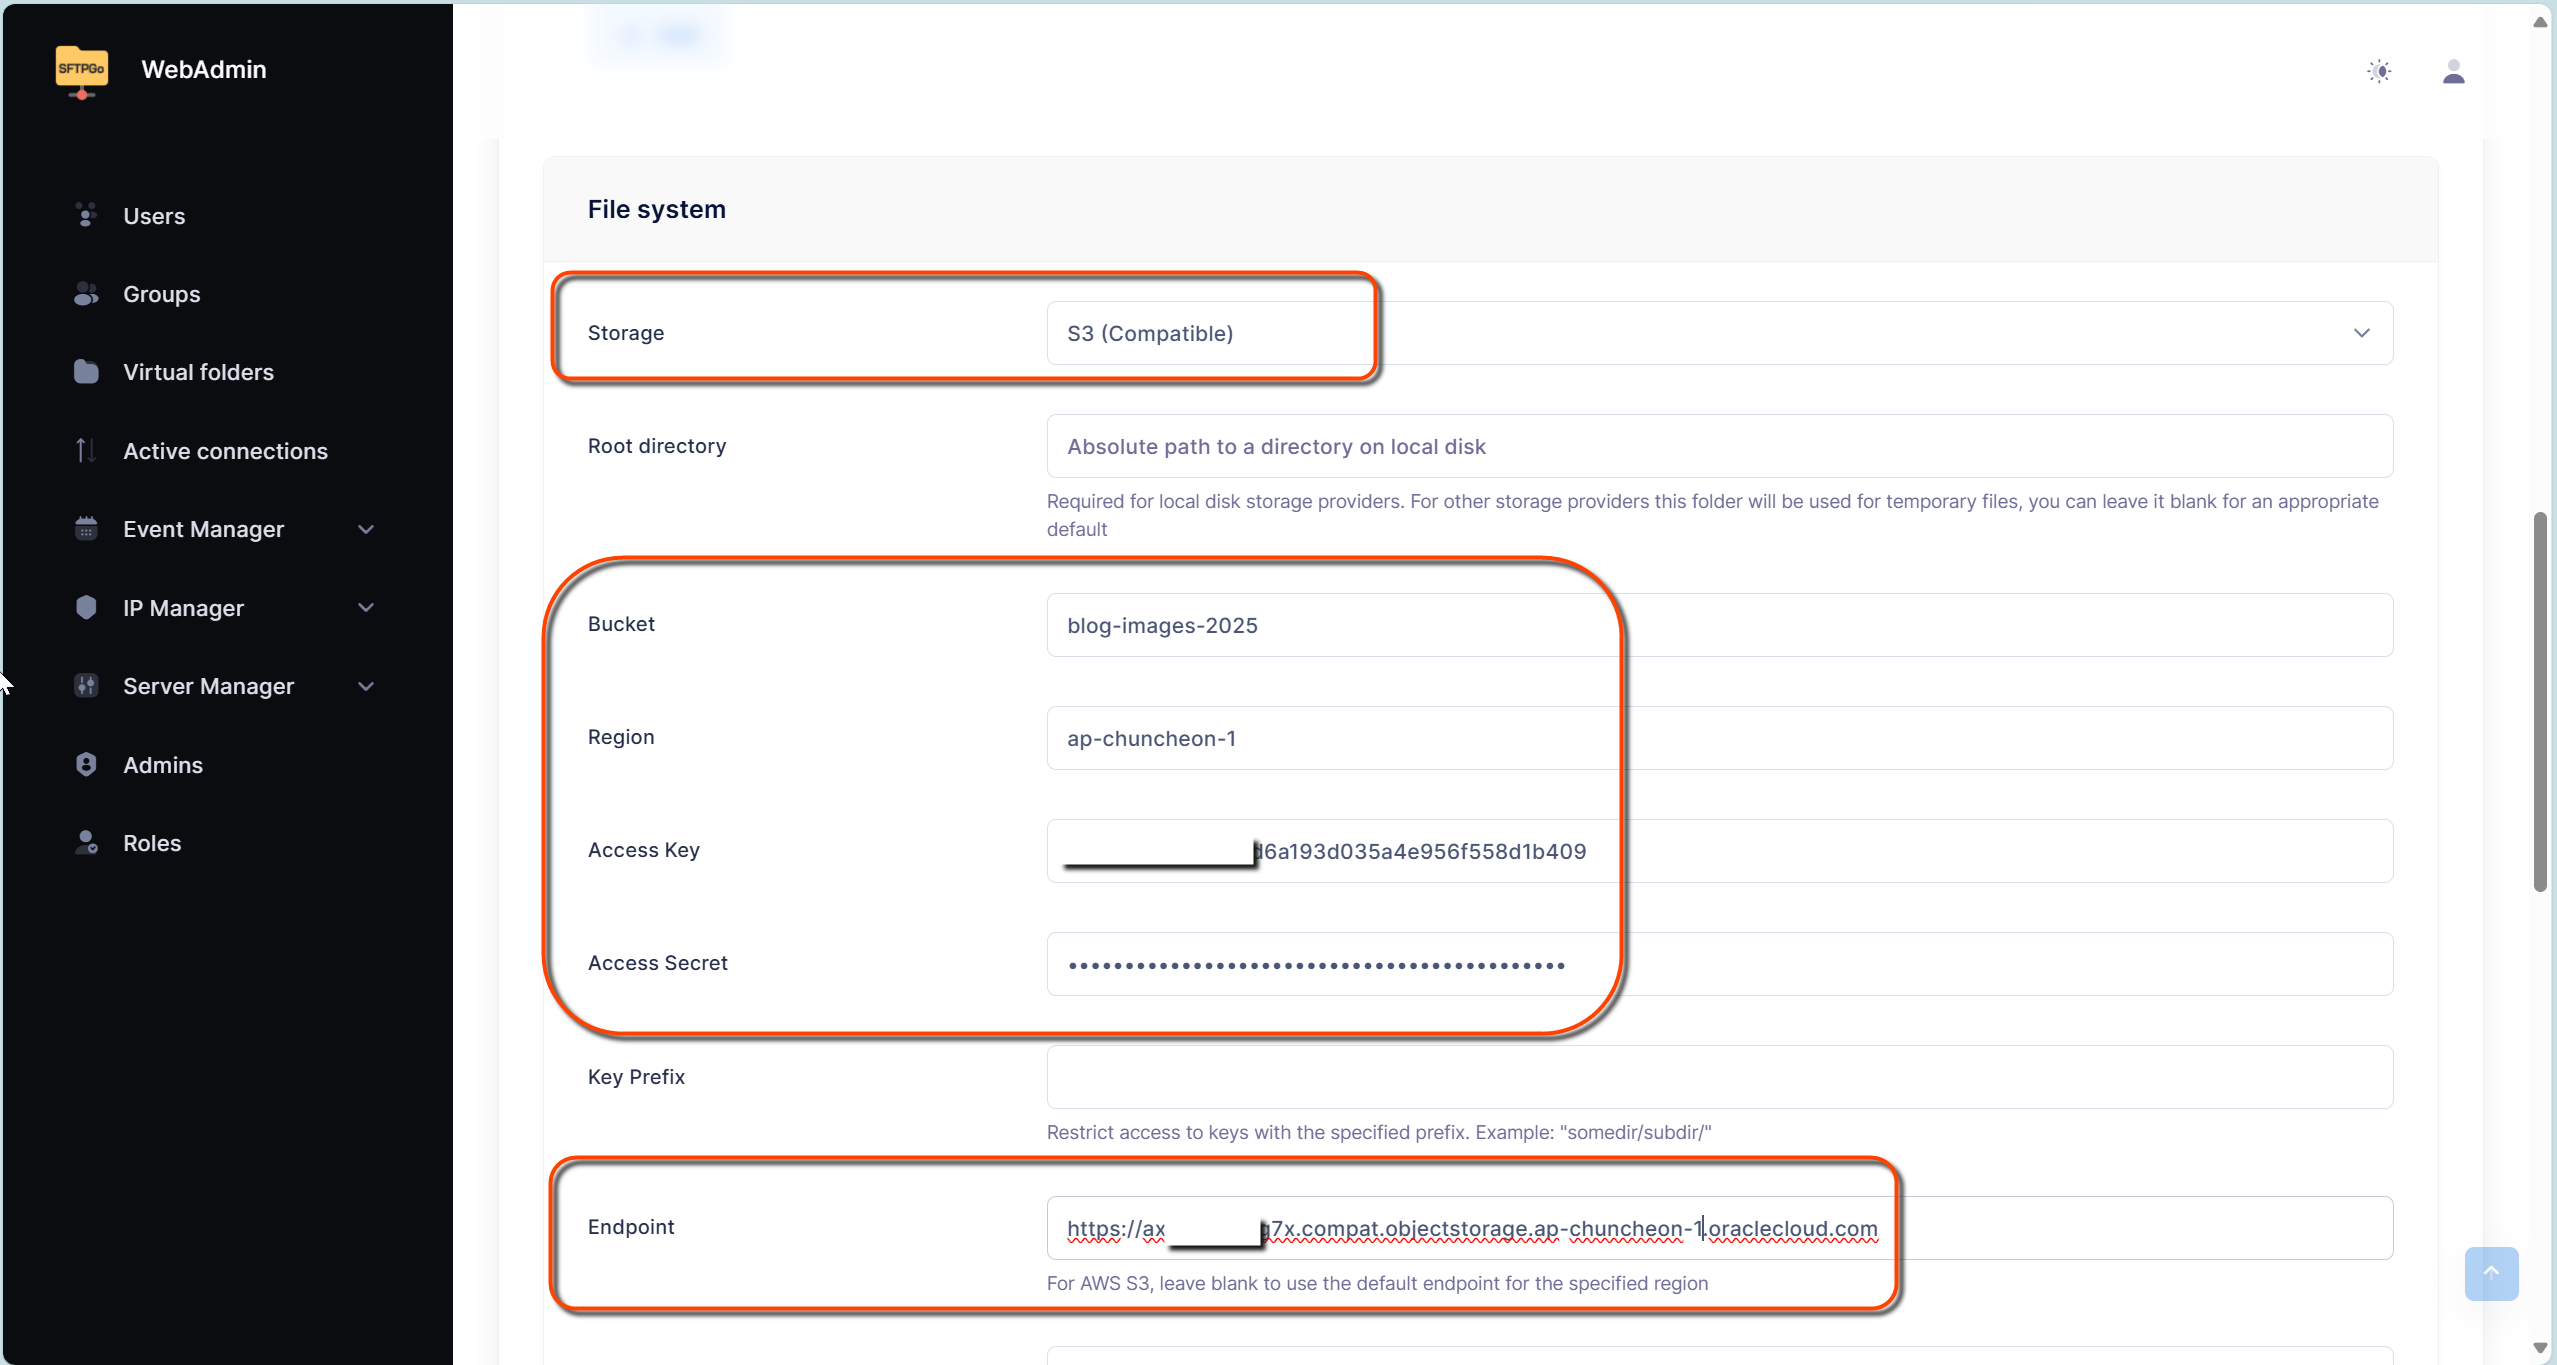
Storage Configuration (Critical Step):
- Select “S3 Compatible” from the Storage options
- Leave the Root directory empty
- Enter your configuration details:
- Bucket: Enter your previously created bucket name
- Region: Your OCI region (e.g., ap-seoul-1)
- Access Key: The Access Key you noted earlier
- Secret Key: The Secret Key you saved
- Endpoint: Use this exact format:
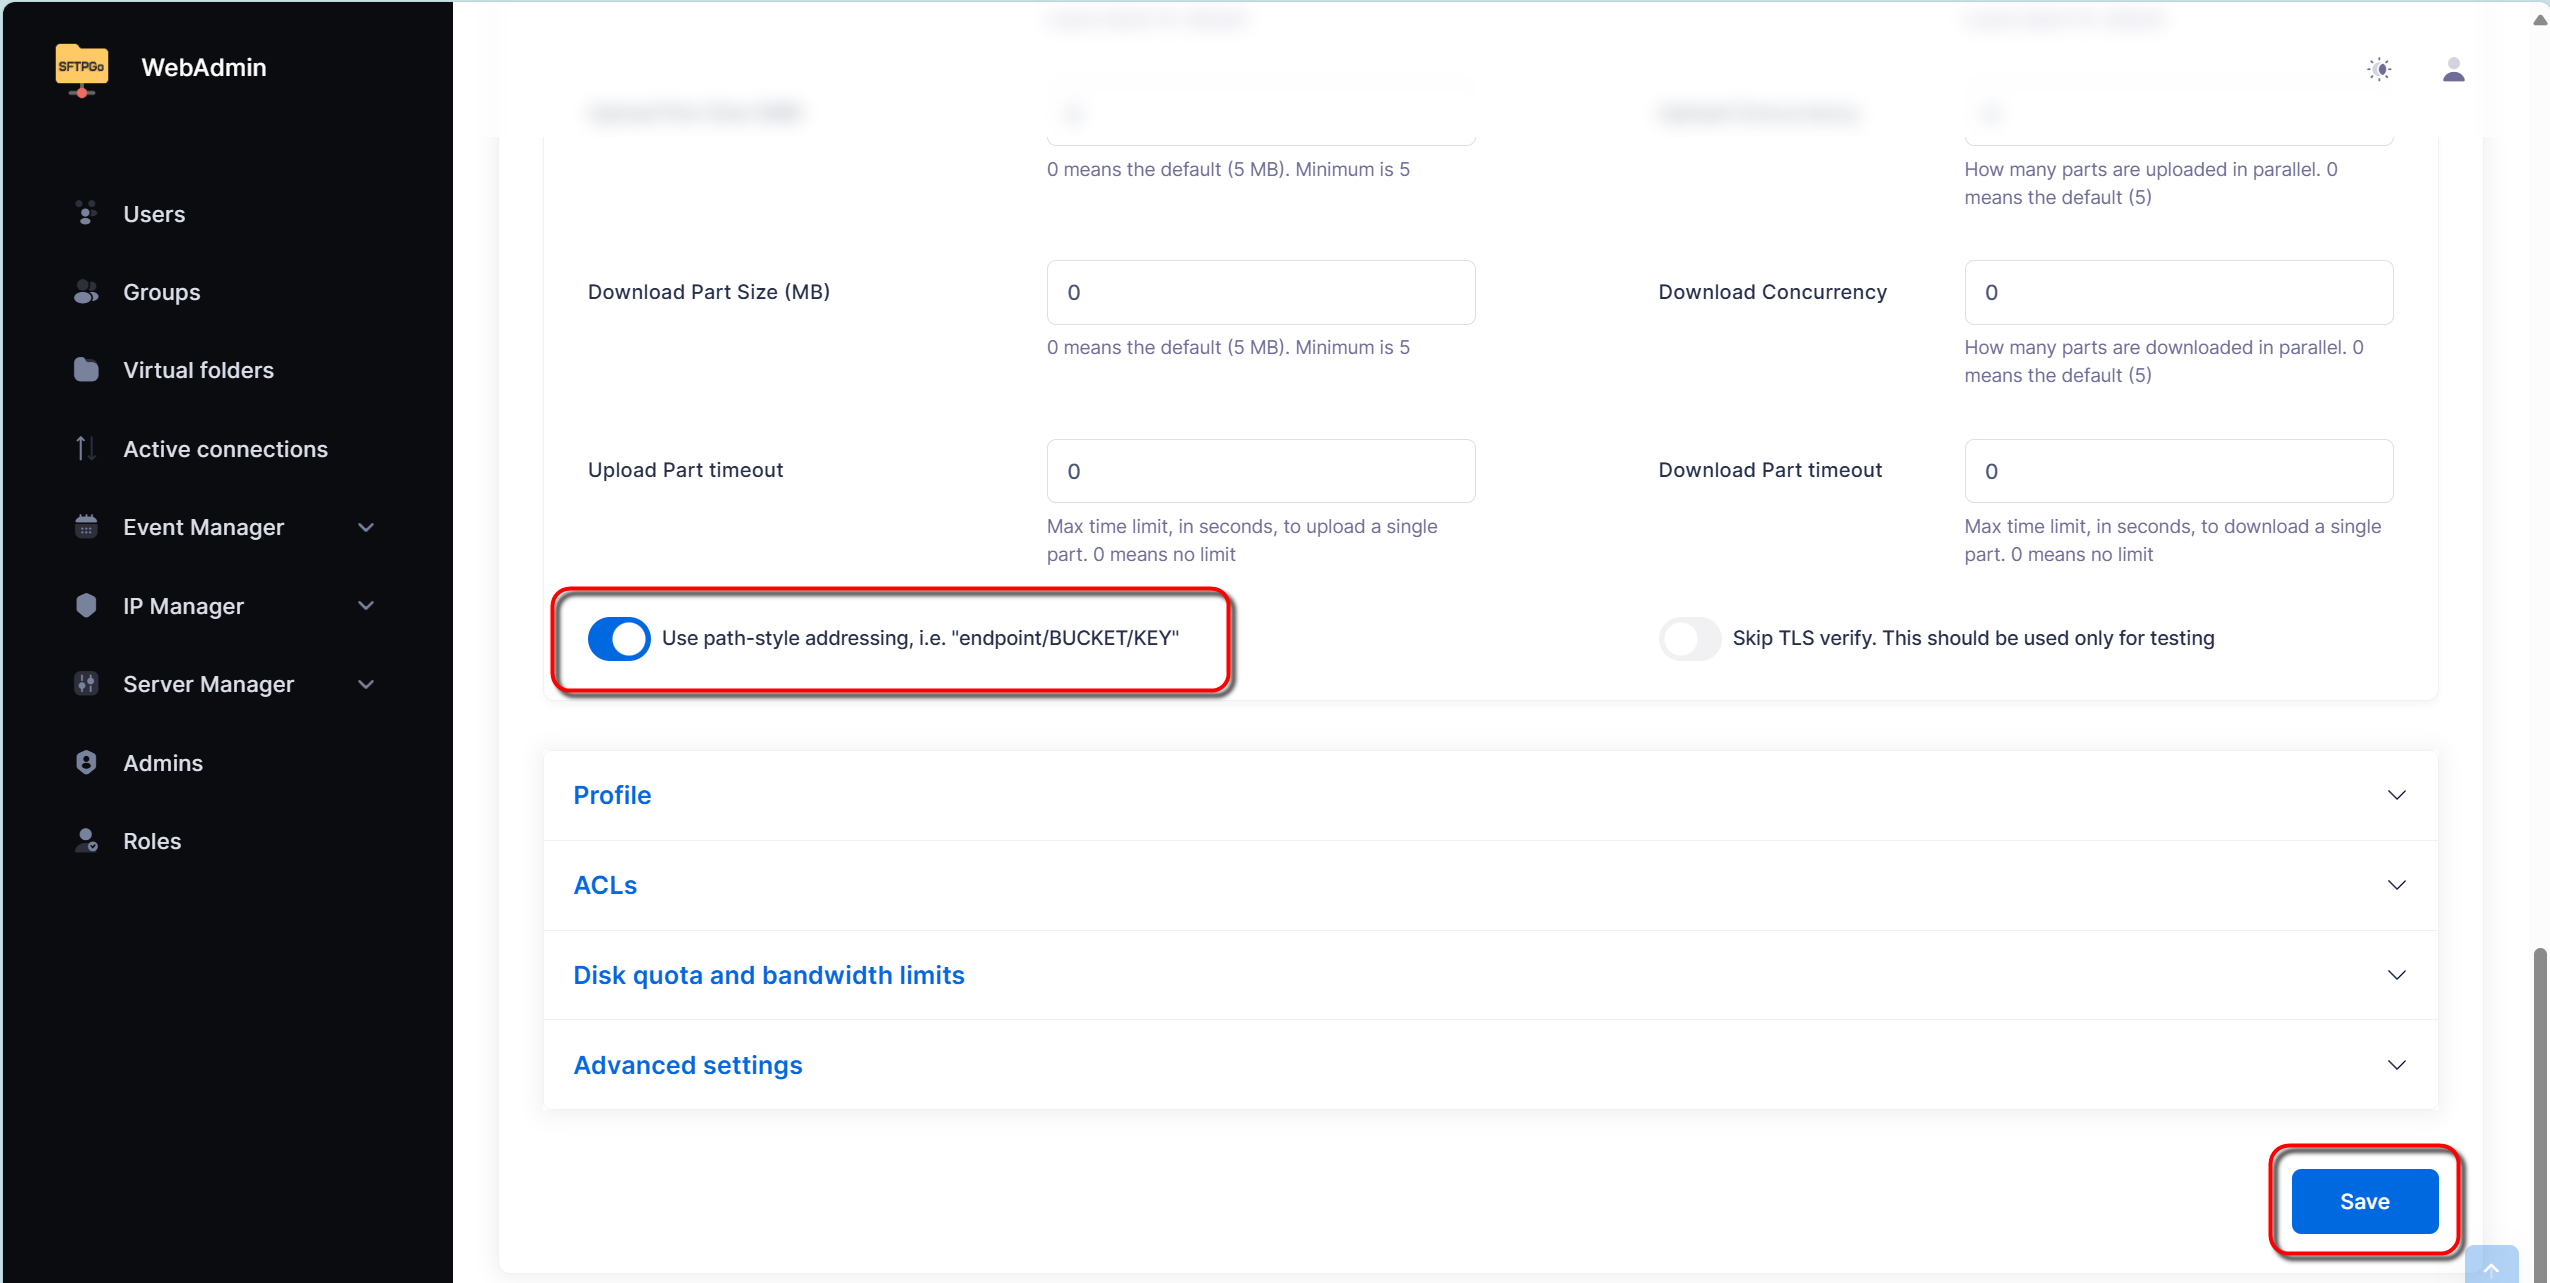
https://{namespace}.compat.objectstorage.{region}.oraclecloud.com 4. Enable the “Use path-style addressing” option at the bottom of the page
5. You can set a key_prefix to limit access to specific folders (optional – leave empty for now)
6. Click the ‘Save’ button to complete the setup
Practical Usage Guide
Now that everything’s set up, let’s put it to use!
Connecting with SFTPGo Client
Let’s verify your setup:
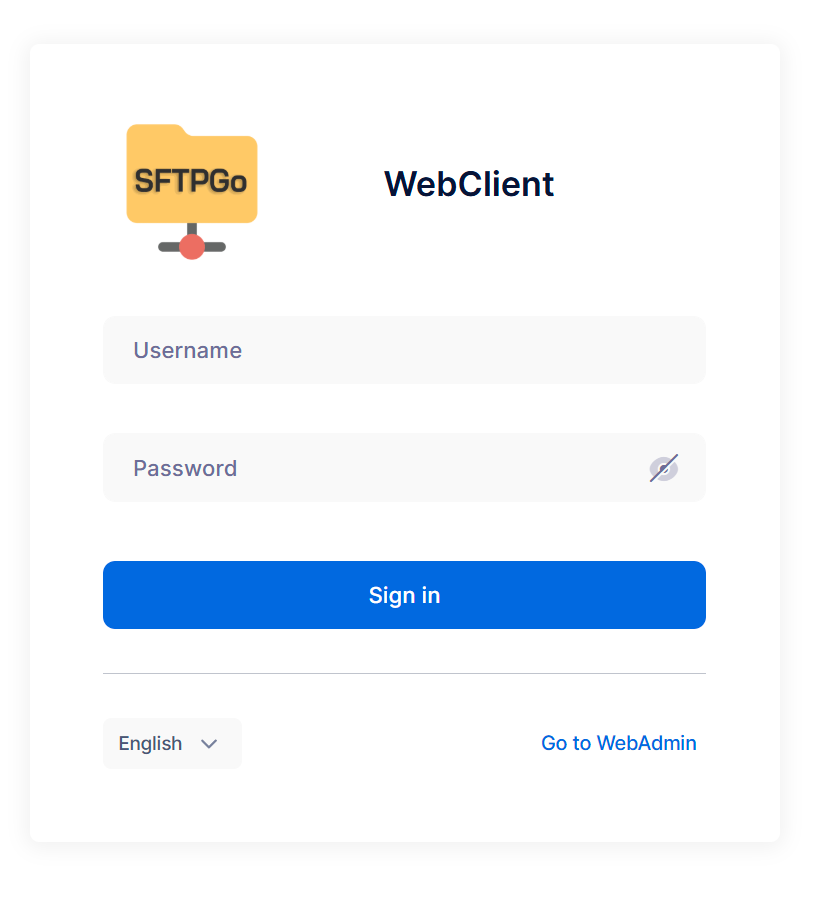
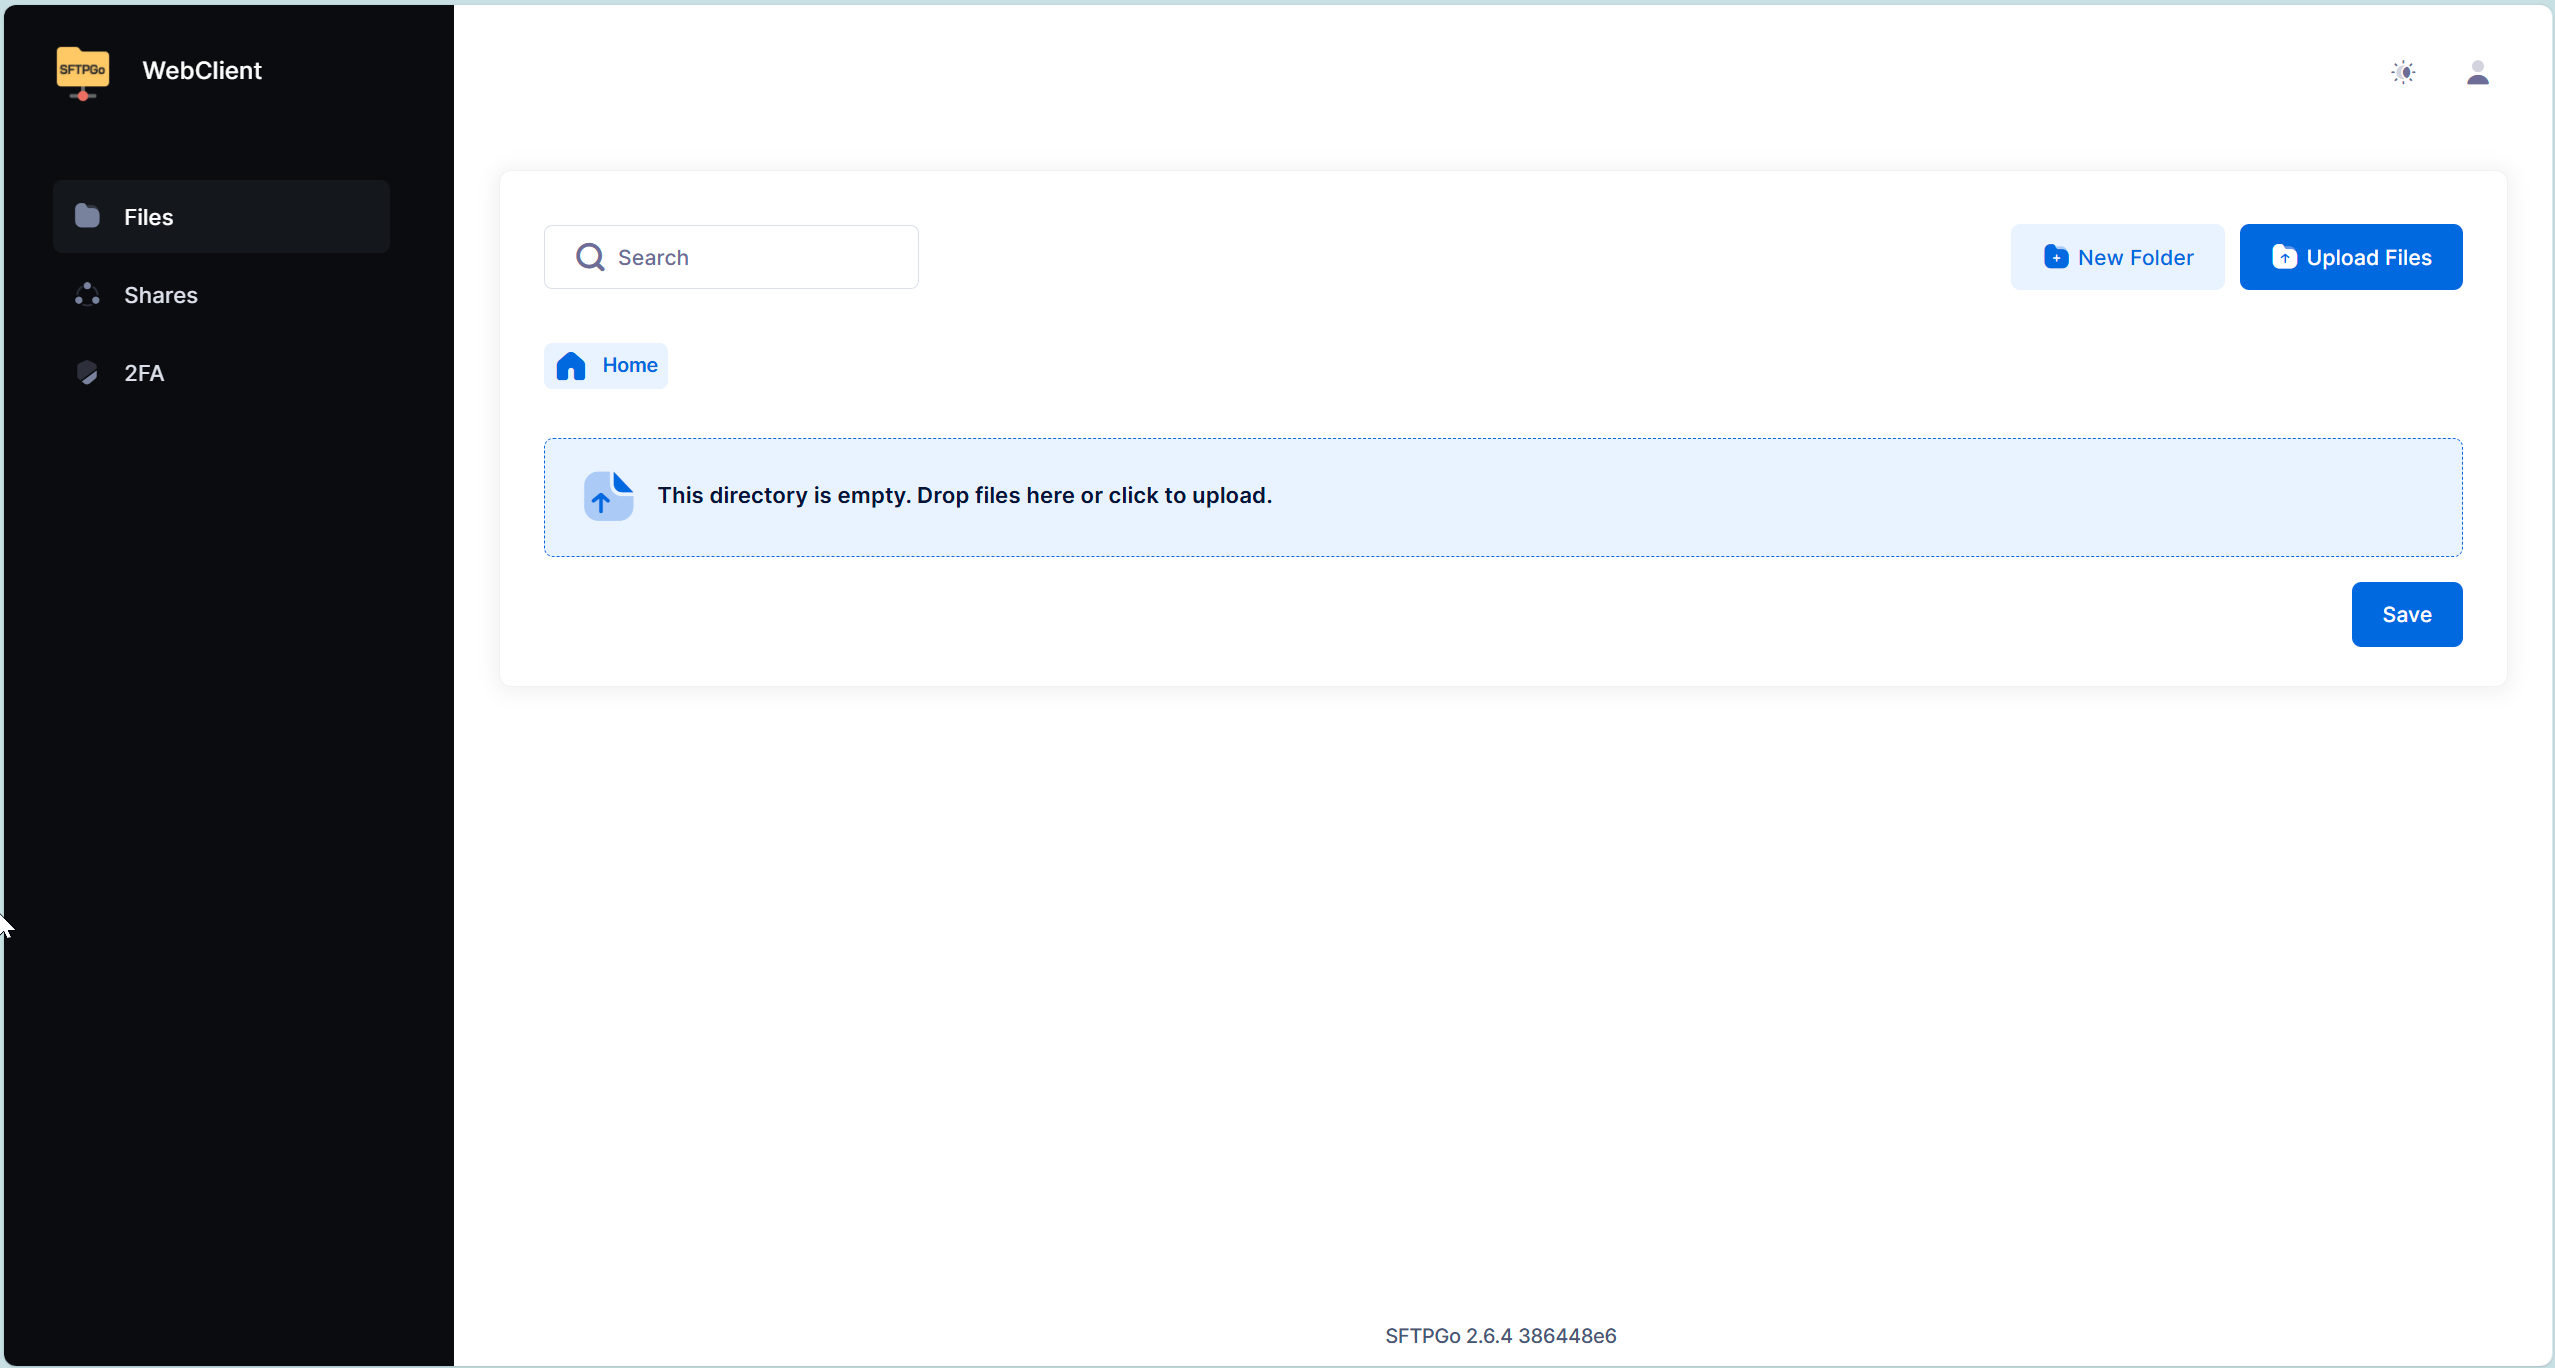
- Open http://localhost:8080/web/client in your web browser
- Log in with your newly created credentials:
- Username: Your configured username
- Password: Your configured password
3. Verify that you can see your bucket contents
Managing Your Files
Folder Management:
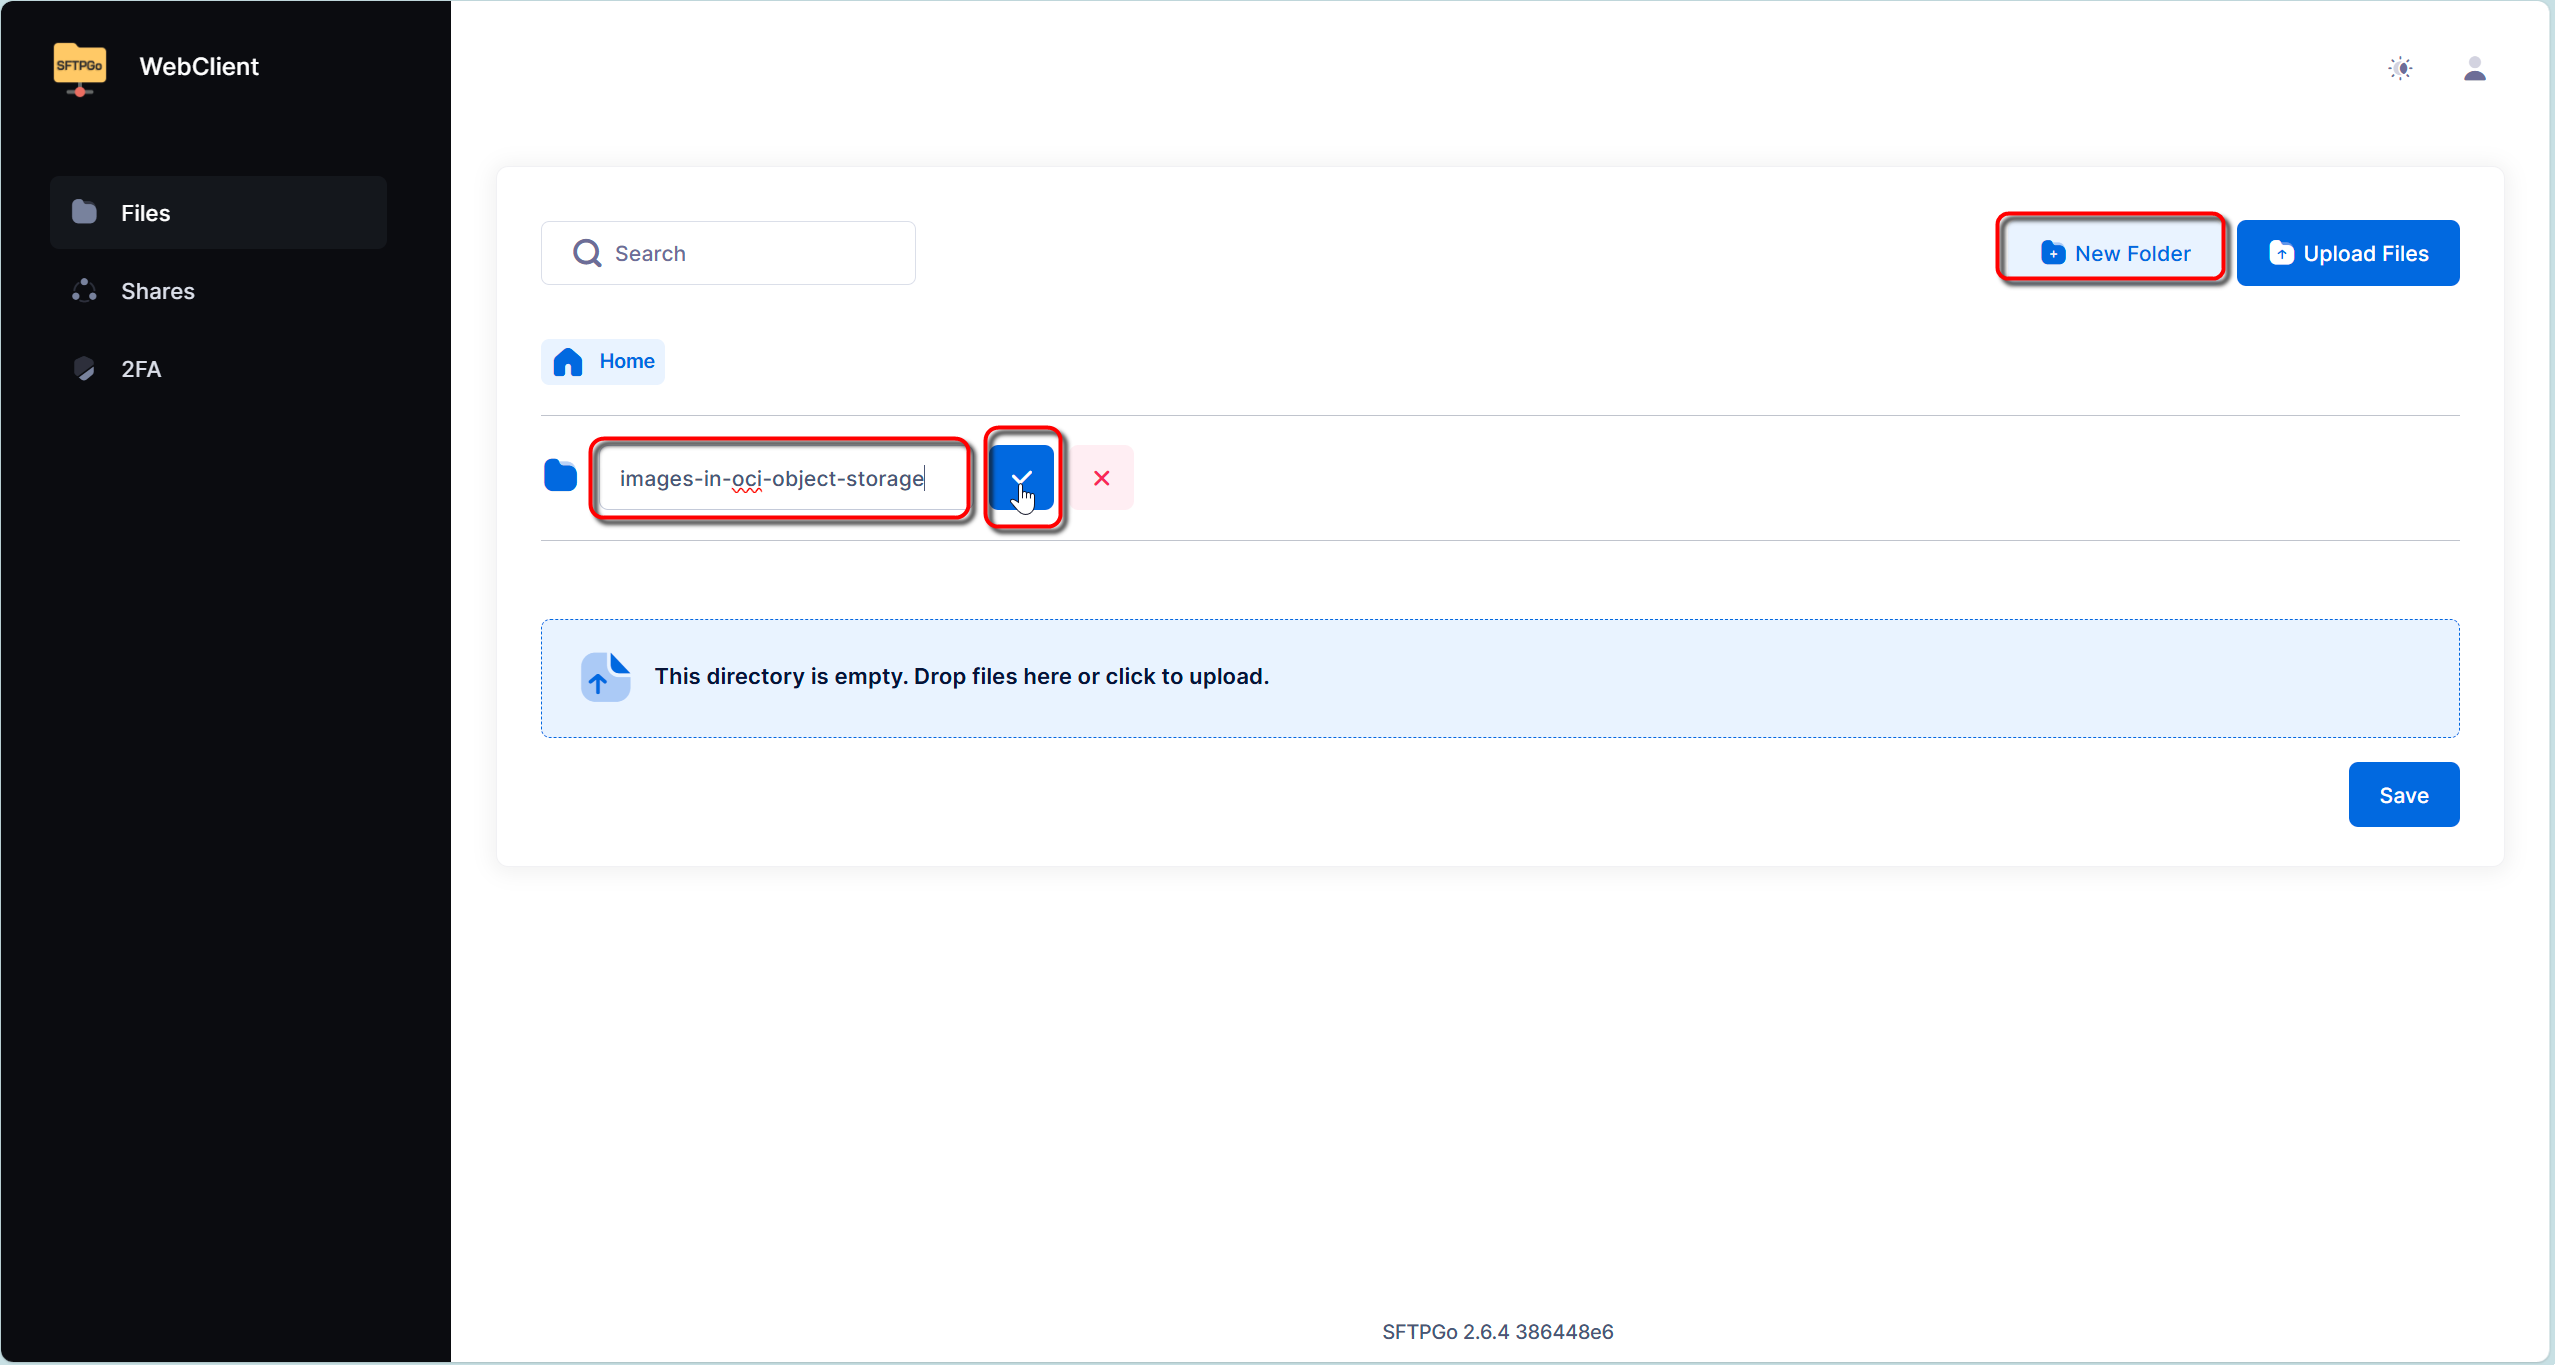
- Create new folders using the New Folder button
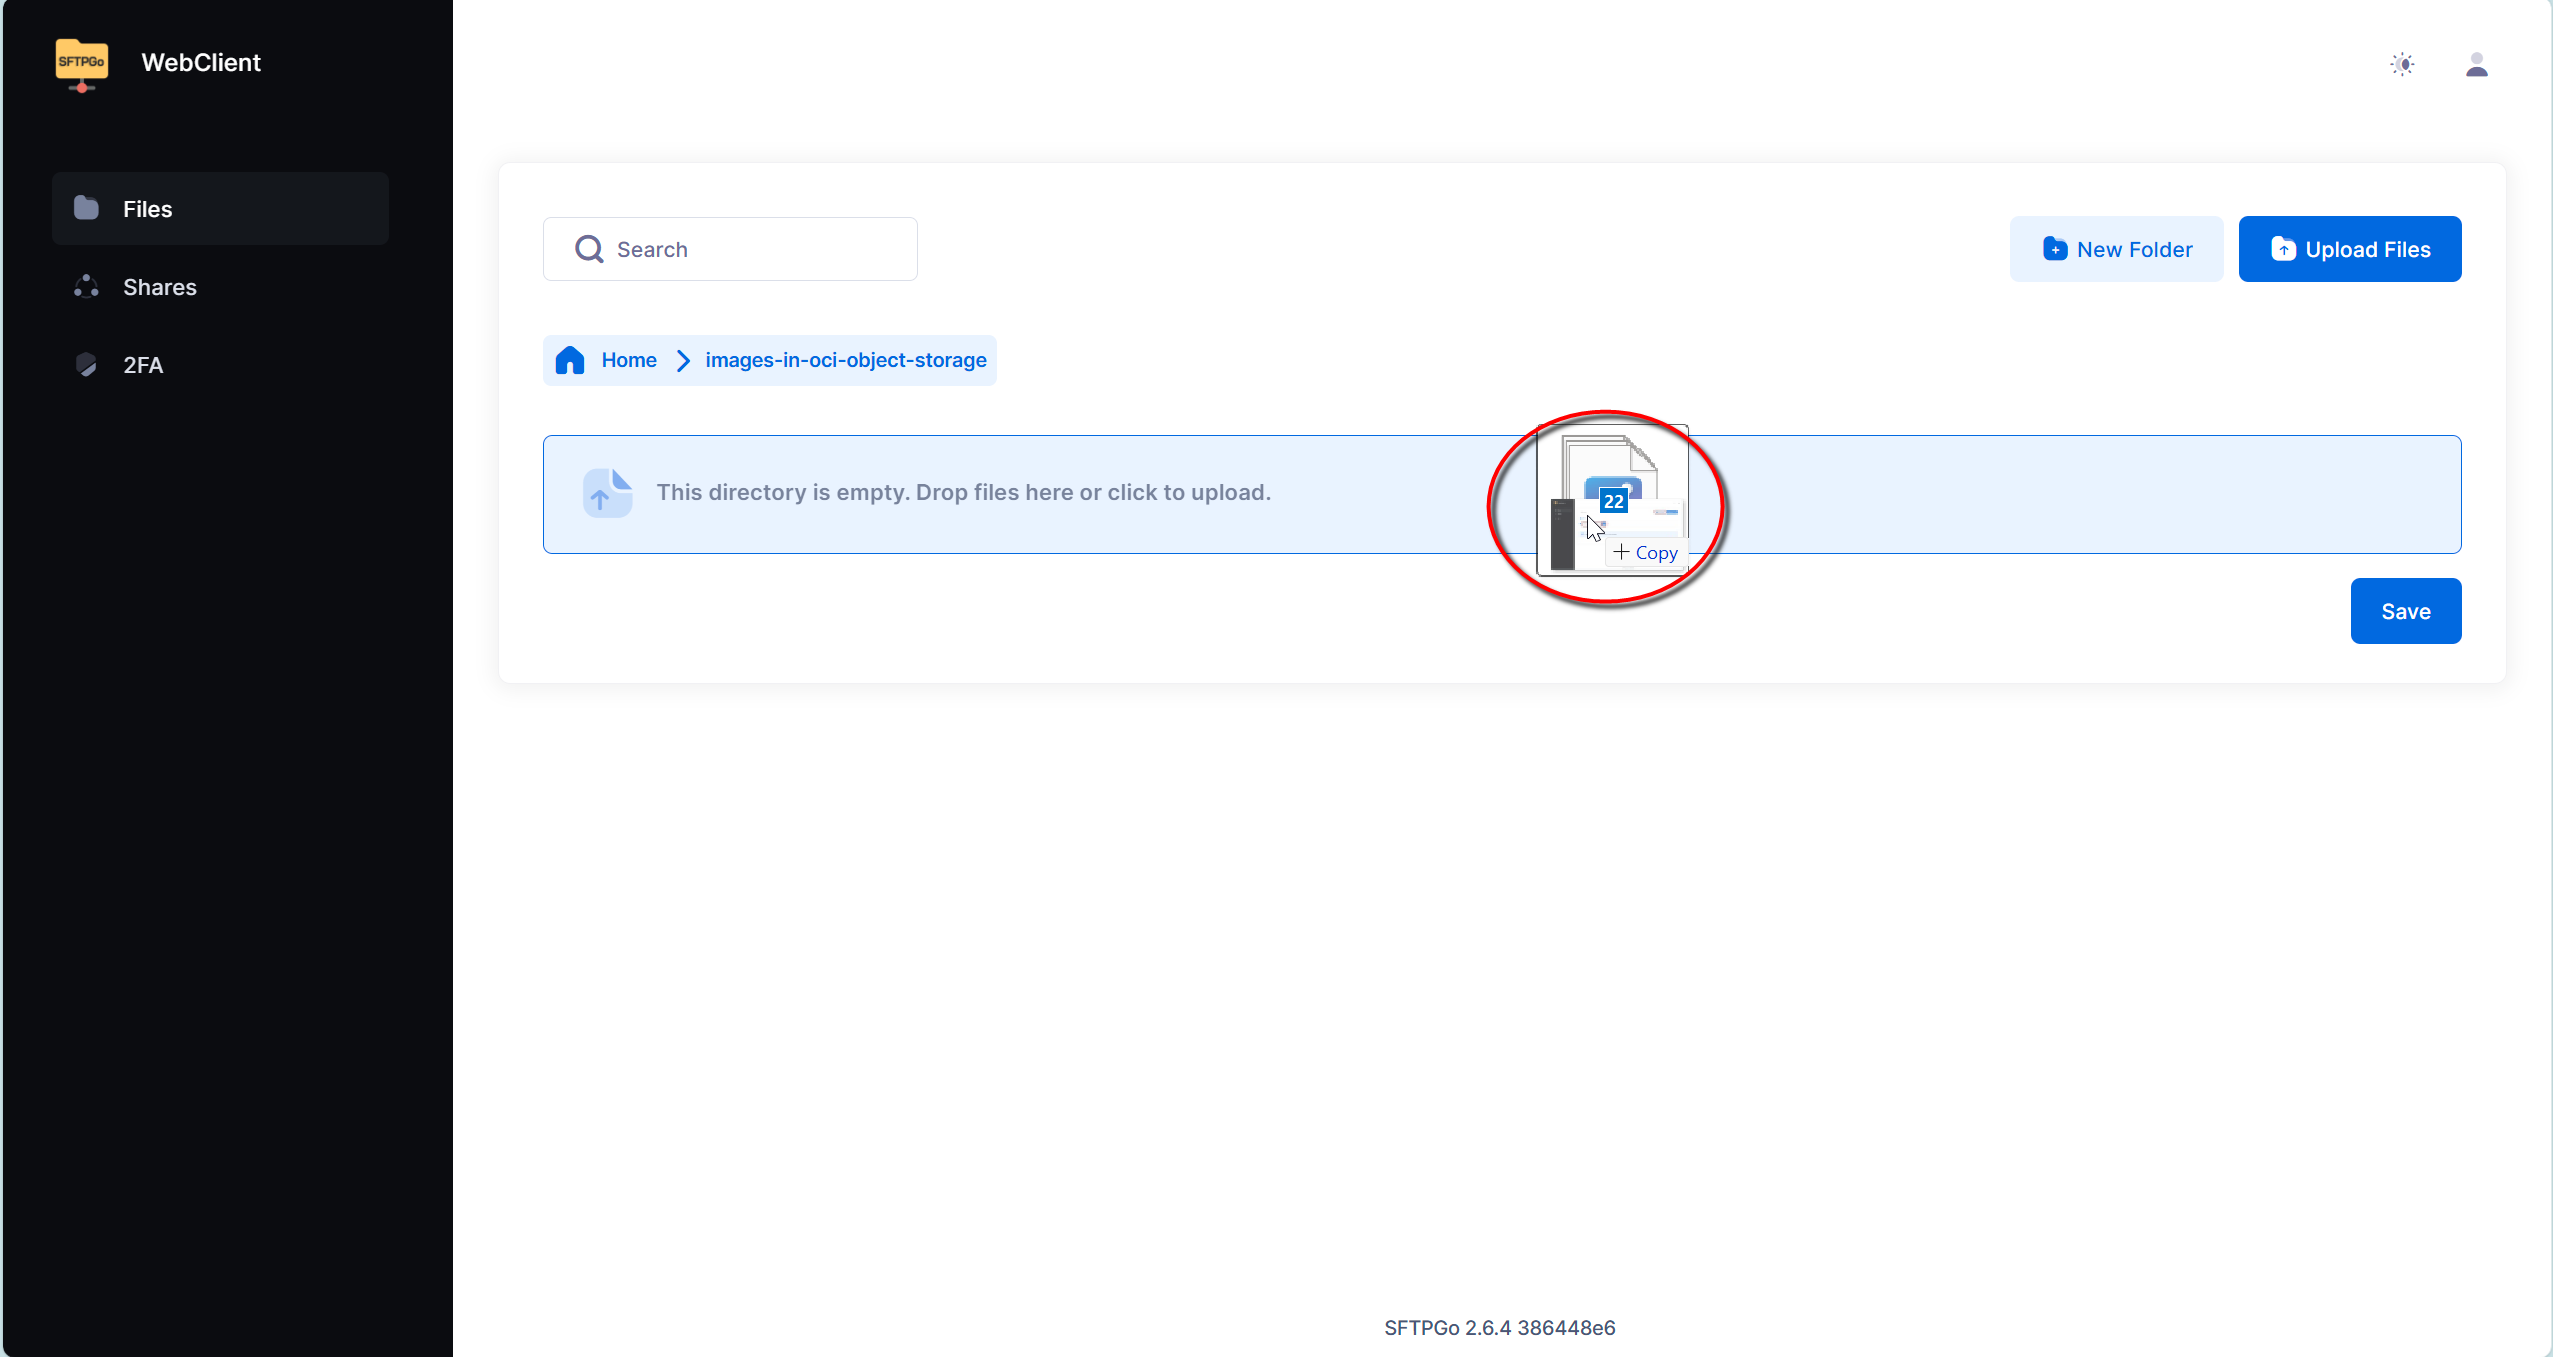
- Move files between folders with simple drag and drop
File Upload Process:
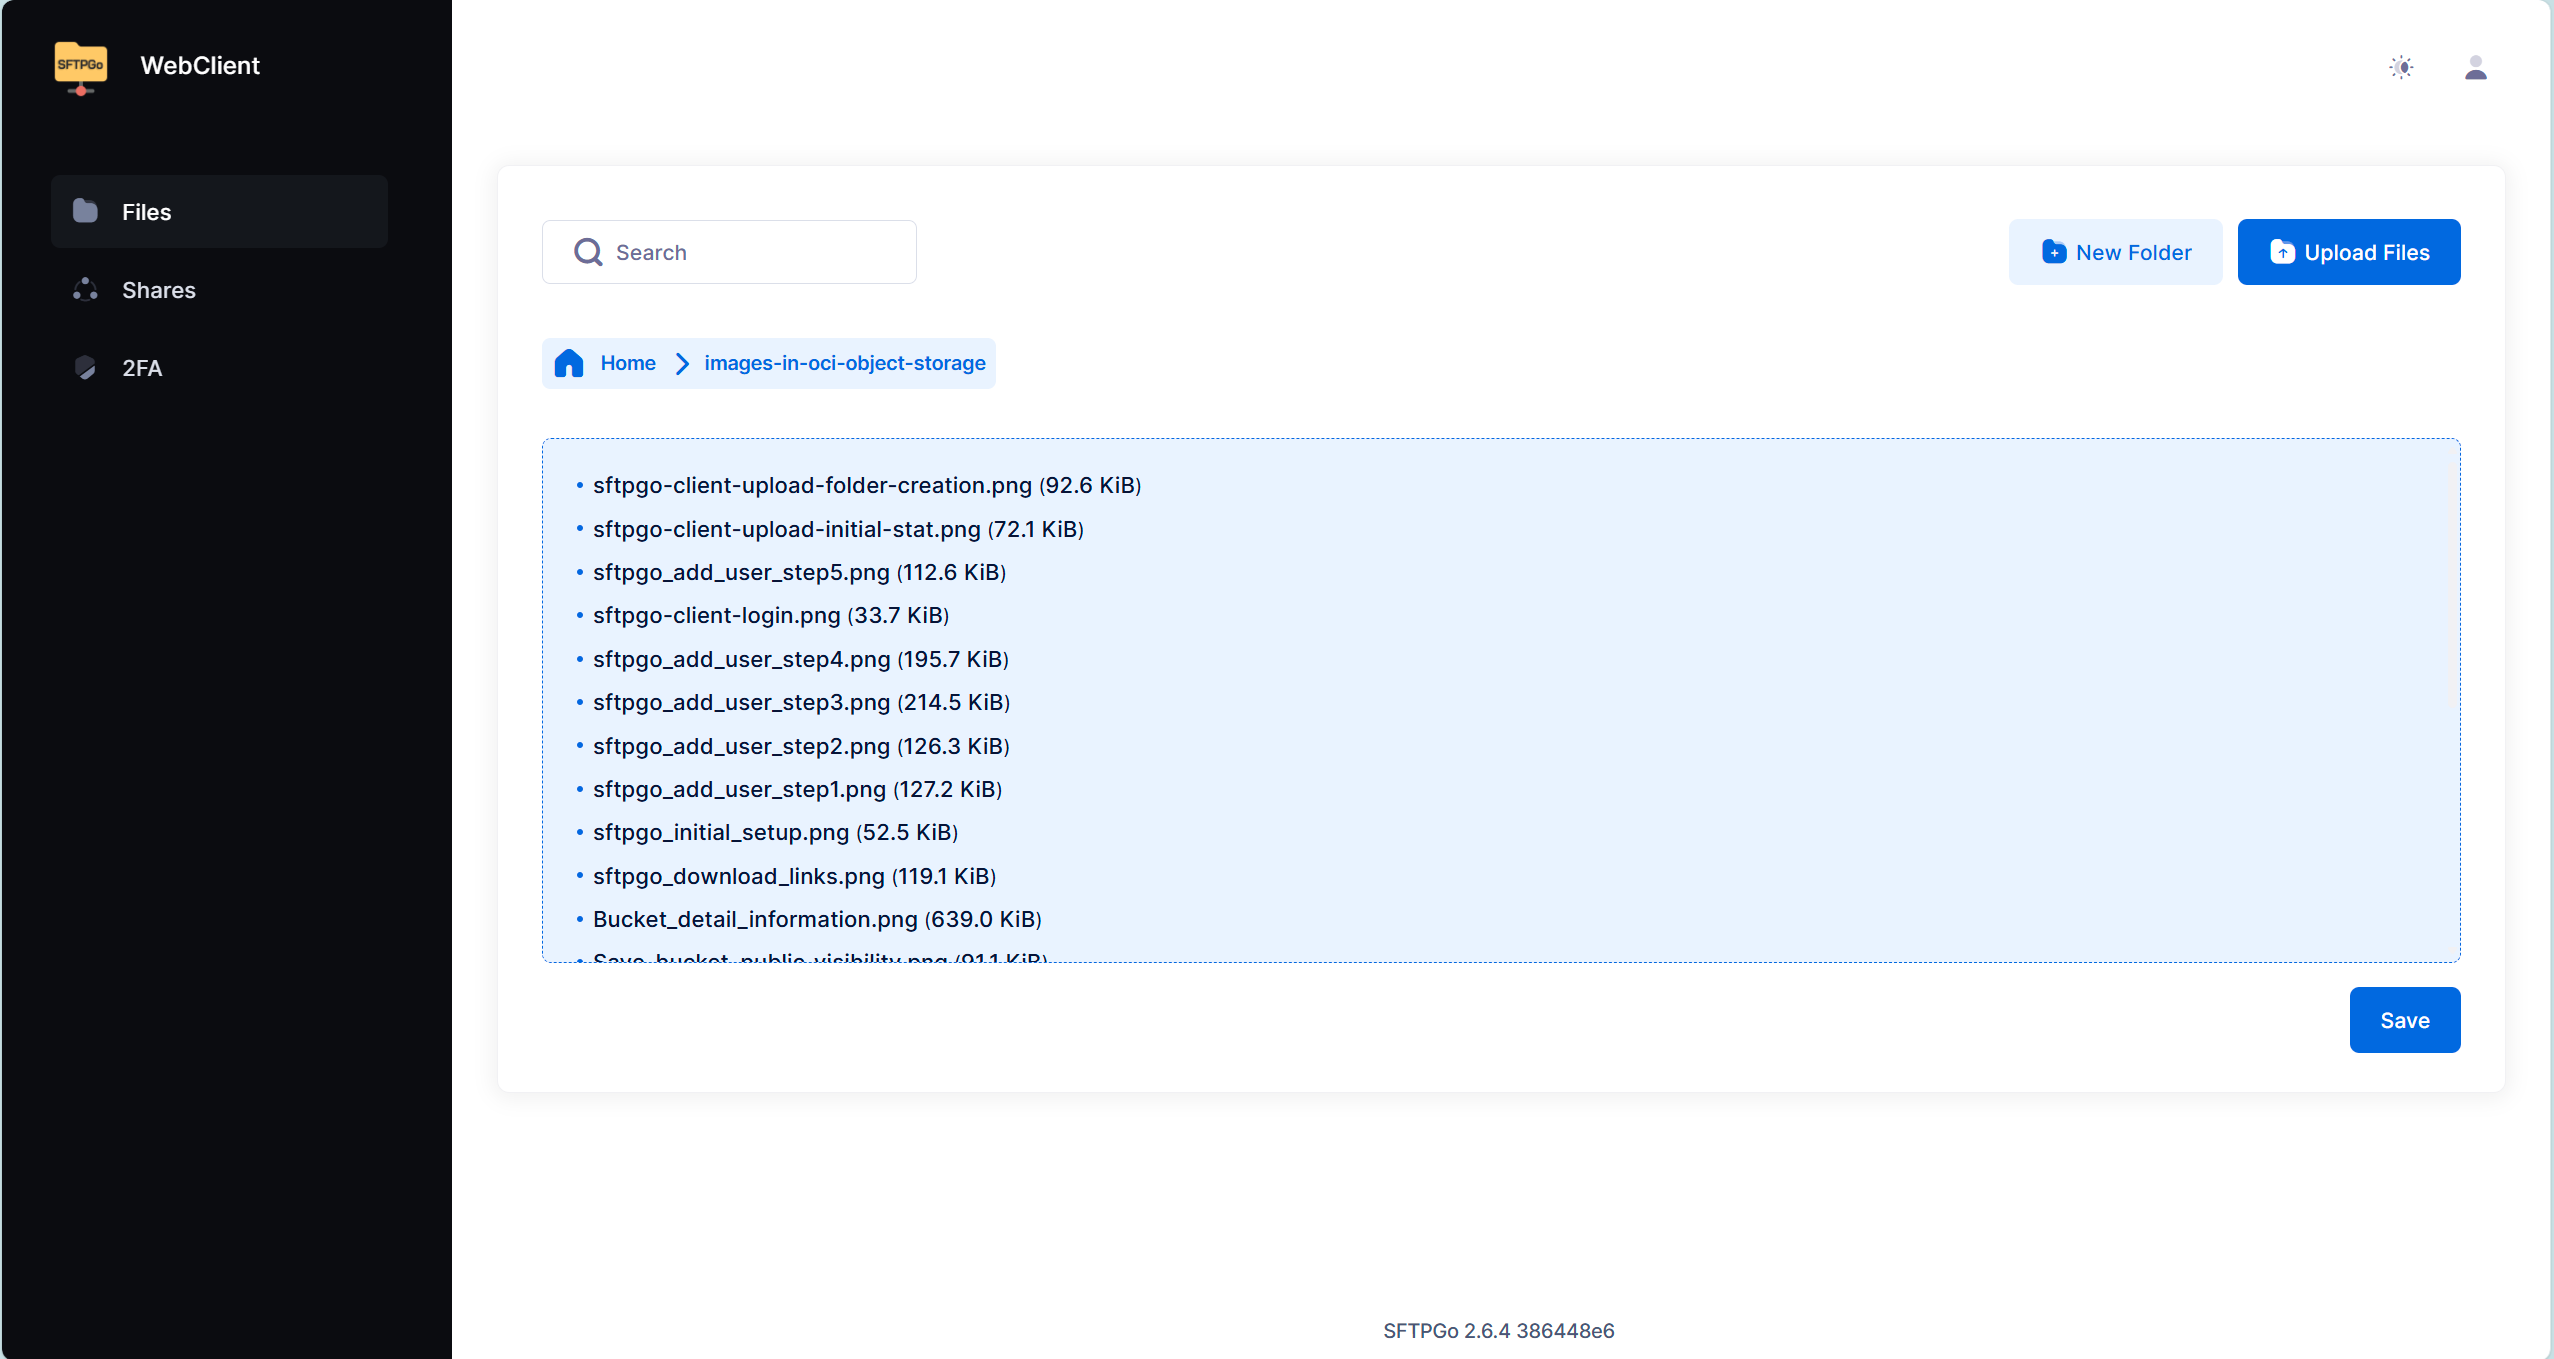
- Select files from the local folder in the left panel
- Drag them to the Object Storage panel on the right
- Alternatively, use the Upload button
Using Your Uploaded Images
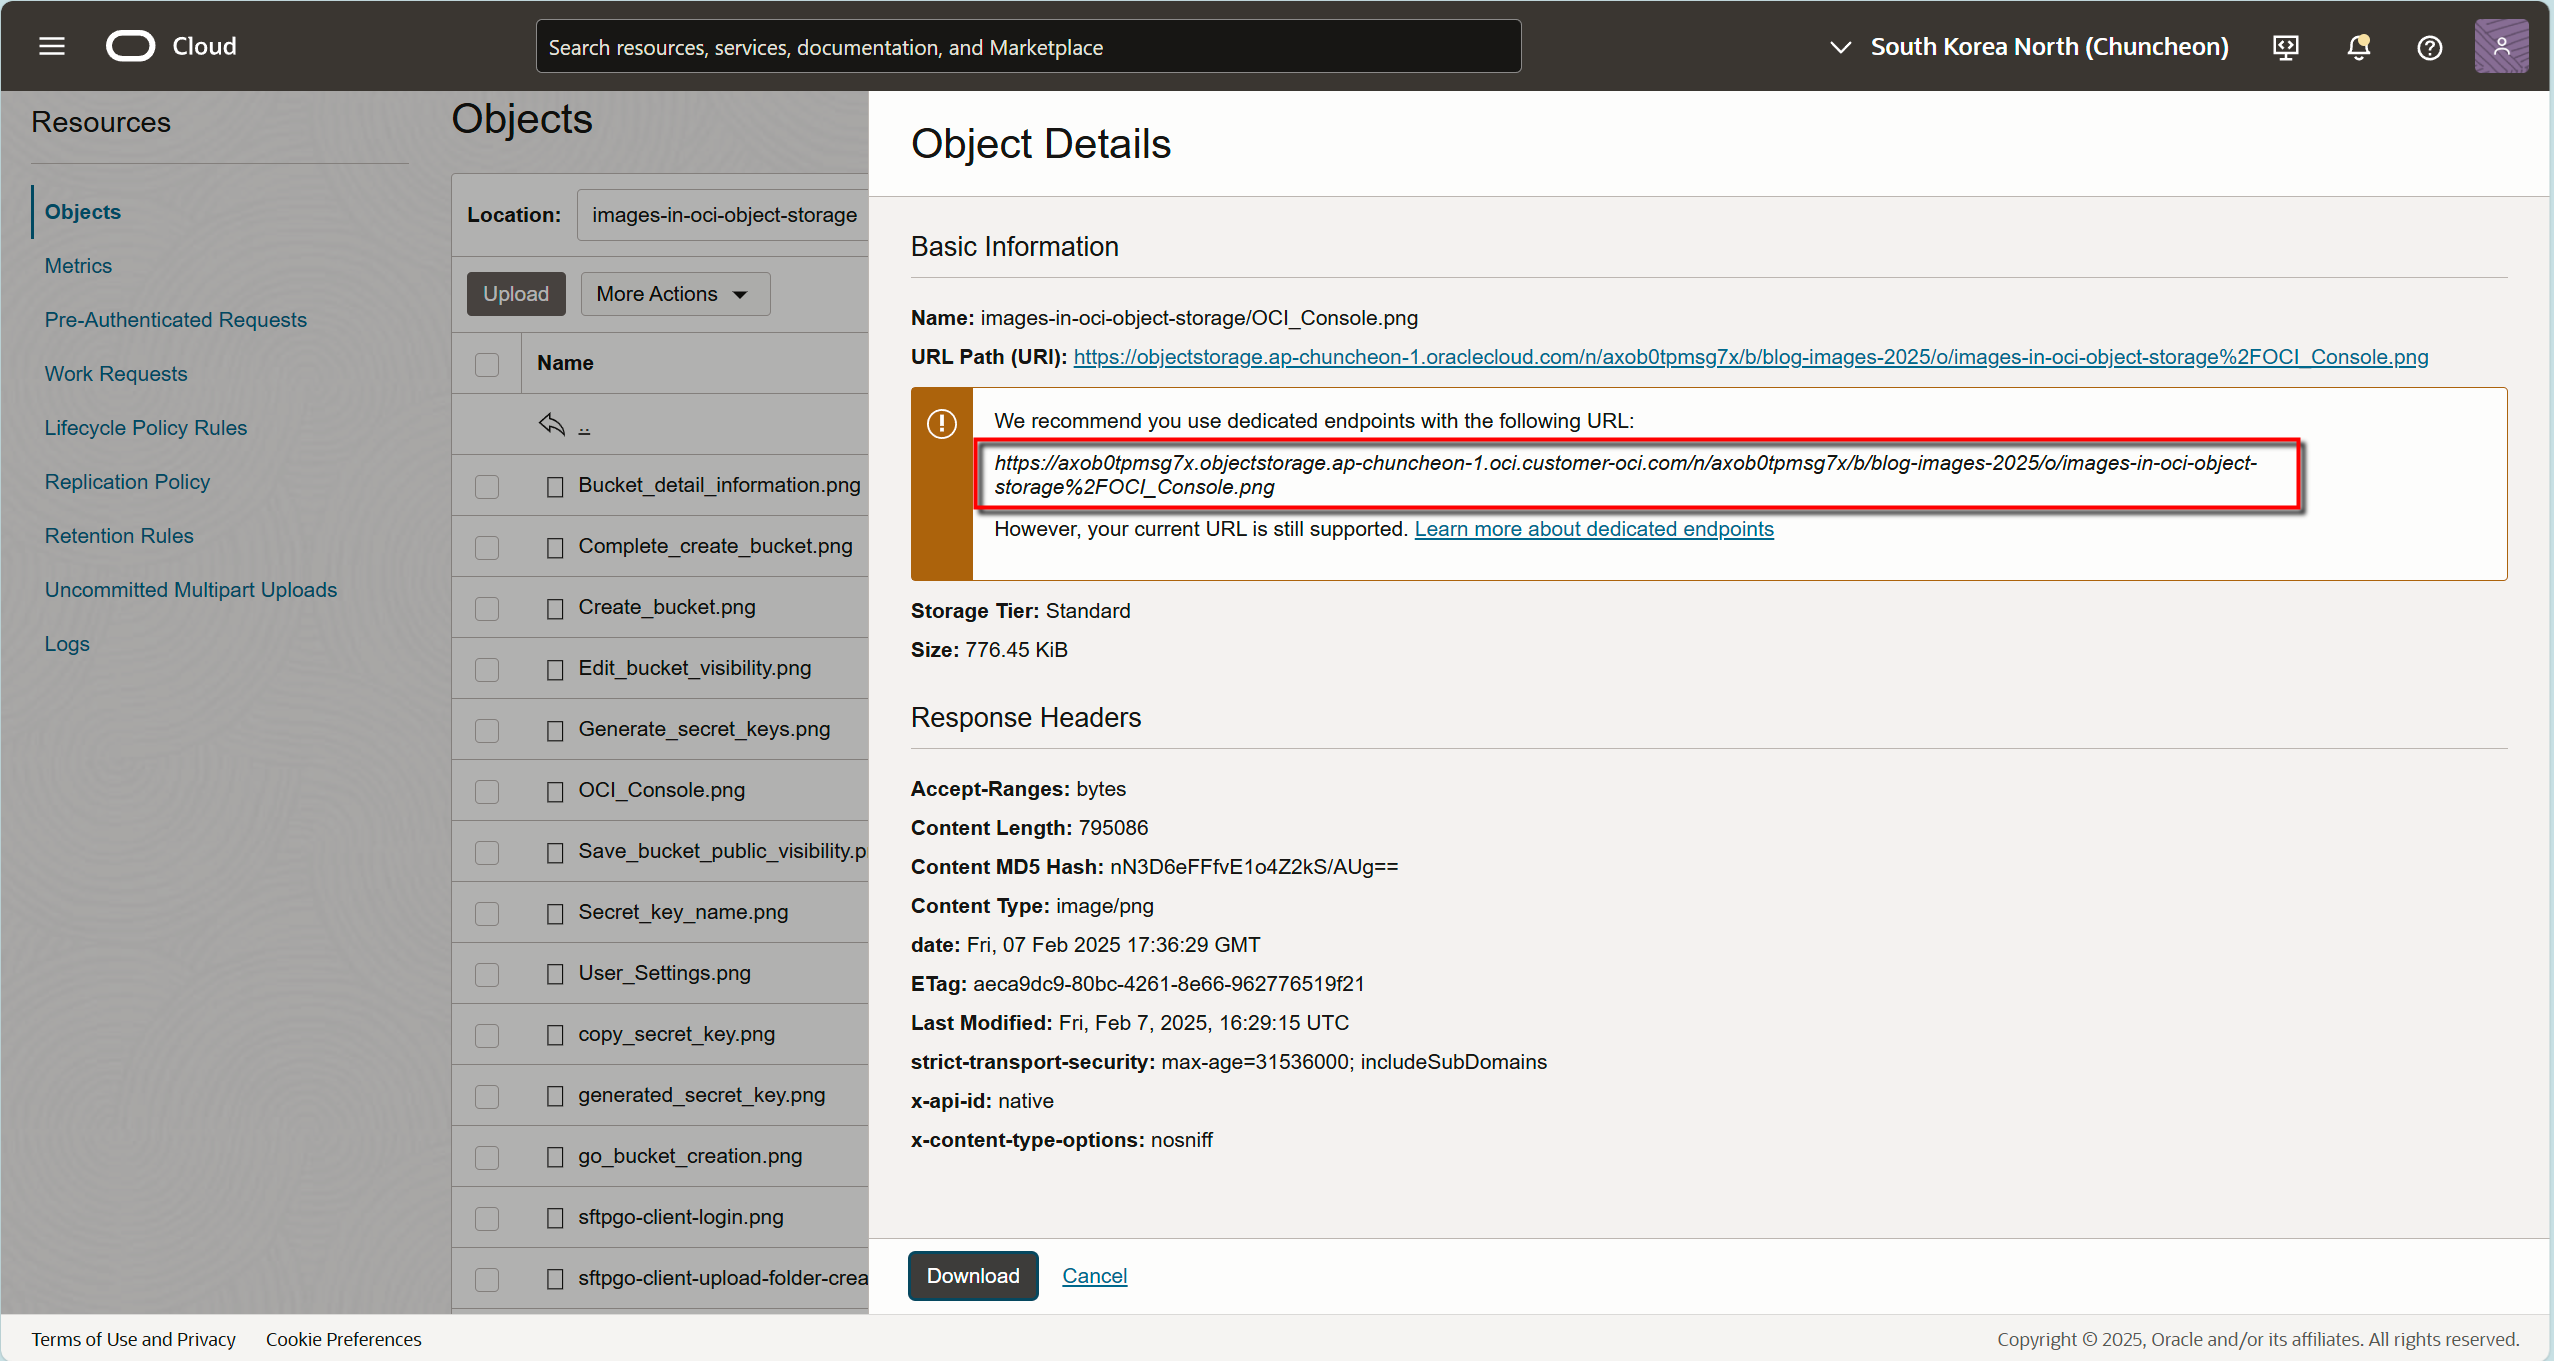
Since we’ve set the Object Storage visibility to Public, all uploaded images are automatically accessible. You can display images on your blog using this URL format:
https://{namespace}.objectstorage.{region}.oraclecloud.com/n/{namespace}/b/{bucket-name}/o/{image-name} Understanding the URL structure:
- {namespace}: Your OCI tenancy namespace
- {region}: Your bucket’s region (e.g., ap-seoul-1)
- {bucket-name}: Your created bucket name
- {image-name}: The filename of your uploaded image
Pro tip: Save a template of this URL with your {namespace}, {region}, and {bucket-name} filled in. Then you’ll only need to update the {image-name} for each new image.
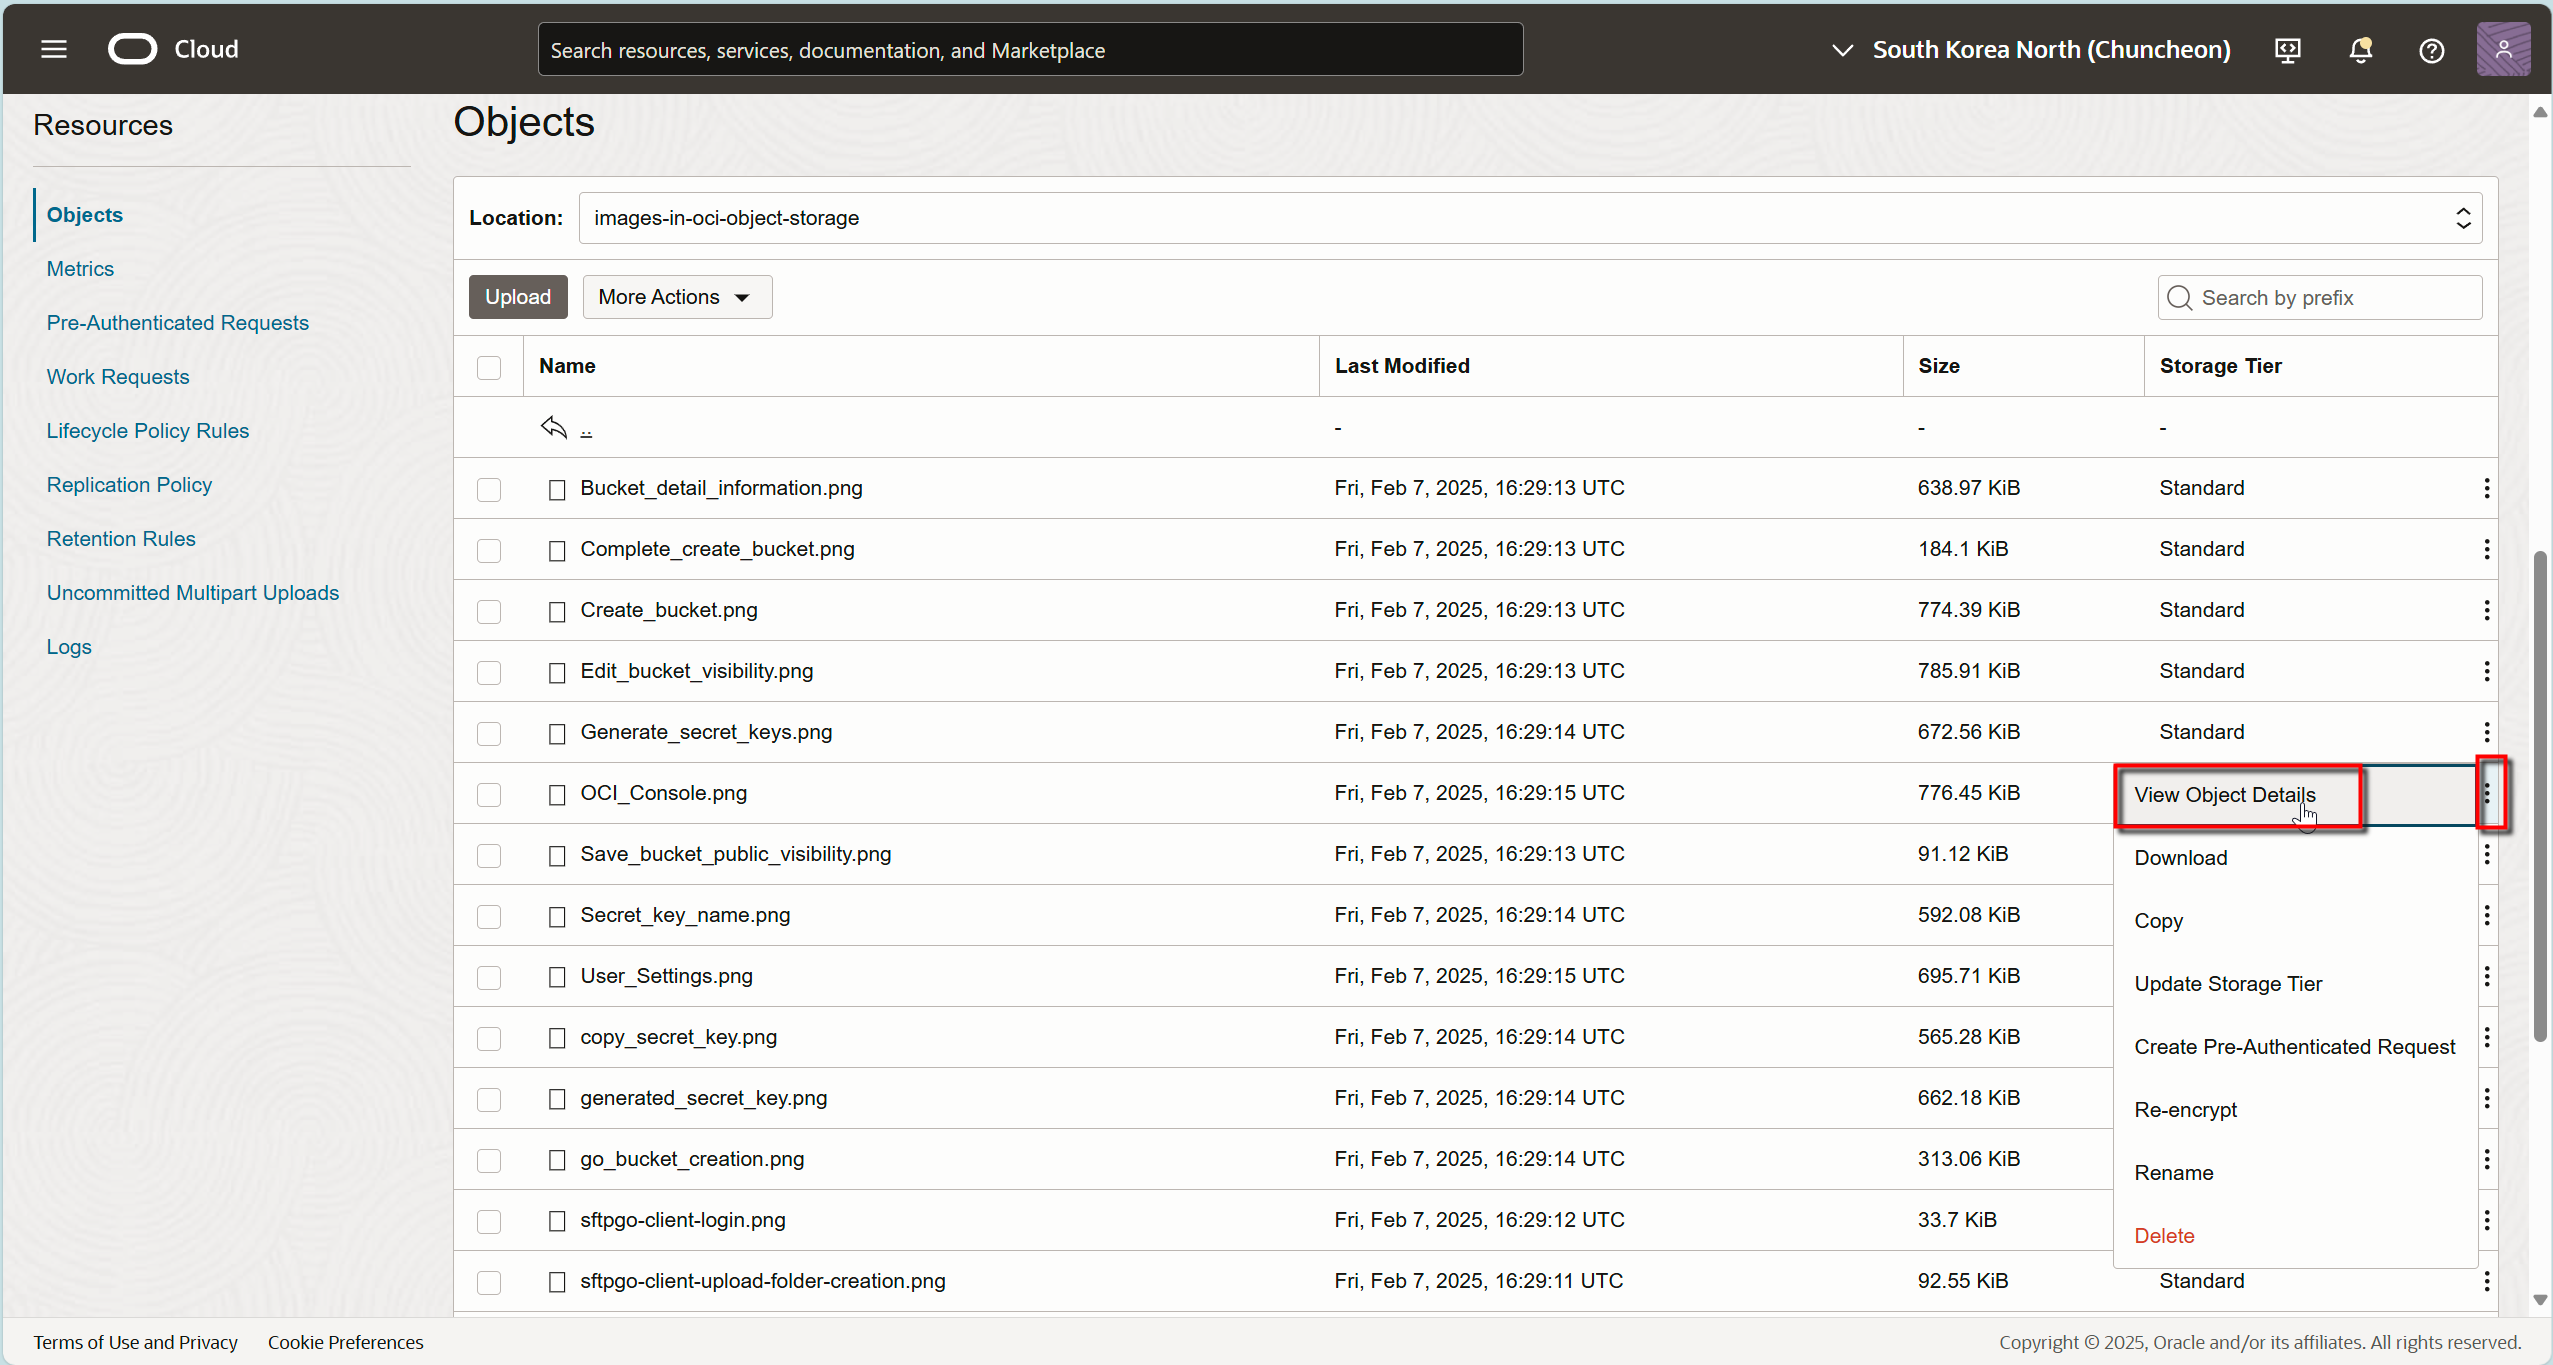
Alternative Method: Checking URLs in OCI Console:
- Navigate to your bucket
- Click the desired image
- Find and copy the “URL Path (URI)” from the “Object Details” panel
Best Practices for Daily Usage
Organizing Your Images
Create a logical folder structure within your bucket:
- /year/month/ for chronological organization
- /category/ for content-based organization
- /size/ for different image dimensions
Image Optimization Before Upload
While Object Storage provides ample space, it’s still good practice to optimize your images:
- Compress images without visible quality loss
- Use appropriate dimensions for your blog layout
- Consider converting to modern formats like WebP
Security Considerations
Protect your storage setup by following these guidelines:
- Regularly rotate your Customer Secret Keys
- Monitor access logs for unusual activity
- Implement proper backup procedures
- Never share access credentials
Conclusion
By implementing this Object Storage solution, you’re not just solving current storage limitations – you’re setting up your WordPress blog for sustainable growth. The initial setup might take an hour or two, but the long-term benefits in terms of performance, cost savings, and scalability make it well worth the effort.
Remember, this guide will be updated as Oracle Cloud services evolve, so bookmark it for future reference. Have questions or need clarification? Drop a comment below, and I’ll help you navigate any challenges you encounter.
